Routine 70 year maintenance, 1929 Essex
Comments
-
Thanks!54coupe said:Great progressYou had a vital part in it!0 -
I sent a mat in respectable condition 6 months ago. I was able to successfully remove it without shattering due to our sweltering hot afternoons. I believe that there is some delay with it’s production due to Covid. Mr. Lynch is handling it and they are going to add material around the perimeter so that it will fit all models, not just the coupe.Jon B said:Is someone making repro floor mats for the 29's? If so, I'd like to add to my Hudson Repro Parts webpage.
I’m so pleased to be doing this for other 1929 Essex owners and I’m sure he will be making them available soon.0 -
After the application of some leather conditioner the seat covers because very supple. For the time being I am going to leave them original and just be extremely careful with them.ESSX28-1 said:Can you not restore the existing leather with a reputable leather restoring cream? It looks good enough unless there are unseen tears. That's what we did with my rumble seat cushion.0 -
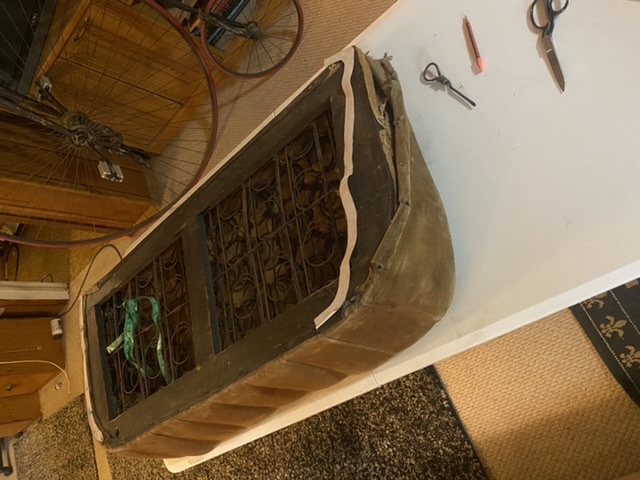
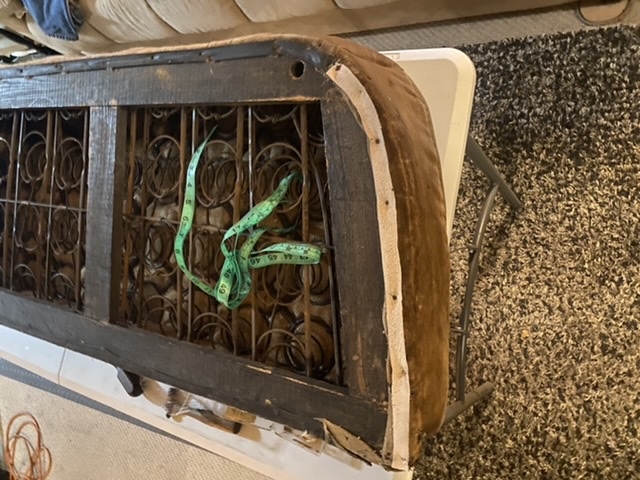
I got a chance to help out with templates but since the rear one was a little daunting I put it off.So today I got off my lazy duff and went to ripping seams and making a set for the rear. I didn’t want to pack it up and delay it further and forget the sequence. Besides I love an excuse to use my circa 1911 Davis Vertical feed treadle machine.
 First I stitched the saddle to the tongue
Next the other end stitches to the top half of the gaiter. Stopping to leave room to insert the saddle into the stitch.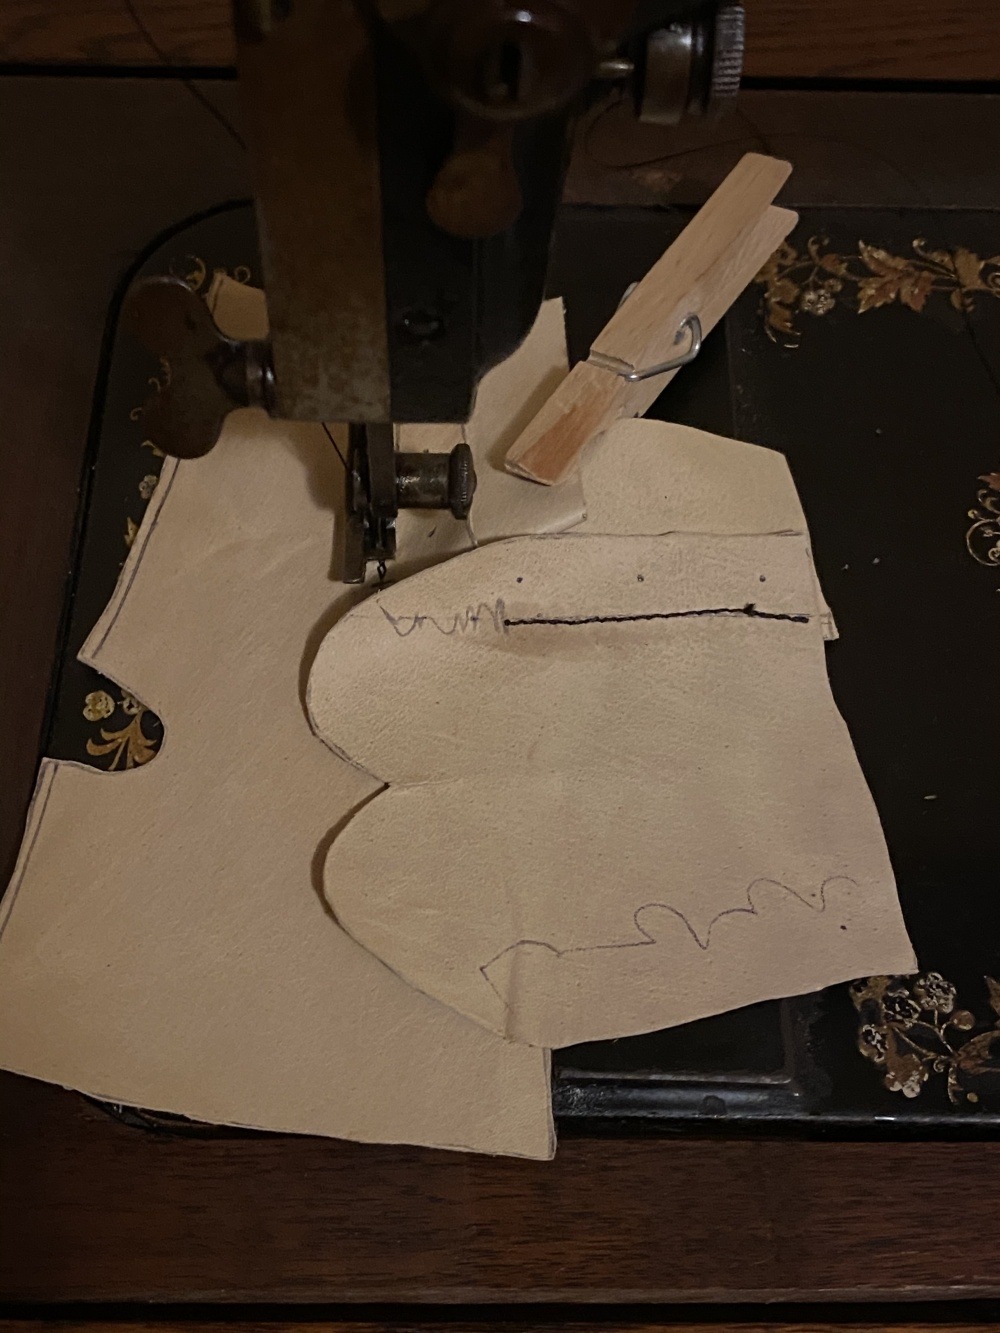
 The saddle is stitched on by folding the tongue up at a right angle.
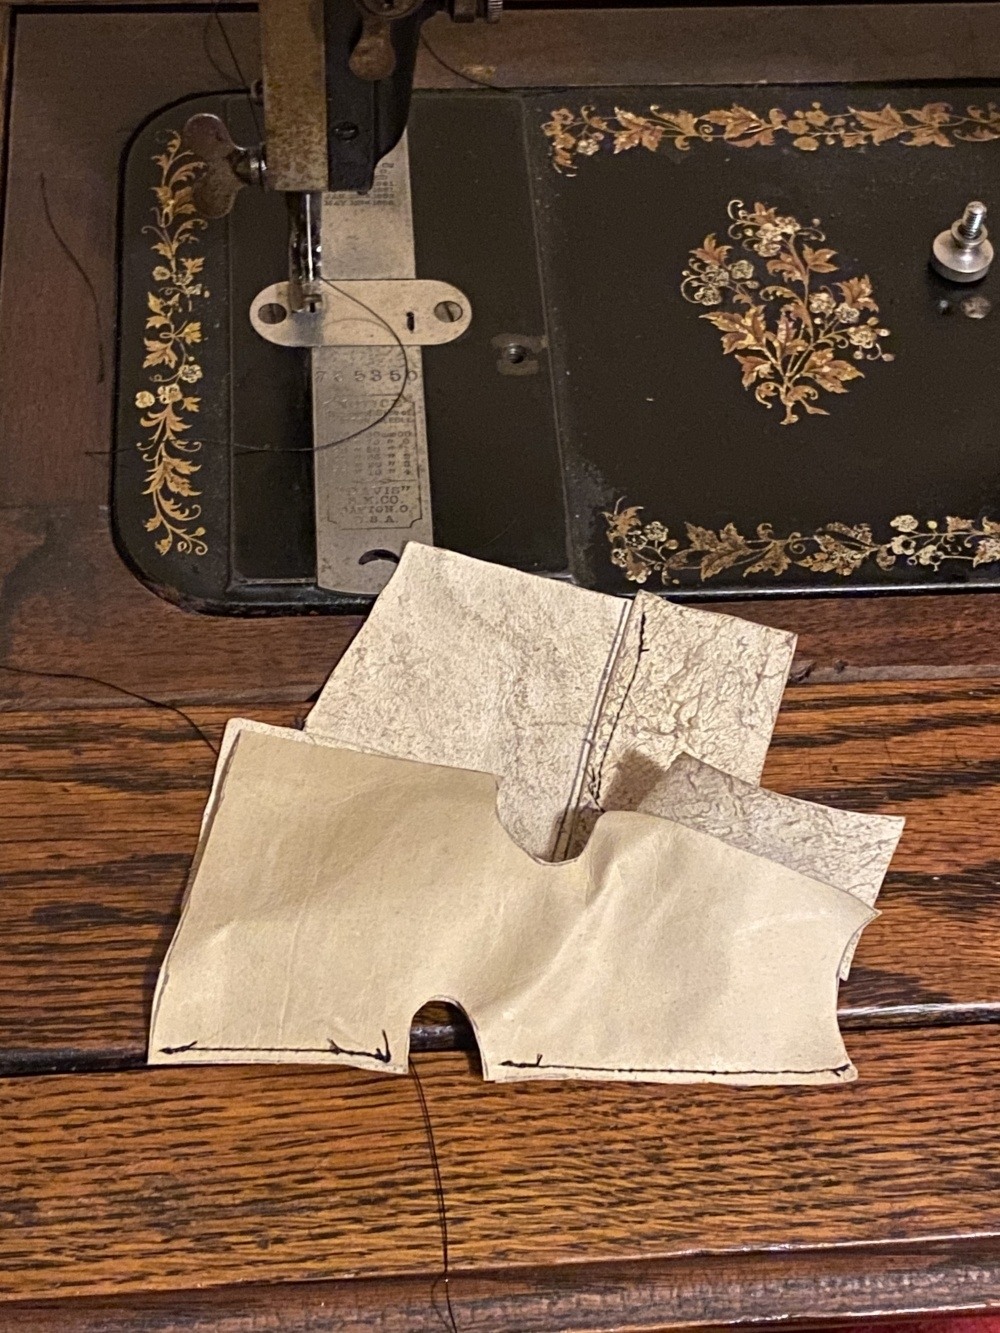 The bottom half is stitched on along the passenger side
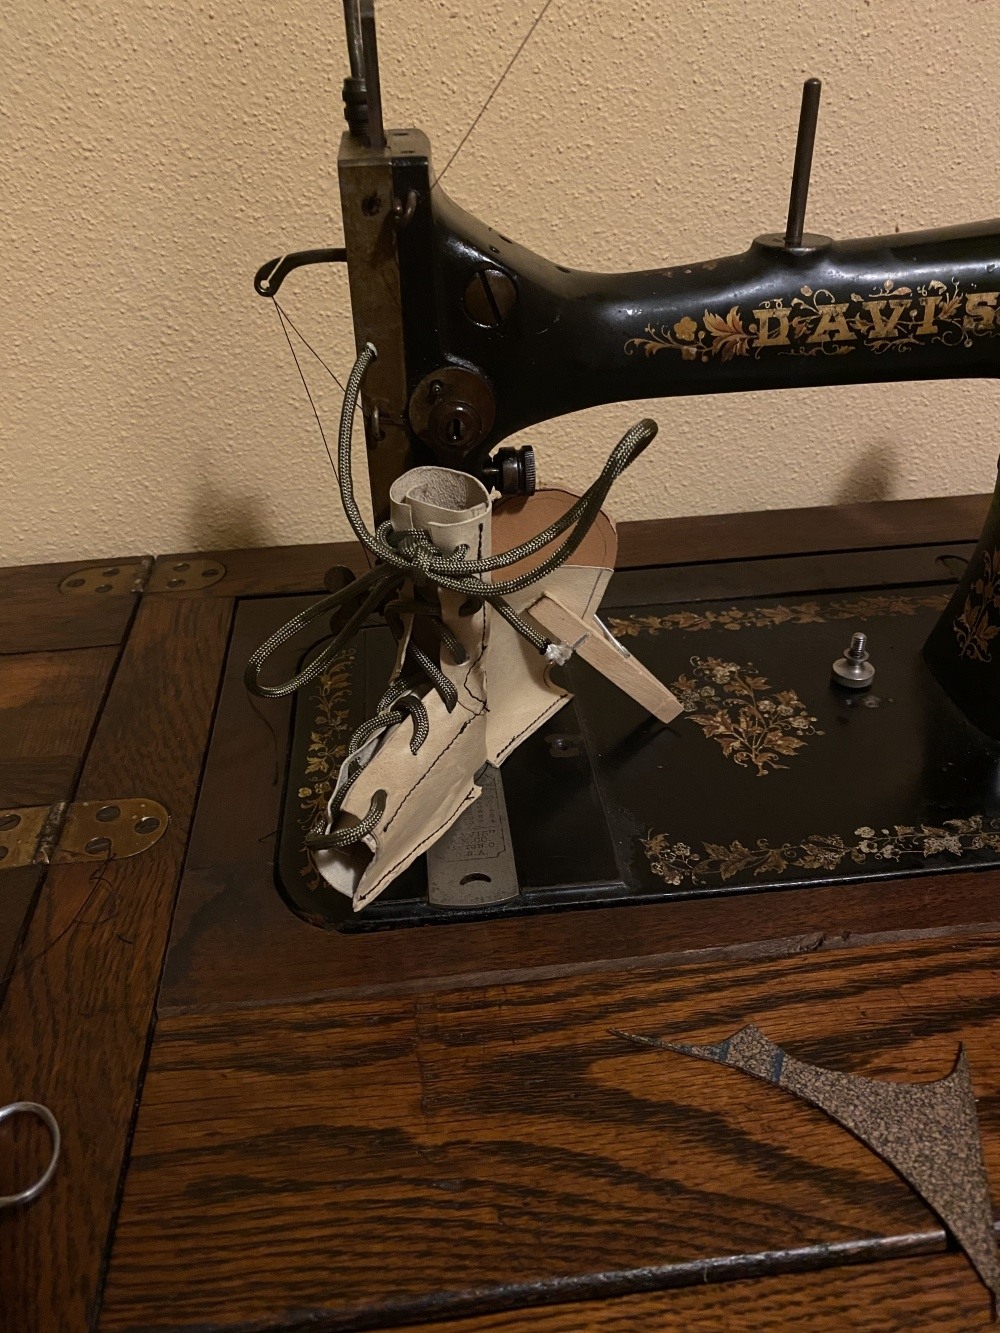 Here’s the end cover pinned in place, ready to be stitched clockwise. Then join both halves of the gaiter, running down to join the other half of the saddle.I’m going to stitch on the heavier leather of the end cap on the 1908 Singer patcher at my home in town because it easily plows through heavy leather.I have eyelets on order and will get the right color cording.0
 -
rusty_apache said:
After the application of some leather conditioner the seat covers because very supple. For the time being I am going to leave them original and just be extremely careful with them.ESSX28-1 said:Can you not restore the existing leather with a reputable leather restoring cream? It looks good enough unless there are unseen tears. That's what we did with my rumble seat cushion. Here’s how they turned out...0
 -
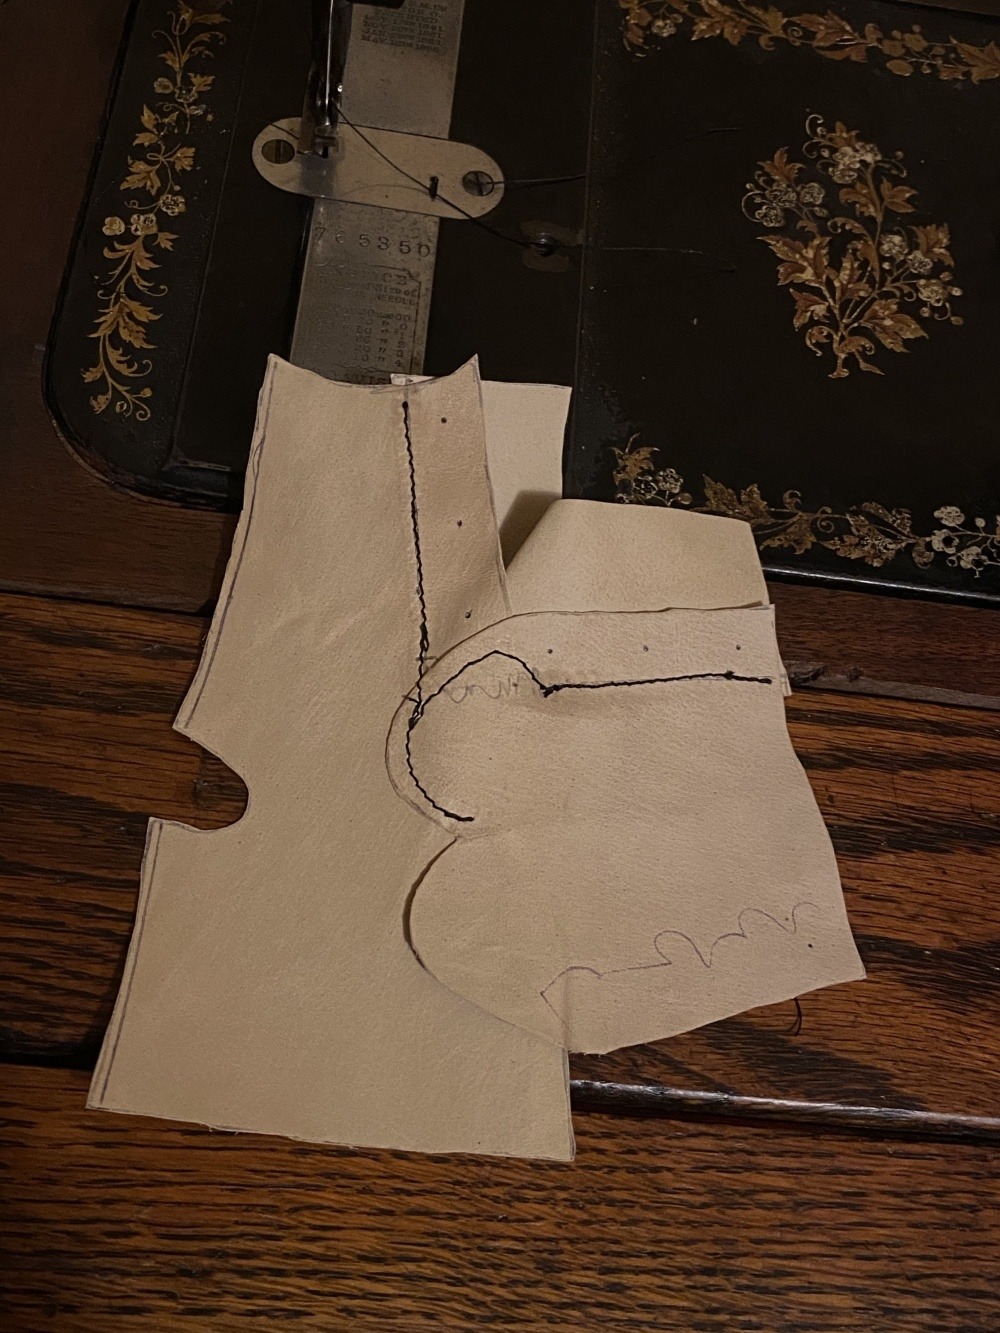
I figured three different colors of thread doesn’t matter since it’s going to get greasy eventually anyway...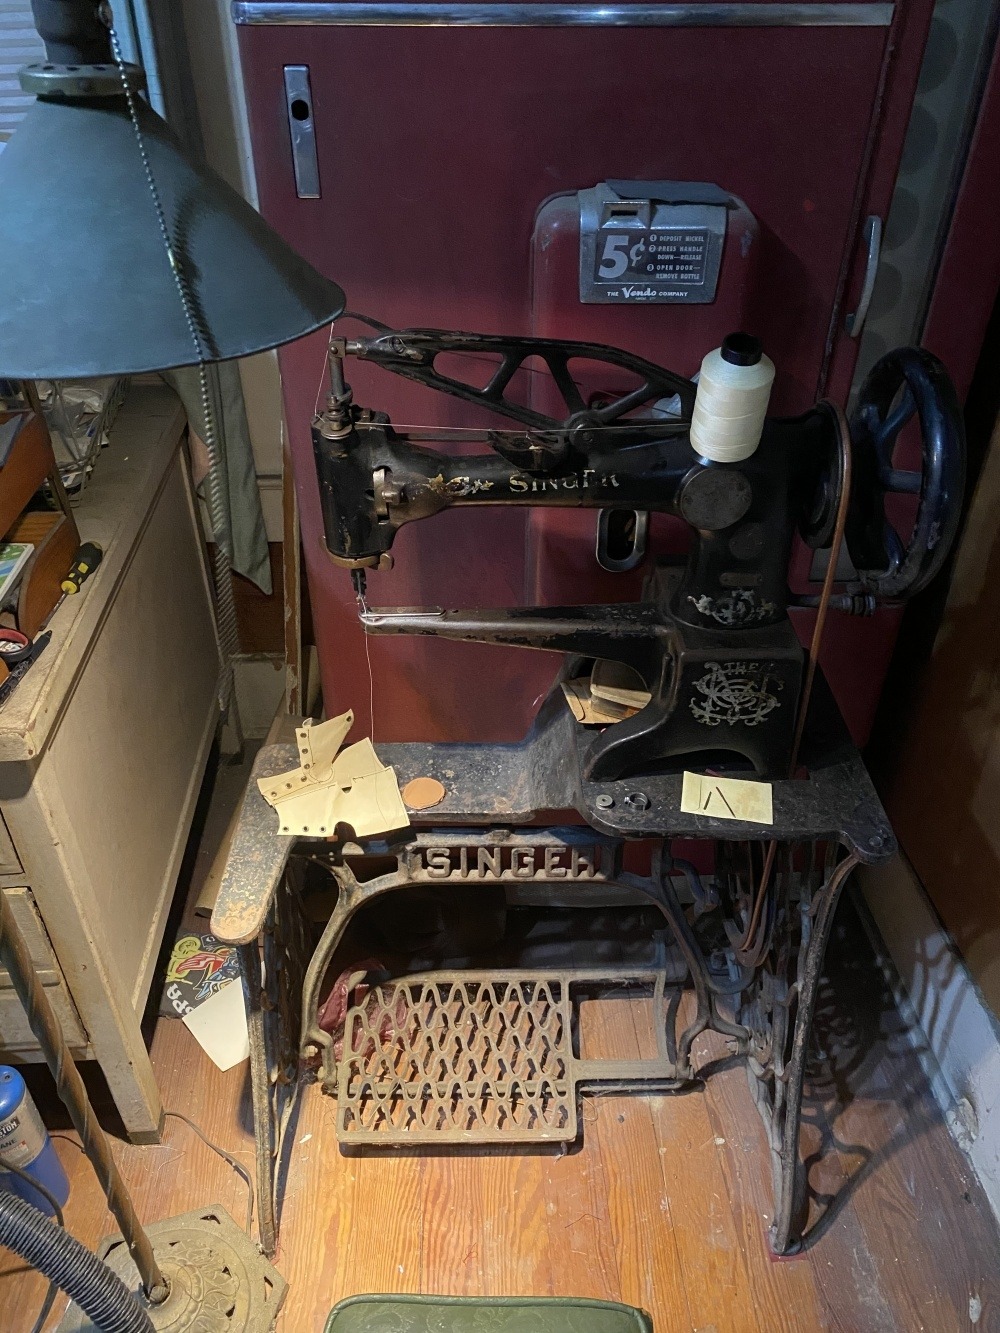
The bobbin thread broke twice and the top stitch once before I re familiarized myself with how everything works on the 1908 Singer “patcher”. Like all good machinery it can be lubricated and I typically do it with each use.There are two ears like a wing nut, that control the walking foot which rotates 360 degrees. This makes it ideal for patching since there’s no need to rotate the work. Hence the nickname Patcher.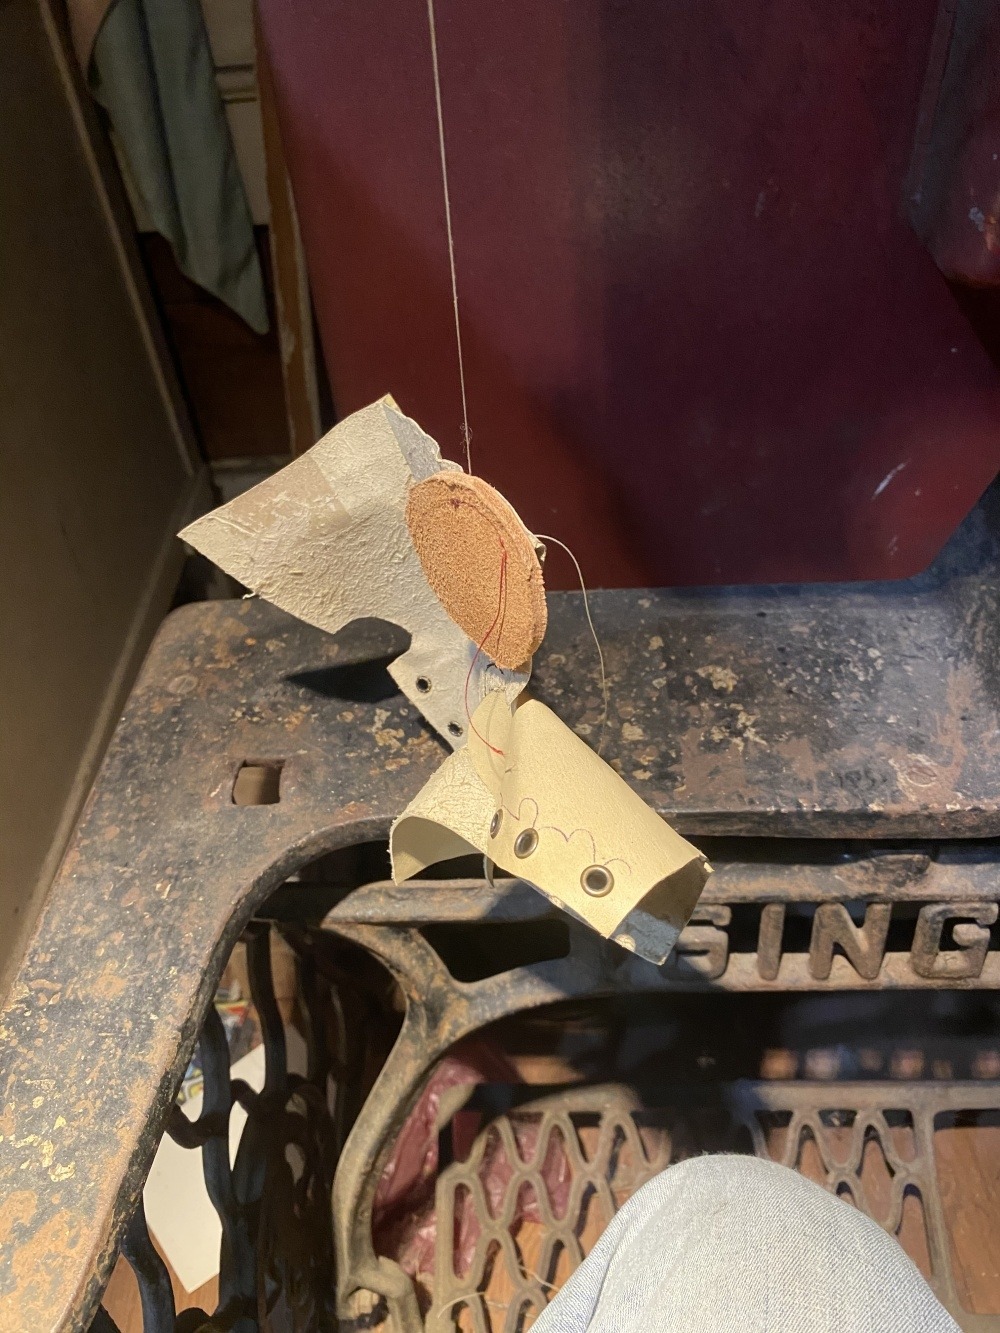 Halfway around...
The eyelets and set tool came and dad’s teeny anvil came in handy for the job. I have yet to remove the front boot in order to set the eyelets, at which time both boots will be dyed black.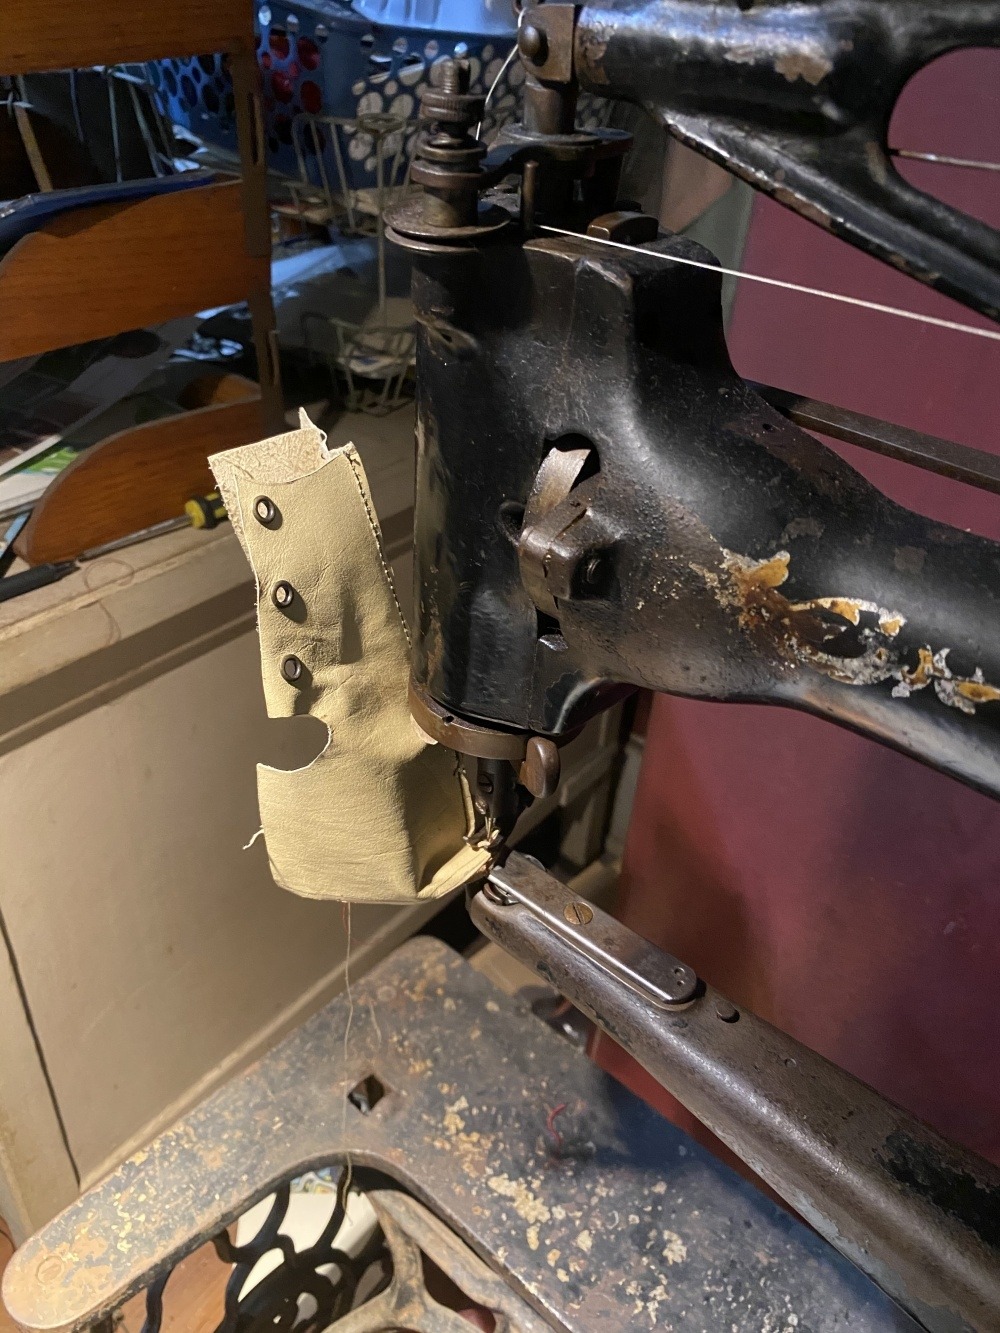
Unfortunately I made the seam closer to 3/16, than 1/8” but if it fits over the arm I will just trim the edge around the circumference so it won’t bother me. I also realized, too late, that the rough side of the end cap is facing outwards. Either way it keeps the sand out.
 I’ll finish out the rest of the stitches back on the Davis Vertical feed.0
 -
 So I decided to change out the fuel feed canister for one that doesn’t leak. It was taking several days to drain out where it won’t start. I also installed a fuel pump bulb to make the canister easier to prime, which will probably be unnecessary with a “well sorted out canister”.
While the mounting bracket was removed I gave the firewall a good cleaning and coat of waxoyl.
I also neglected the battery so it’s getting a fresh one and the old one can go on a tractor. I cleaned the oxidation from the terminals and the battery bracketry and painted the it black.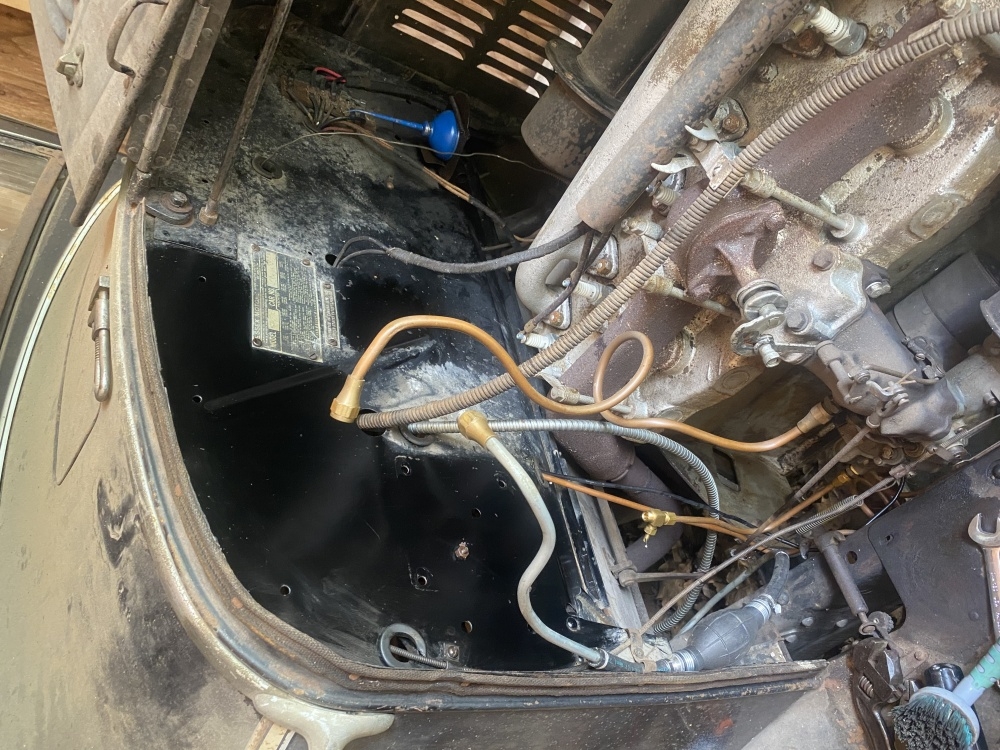 Who knew the paint was so shiny underneath the smut! Regular 409 cleaner got most of dirt off and a gentle application of Bar Keeper’s Friend cleaned up the solidified substance with gentle scrubbing and repeated applications to keep the paste wet.
The oxalic acid does the work not the abrasive grit.
It also dissolves surface rust, bringing the paint color back in many areas.
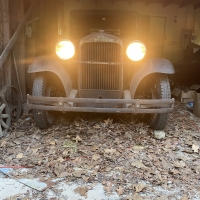
So now she’s 100% turn key!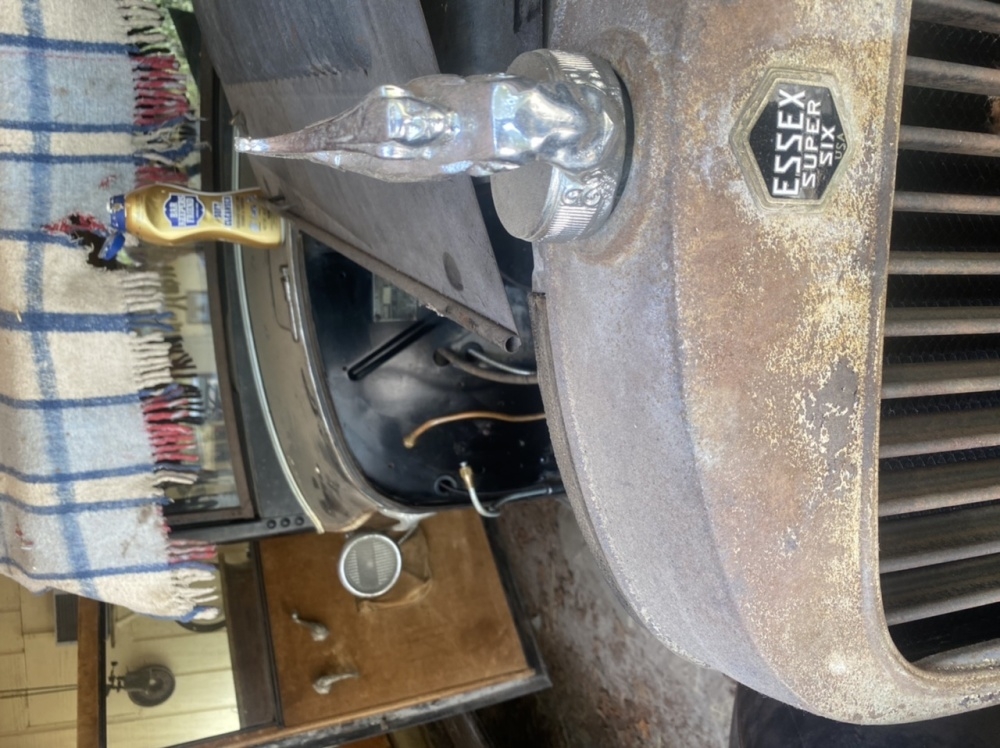
Note, Icarus FINALLY has enough dust to fit right in!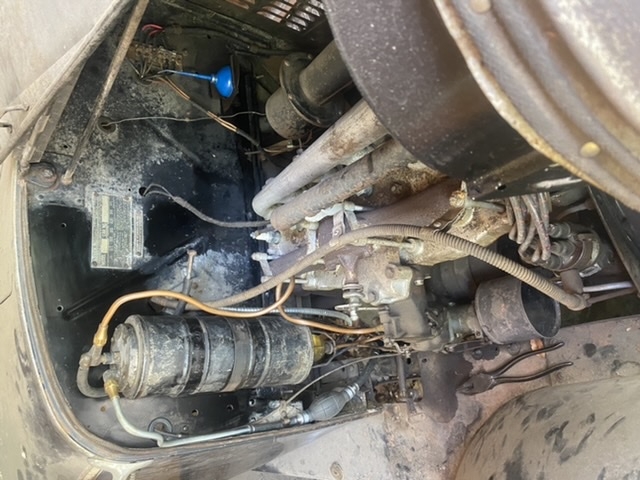 I will probably repair the canister that is original to the car at some point.0
 -
Well done! Just a heads-up - if you are storing the vacuum tank dry it pays to spray the or coat the bottom flapper valve with oil or grease to stop it oxidising. If you can find a brass one from an earlier version tank then replace it.0
-
Looking Good0
-
Thanks Geoff!Geoff said:Well done! Just a heads-up - if you are storing the vacuum tank dry it pays to spray the or coat the bottom flapper valve with oil or grease to stop it oxidising. If you can find a brass one from an earlier version tank then replace it.
I was only storing it dry because it was leaking out!
Now that it’s holding, I will be driving it with more regularity since I no longer must prime it after two days of dripping!
However I did install a petcock between the carburetor and the tank so that I can run the carburetor dry. If that is likely to cause oxidation in the carburetor as well,
maybe I should rethink that, or coat the fuel bowl with oil.0 -
Thanks Mr. King35 Terraplane said:Looking Good
Hopefully I will be sending you a Texas title application form to sign!0 -
Best to keep fuel in the carb. Running it dry would have more disadvantages than any advantages you may be thinking of.However I did install a petcock between the carburetor and the tank so that I can run the carburetor dry. If that is likely to cause oxidation in the carburetor as well,
maybe I should rethink that, or coat the fuel bowl with oil.
0 -
Well, its smart to shut that valve off when the car is parked due to updrafts being well know to flooding while parked . Keep fuel in the bowl yet shut the valve. Some advice from a prewar fanatic0
-
Thanks guys,
I burn non ethanol in everything I own so leaving it in the bowl is not a problem!0 -
Time for new battery #2. The front seat came out to replace it so I replaced the canvas upholstery binding with some strips of pigskin I had on hand.
0 -
Sorry photos always go sideways.I received a request for wire routing under the hood so I’m adding them here for future reference.
The headlight wires are all individually armored in a spiral cable.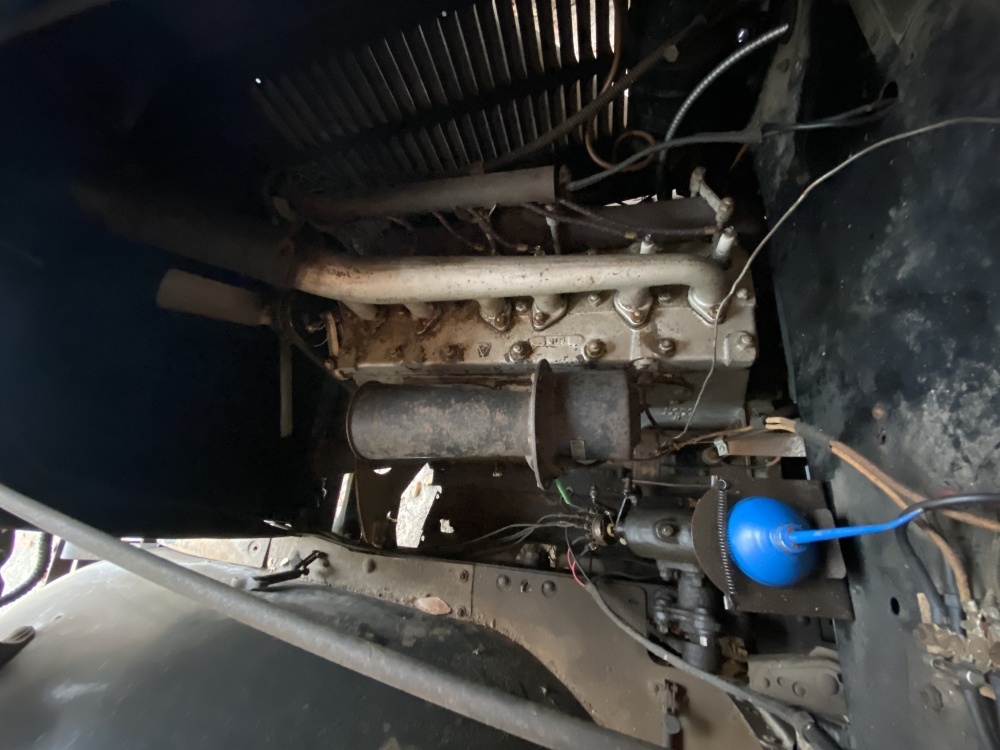 The ignition wires run through the spark plug wire tube.0


Categories
- 36.6K All Categories
- 85 Hudson 1916 - 1929
- 11 Upcoming Events
- 73 Essex Super 6
- 28.3K HUDSON
- 511 "How To" - Skills, mechanical and other wise
- 989 Street Rods
- 150 American Motors
- 170 The Flathead Forum
- 47 Manuals, etc,.
- 71 Hudson 8
- 40 FORUM - Instructions and Tips on using the forum
- 2.7K CLASSIFIEDS
- 592 Vehicles
- 2.1K Parts & Pieces
- 76 Literature & Memorabilia
- Hudson 1916 - 1929 Yahoo Groups Archived Photos