Car Won't Start / Condenser Testing / Synchronizing distributor / -- All problems now solved!

I have a problem and could use some advice.
After installing new points and a condenser I discovered the car wouldn't start. No spark at the plugs. (Well, I don't think there is. I pulled a spark plug cable and held the end near one of the engine bolts while I hit the starter for a few seconds. That's correct procedure, right?)
So if there's no spark, it could be a bad condenser I guess. I have about 10 NOS ones and have tried a couple of them so far, with no luck. (Geoff Clark, in answering my original inquiry about testing condensers, says I need the old analogue multimeter to check them, but I only have the digital type!)
Then too, it's possible I may have replaced the distributor with the rotor in the wrong position (my distributor shaft isn't keyed; you can replace it in any position). But even if that's wrong, I should still get a spark while cranking, correct?
So, maybe the coil is going bad. Is there is quick way to check that by checking for a spark, or is there a way to actually check its condition using simple tools like a multimeter?
I don't work on my car very often, so I tend to forget all I've learned over the years. I'll be grateful for any thoughts!
(This discussion was originally labeled "Question about condensers", by the way. But the problem might not lie in the condenser.)
0
Comments
-
Outward appearance means little. To test you need an old fashioned analogue multimeter, set to the 10KR range. Ground the negative lead to the case of the condensor, and touch the other lead to the wire, and the needle should momentarily deflect and then return to zero. If it stays with a resistance reading, throw it away.0
-
My guess is you have a wire grounded somewhere in the distributor.
Was it running before you changed the points?
0 -
Yes it was running smoothly right up until I changed the points / condenser, though lately I'd noticed it took a bit longer to start than before.
Can I do a test to see if there's a ground, maybe with a test light or multimeter? (The only place I can think of, is that screw terminal that comes through the side, but there is an insulating sleeve that fits around it where it passes through the distributor wall).
I just went out and checked for spark from the coil, and there was none. Which would lead me to believe the coil is failing, but...could it still be caused by a problem in the distributor or condenser?0 -
Jon, Any spark from the coil?0
-
The ignition system in our Hudson’s operates as is shown in the utube video at the listed URL. https://youtu.be/W94iksaQwUo
Obviously the stock 6 volt positive ground factors should be overlaid, but the rest is precisely how your ignition works.
A recommendation for test would be an inexpensive electrical probe testing set like those sold at Harbor Freight or Northern Tools.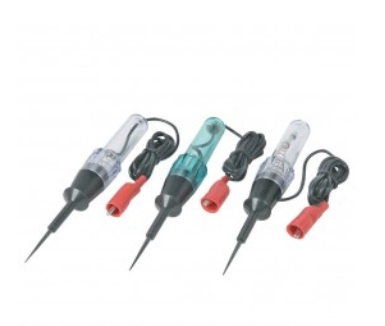 0
0 -
If it was running before you started working on it, you might want to look at the work you did, first, to make sure it's right. Don't go chasing things like the coil, etc. yet.It sounds like you removed the distributor to work on the points.Anyways, a test light like shown above will be a big help to see if the points are working as they should. A digital volt meter will also work. Connect one lead to ground, the other lead to the small (primary) wire connecting the distributor to the coil. Turn the ignition switch on, and rotate the engine slowly by hand. You should see the voltage go from zero to 6v (approx) back to zero back to 6V each time the points close and open. If it's not doing this, then there is a problem...if that wire is always 6v, then the points are not making contact. If it's always zero, then there's a short, or the points are not opening.0
-
The mystery deepens.The terminal (extending from the side of the distributor body) is grounding on the distributor body. In a way I'm happy, because that should be simple to fix, and it would mean that all the other components are okay!0
-
Failure.I found the source of the short circuit within the distributor, but evidently that wasn't the source of my woes. I'm still getting no spark from either the spark plug wires or the coil wire.0
-
what happens if you disconnect the wire from the distributor, and scratch it to ground? do you get a spark out of the coil?And what happens when you do the test I described above?0
-
No. No spark from the coil wire (the end that attaches to the distributor cap) when grounded on engine.I haven't tried your idea yet, because I'm wiped out, plus it's getting dark. And I haven't figured how to turn the engine by hand (I can do that with the emergency crank but can't read the voltmeter at the same time!)Can I just crank with remote starter button while watching the meter, or will that be too fast?At any rate, thanks for your ideas. I guess I'll start again in the morning.0
-
Success! (Of a sort).No, the car is not running yet. But I do have spark at the plugs.And it's pretty incredible how that happened.Apparently some (or all?) of the new ignition points come with some sort of coating or glaze on them. (Or, possibly, they are oxidizing quickly.)It seems that people are removing this before installing the new points, by various means: solvents, points files, sandpaper, thin cardboard, and U.S. currency folded in half.I read this tonight on the internet. (If it's on the internet, it must be true...right?)So, having nothing left to lose. and with darkness moving in, I folded a $20 bill in half and ran it back and forth between the closed points for maybe a minute.To my total surprise, it worked! (Well, I got spark. Though the car still won't start!)Now, of course, I have removed and replaced my distributor so many times today that I fear the rotor is no longer in the correct orientation. (One has to remove these pre-War distributors to work on them, due to inaccessibility, and they are not keyed to the camshaft gears, so they can easily get out of sync with the engine. Each time I remove the distributor I mark the rotor's position with chalk, and then re-install the distributor so the rotor is in the same general location. A lot of "eyeballing' is involved.)So now I must ask my learned fellow Hudsonites: how do I get the distributor back in sync with the engine? I think the procedure is:1). Remove first sparkplug (nearest radiator)2). Put finger over hole and crank engine (ignition off) until the compression stroke is felt.3). At or near the end of the compression stroke, the U.D.C. mark should appear in the "window" of the motor plate. At that mark, the rotor should be pointing to the position (on the distributor cap) of the #1 spark plug wire.4). At that point, it's fine-tuning with a timing light, to get the smoothest operation.Is this correct? (Is there a better and faster way to do it?)Thank you for your many thoughts and ideas. I'm a little bitter, though: I followed the correct procedure and then spent the better part of a day trying to see where I went wrong. But actually, I was done in by something of which I had no concept. Oh, well, typical amateur mechanic!0
-
If you had been able to do the test I suggested, and found there was no voltage, I would have then suggested cleaning the oxidation off the points as the first thing to try. I don't think there is a coating, I think the problem is that points have sat around for decades, and they seem to get some oxidation on them, which takes just a little bit of effort to remove.yes, that's how you set the timing. There's another trick (outlined in some of the shop manuals) to get it really close, which is to set the pointer so it's where you want the spark to happen. Then turn on the ignitionk, and carefully turn the distributor "into the points" so the points just open, you'll get a spark. That is where you want to clamp the distributor, just where it makes the spark as the points open. You can rotate the distributor housing back and forth a few times, just a little bit, to make sure it's in the correct spot.0
-
Jon, remember Murphy's law states "If you fiddle a thing long enough it will ultimately break".0
-
Thanks, Squirrel.
Can you please elaborate on your procedure?
First: are you saying that I can forget the whole finger-over-the-sparkplug-hole procedure? I'm not sure what you mean by "set the pointer". (Which pointer?)
And, how would I know where I want the spark to happen? Doesn't it happen at UDC of the #1 cylinder? I'm all for a short cut!0 -
Jim (Squirrel) is talking about the timing mark on the front pulley. Set the timing to service manual spec, use your "finger trick" to make sure you're close to TDC, then use a socket to rotate the crank to the correct timing mark, (i.e., 10 degrees BTDC), for example.Jon B said:Thanks, Squirrel.
Can you please elaborate on your procedure?
First: are you saying that I can forget the whole finger-over-the-sparkplug-hole procedure? I'm not sure what you mean by "set the pointer". (Which pointer?)
And, how would I know where I want the spark to happen? Doesn't it happen at UDC of the #1 cylinder? I'm all for a short cut!
From there, leave the distributor somewhat loose and rotate the distributor body into (advance) the points until they open and make a spark with the key on. that's the static timing point. The distributor can be clamped down then, and you'll be very close to where you need to be. If the timing is waay off, you'll have to pull the distributor and rotate the shaft to get the rotor into the correct position.
When I do forensic diagnostics on an engine, I look for the old clamp marks on the distributor as a general guide. Engineers are funny people as well - they tend to pick a rotor position on the points of a compass for ease of assembly on the line. Either that, or something 45 degrees off the points, with north pointing at the block on a straight six. Find #1, then find the historical clamp marks and set the distributor there. Make sure the rotor is on #1 when the engine is at TDC, then use Jim's method to get it spot on sans a timing light!
0 -
What year is the car?the "pointer" I'm referring to, is the thing you would look at with the timing light. On the early 1950s engines, it's in the hole above the starter, and there is a line on the flywheel. If you read the service manual, it shows all this stuff. I highly recommend you do some reading on the subject, it is a bit too complicated to try to explain it all in a forum, it helps if you do some homework. If you dont have a service manual, you should be able to find it on line, I think there are folks here who have all the info you need, but we need to know exactly what you're working on.0
-
Thanks, Chuck and Squirrel. While I do know certain procedures, I have never successfully mated the #1 UDC to the correct positioning of the distributor. I do understand the theory, just don't want to muff it when I do it. The "pointer" in my '37 is back on the motor plate and isn't very precise.The spark that occurs as you rotate the distributor is fairly precise. The actual tune-up procedure merely says to set UDC first, then rotate the distributor "until the points just open". I like the spark better, it's much easier than trying to interpret when those little-bitty points start to separate.0
-
The UDC pointer is not very precise, but it's precise enough...the timing on these engines should be adjusted based on how well it runs, rather than an exact number of degrees. I haven't read the 1937 manual, but the 1951 manual states that you can adjust it up to one inch advanced, if there is no pinging (knock) on acceleration.To convert inches to degrees, you need to know the radius of the timing mark and pointer, from the center of the crankshaft. Since there is no specification for degrees, it's kind of meaningless.0
-
Jon B, I went thru the same thing you are as I put a different distributor when the pertronix failed on my 39. I set the distributor in the car and adjusted the timing basically resetting it. That worked for me. Steps as described in this tread. I followed the steps in my 39 owners manual.0
-
Problem is solved! Engine started immediately this morning. Thank you all for your help and suggestions.Timing is very imprecise on my car. First, to verify the pointer is on the UDC mark, one must hang, upside down, with one's head deep in the engine compartment. So from where I stand, I am sort of "projecting" that the pointer's aligned.For "fine tuning", the manual suggests driving at 10 mph, then suddenly accelerating to 15. A ping should be heard, but if it's not heard, advance the distributor a notch (but not more than 3/4"!). If it's an especially loud ping, you retard the distributor a notch.So, it's all very seat-of -the-pants!0
-
I used to set my Terraplane timing with a vacuum gauge. Advance to highest reading
and road test. Even todays gas is much better than 1937.
0 -
Final timing of a HUDSON engine with a vacuum gauge is the preferred method to assure that all of the "factors" concerning the "tuning" of the engine are combined into one final adjustment. Max vacuum at idle will provide the best tune overall.0
-
I understand that completely JonB, my 39 is the same way. Glad you got her going again I also use a vacuum gage for final tuning0


Categories
- 36.6K All Categories
- 85 Hudson 1916 - 1929
- 11 Upcoming Events
- 73 Essex Super 6
- 28.3K HUDSON
- 511 "How To" - Skills, mechanical and other wise
- 989 Street Rods
- 150 American Motors
- 170 The Flathead Forum
- 47 Manuals, etc,.
- 71 Hudson 8
- 40 FORUM - Instructions and Tips on using the forum
- 2.7K CLASSIFIEDS
- 592 Vehicles
- 2.1K Parts & Pieces
- 76 Literature & Memorabilia
- Hudson 1916 - 1929 Yahoo Groups Archived Photos