37 Hudson Cam Thrust Washer Question

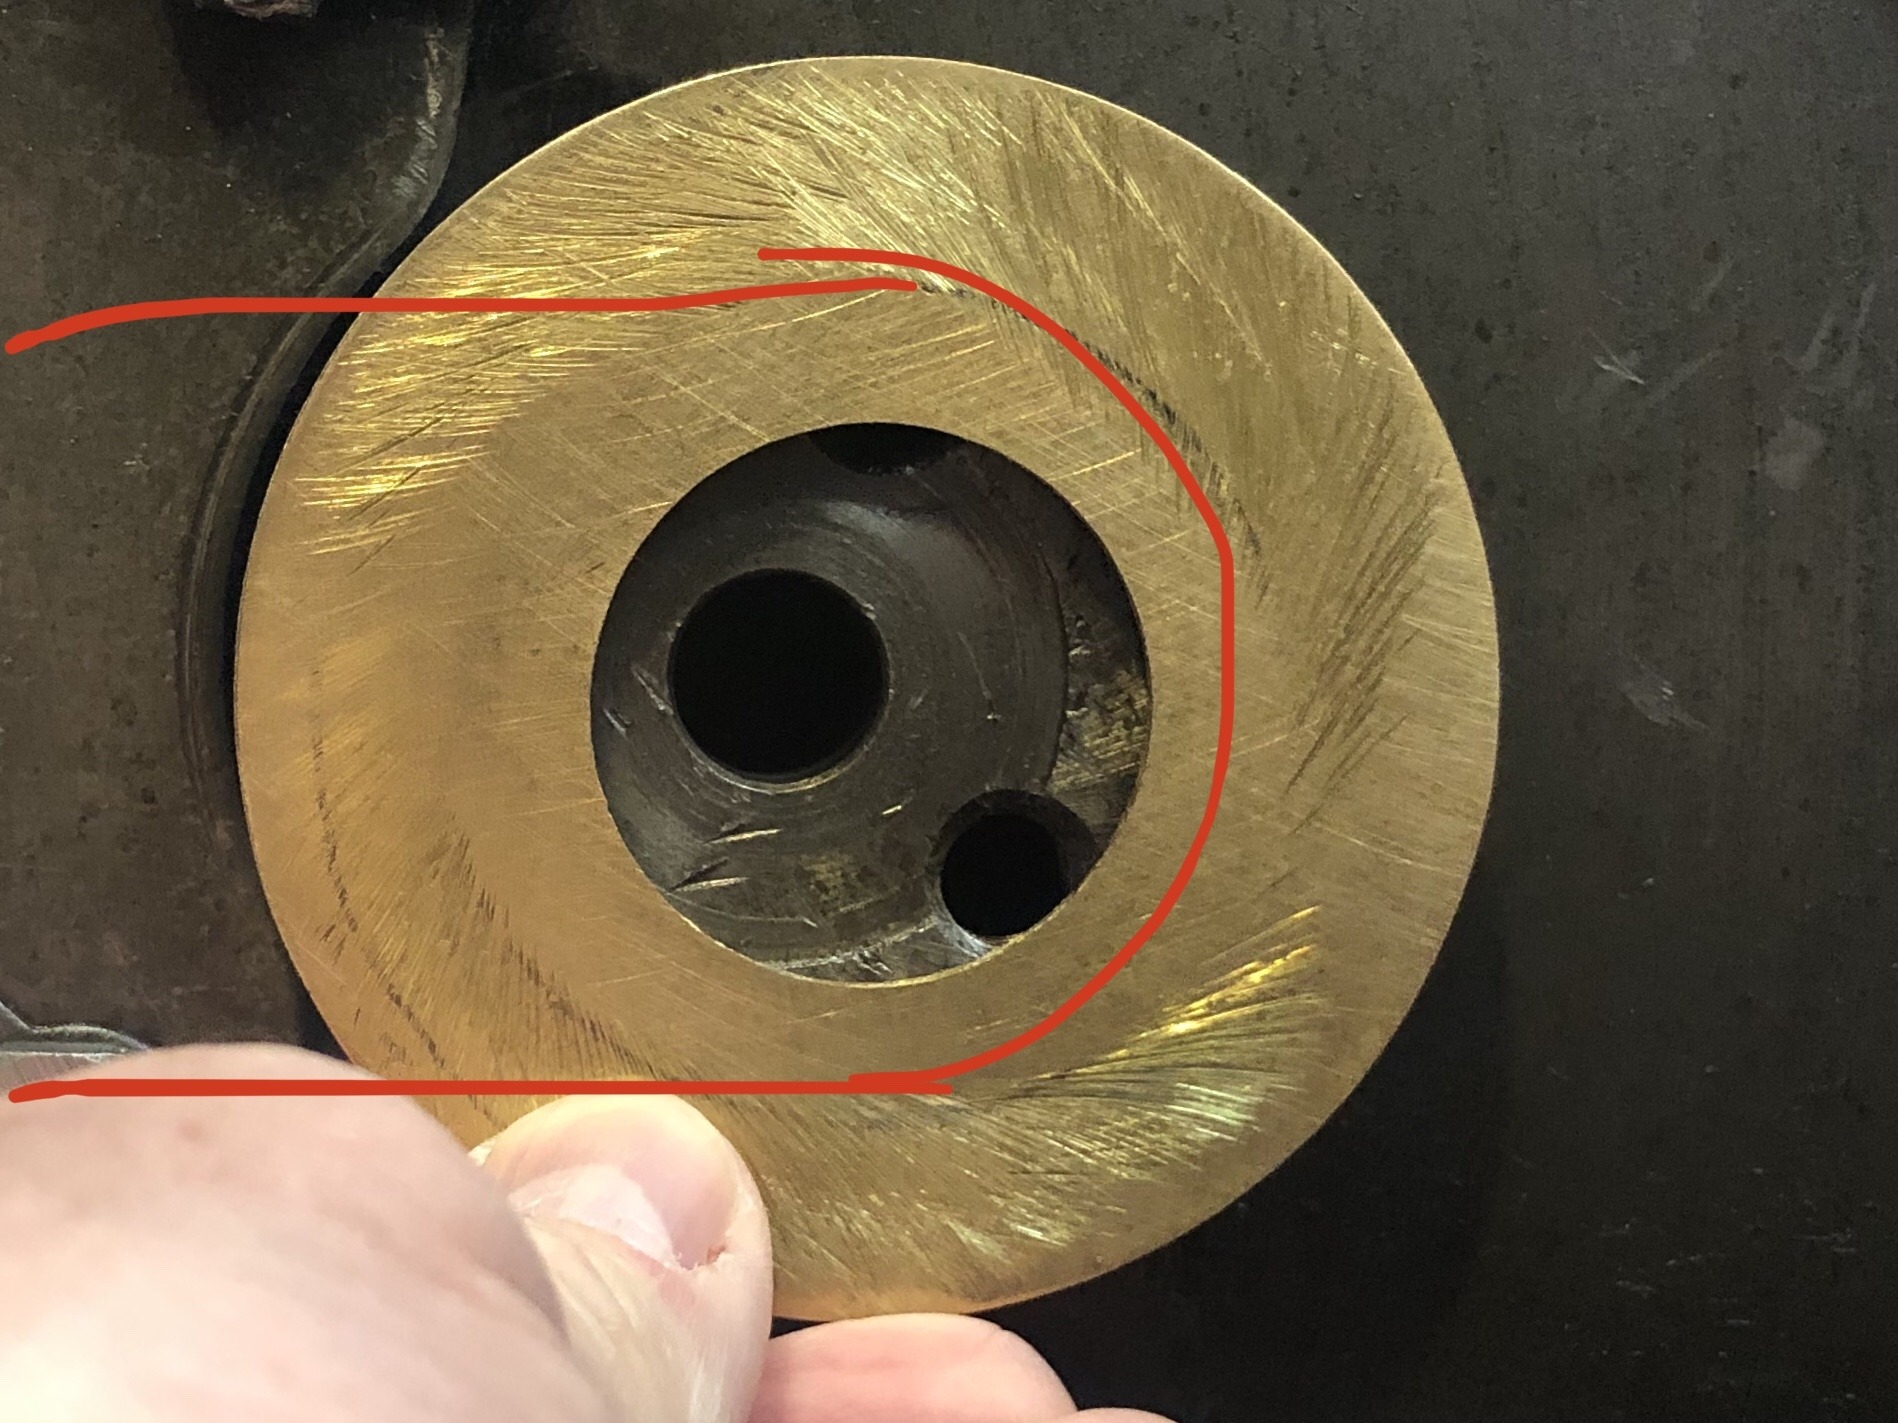
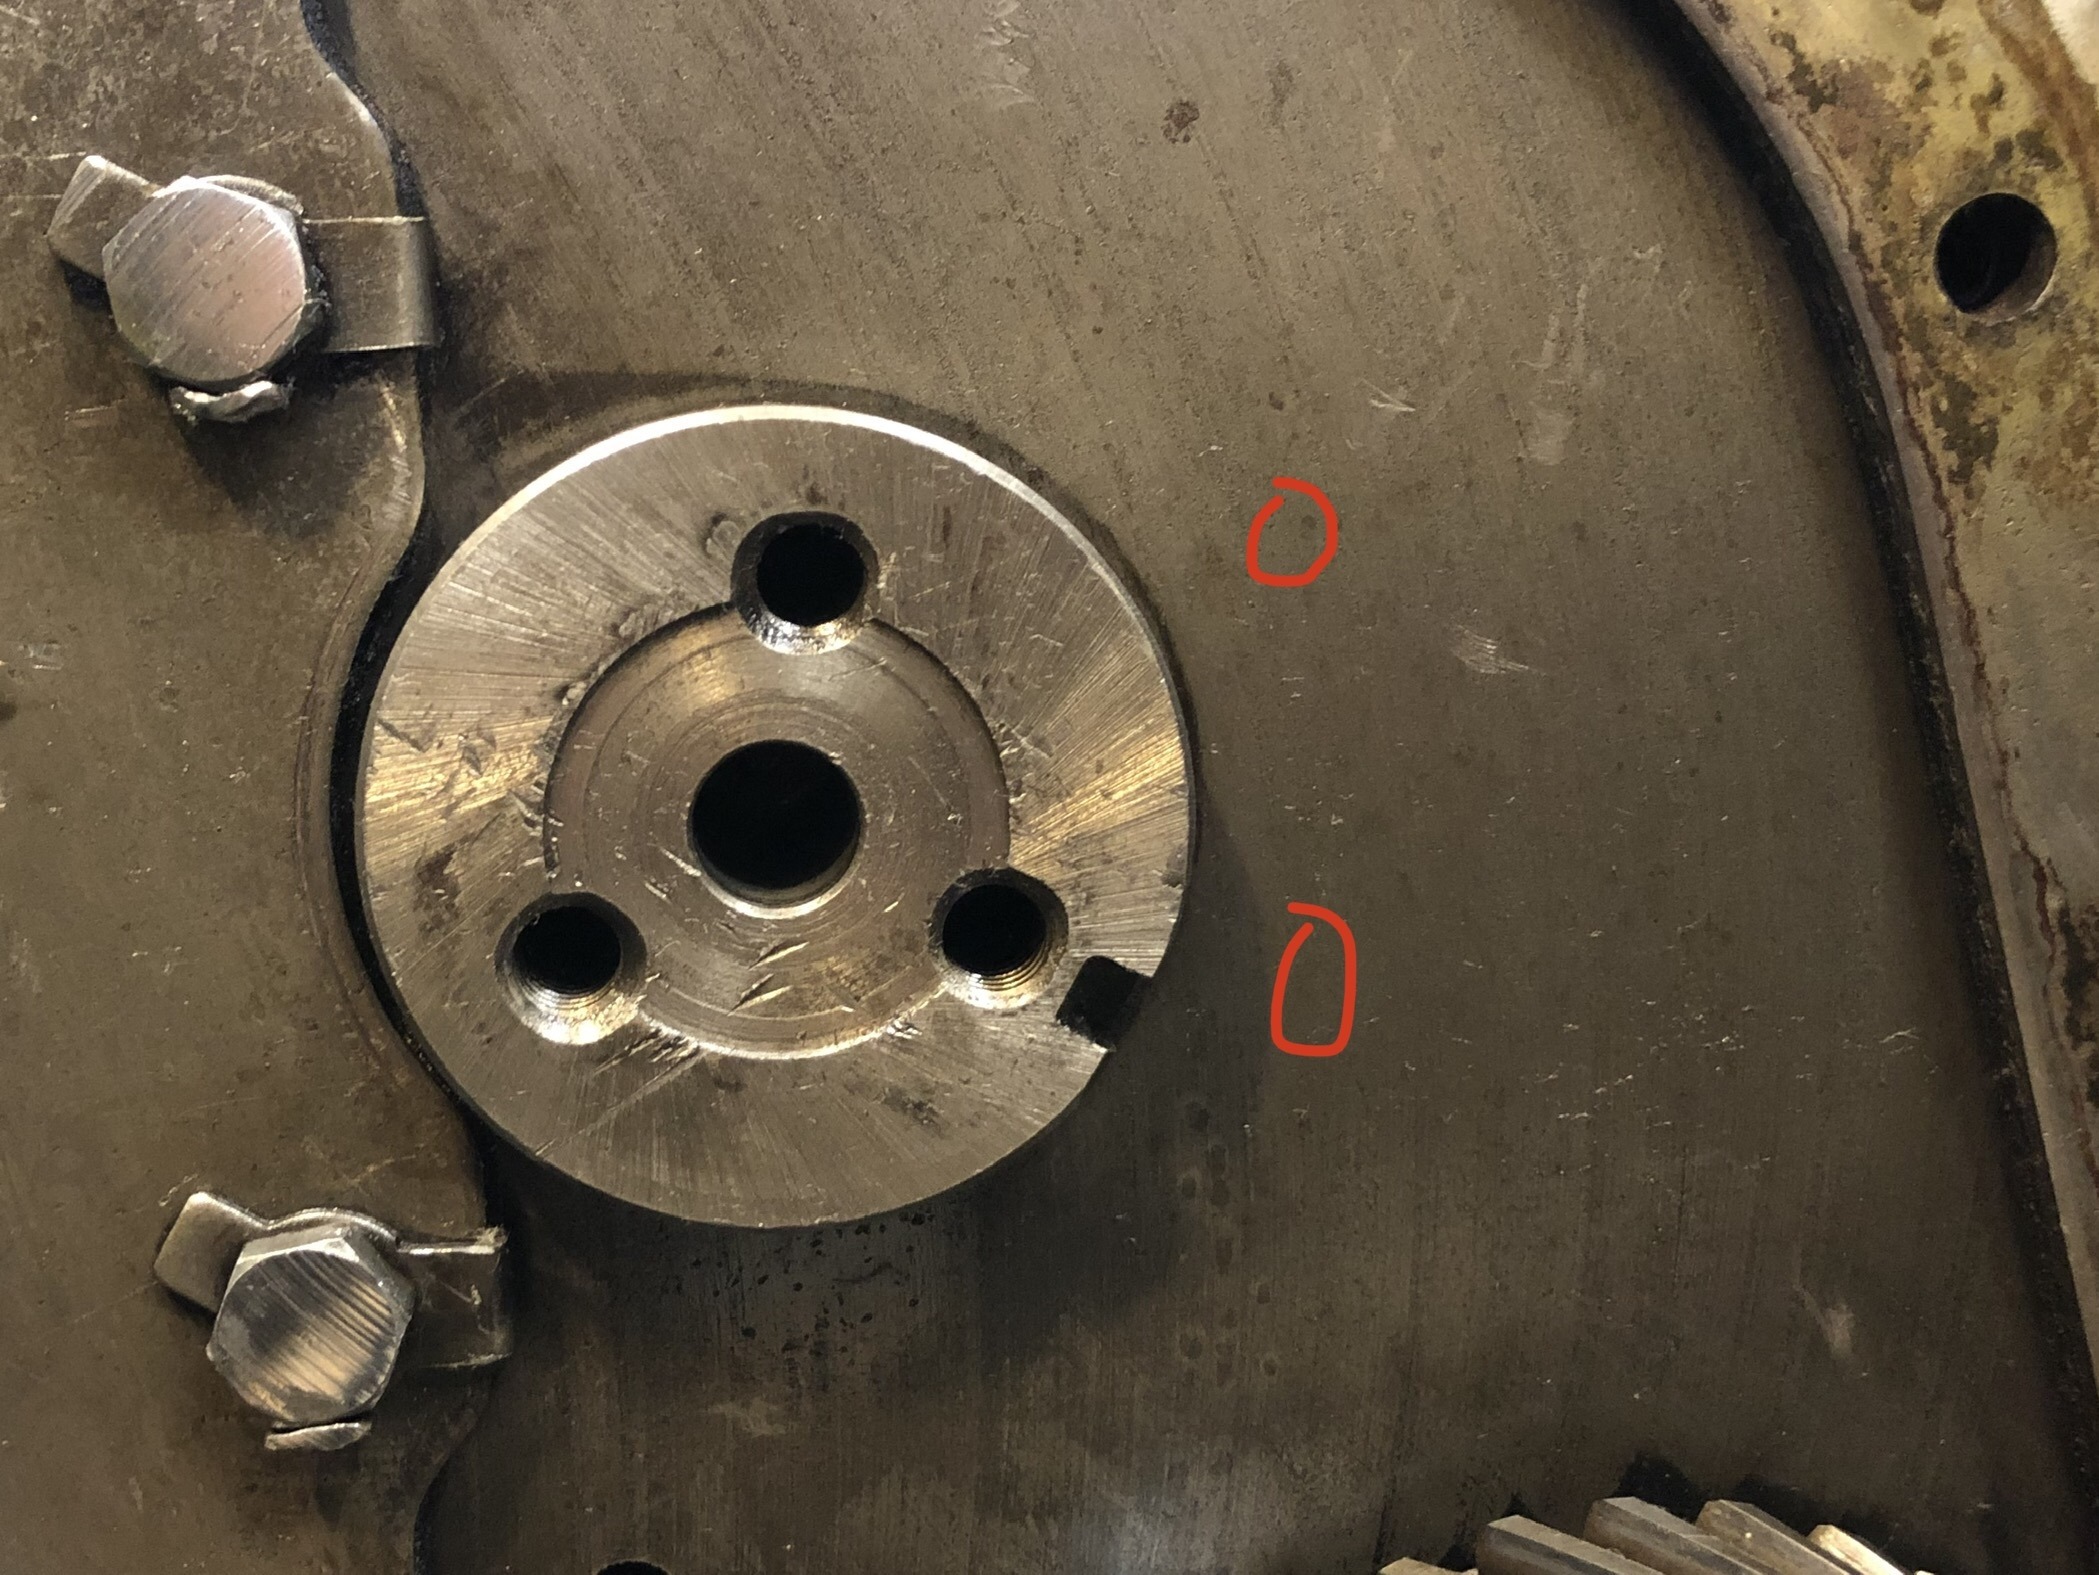
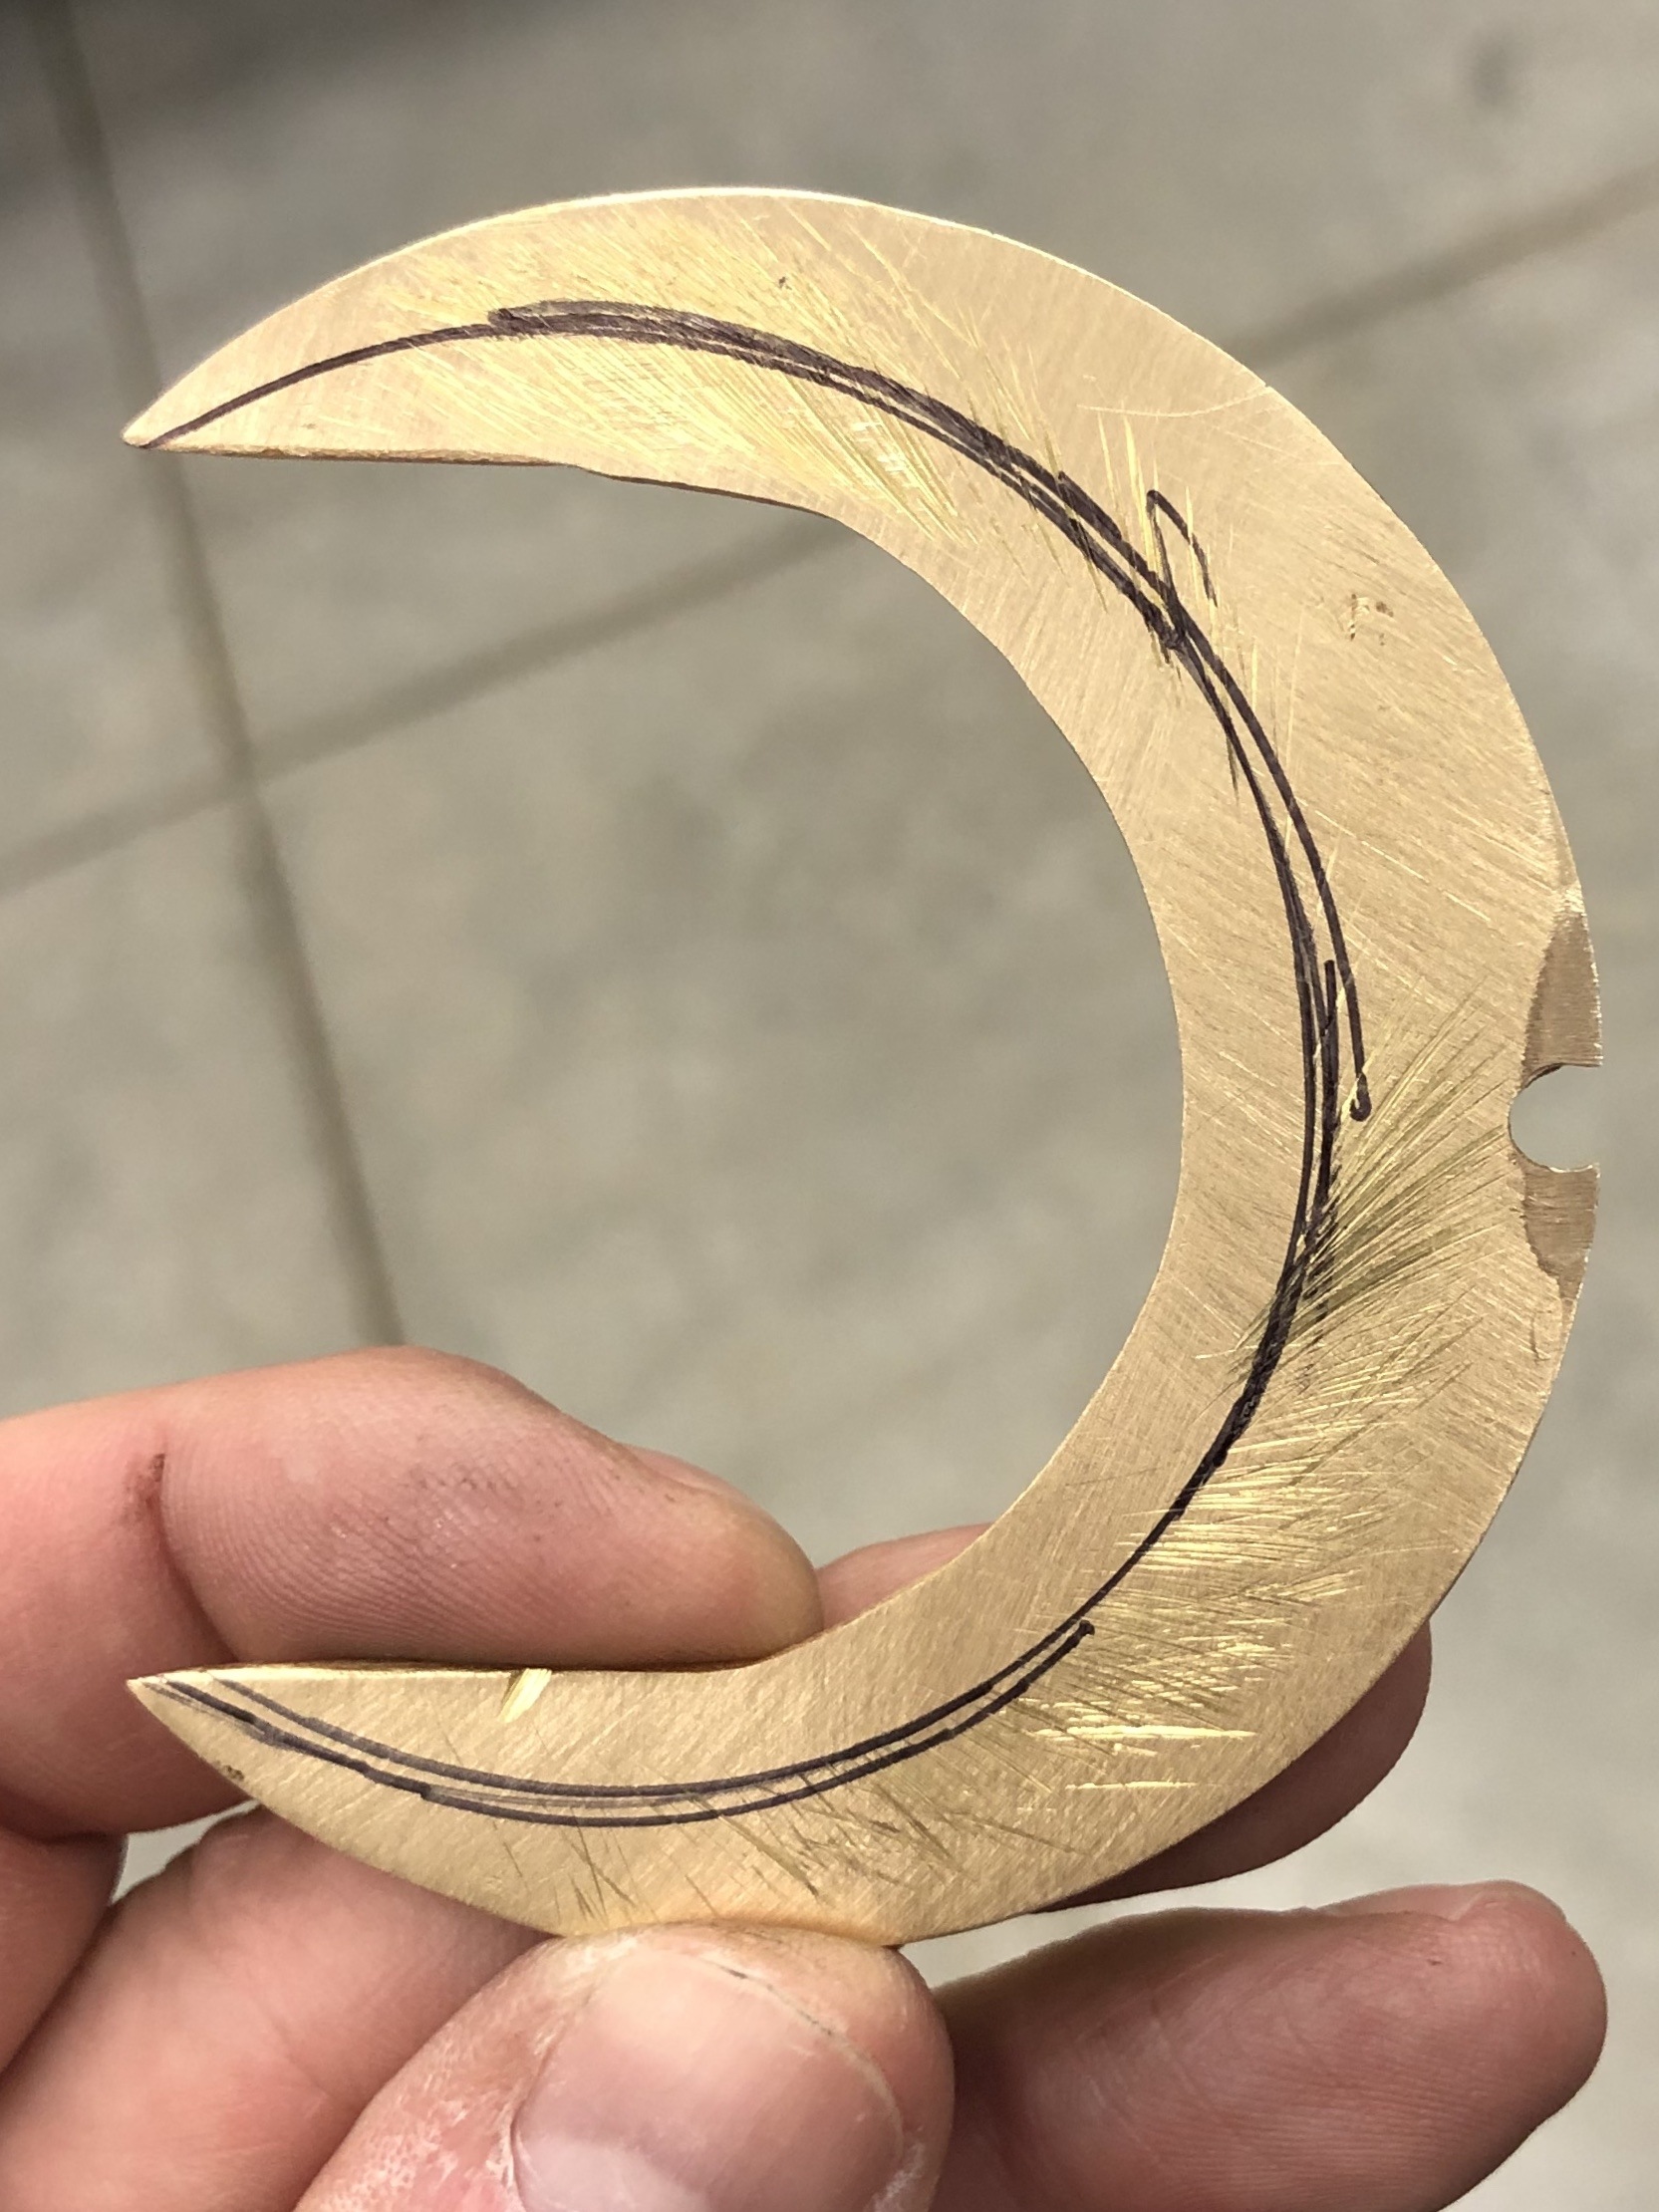
I was looking at the possibility of cutting out part of this brass washer to slip it into place. My hope is that I could tap a hole somewhere like the red circles to hold it in place. However I don’t know if I could drill in this area as I don’t know what’s behind it. Any one know?
0
Comments
-
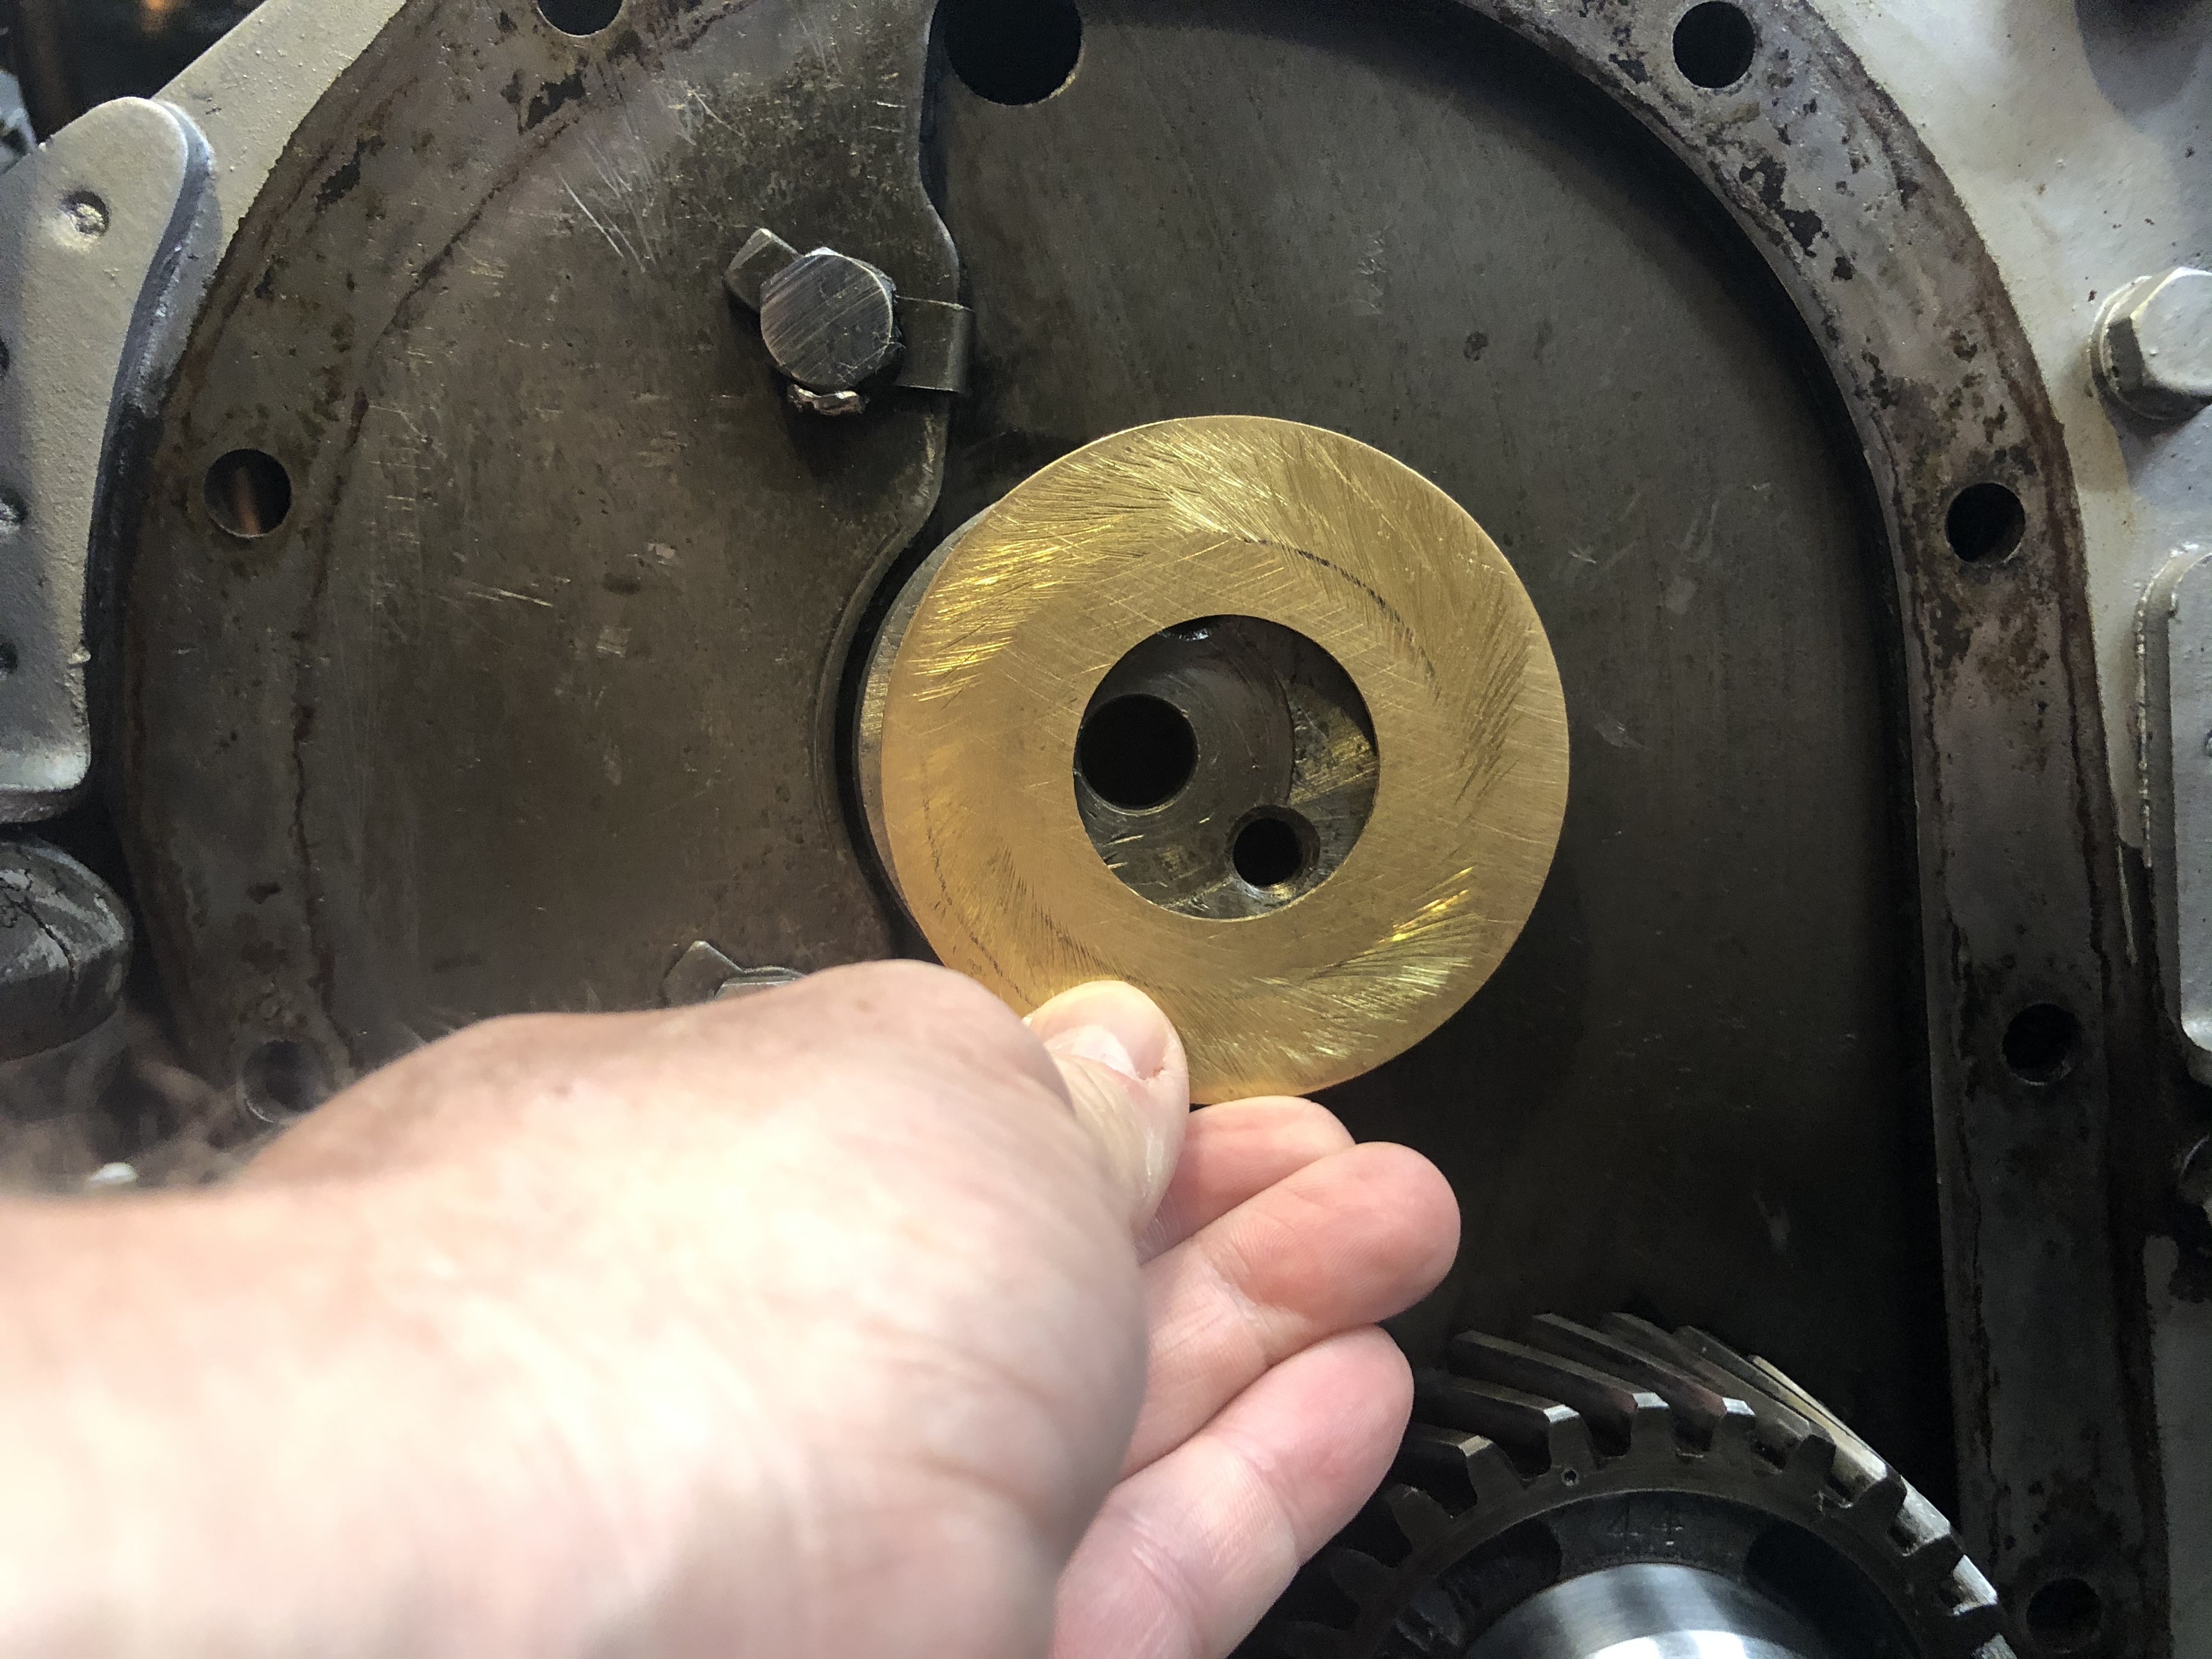
This maybe a better picture, where my thumb is on the possible “U” shaped cutout to slip it into place.
 I don’t think it needs much of a hole to hold it in place, maybe just one hole with some lock tight on it.If that isn’t possible any other ideas out there to hold it in place? Trying hard to avoid pulling cam as then the engine comes apart again....0
 -
You can make up two half moons. Slip one around the cam, and make the other one wider on the outside, and then drill a 3/16" hole in it, and drill and tap the block to take a screw to hold the exposed side in place, as you have illustrated. I have done this before. There is nothing behind in the block that would cause any problems. Use lock-thread compound, and a lock washer as well.0
-
Much simpler: Hudson had a replacement that was just a circle with a scharff ( angle ) cut. Instructions were to just feed it in with cam just pulled forward enough to have it slip in.
The ones most are used to have "ears" which rested against the motor mount bracket inner surface. Requiring cam to be removed to install it.
The circular replacement would rotate and likely have less wear than the older design that was held fast from rotating.
Think about it: no pulling of cam shaft, it was a great idea for a wear-loss part.0 -
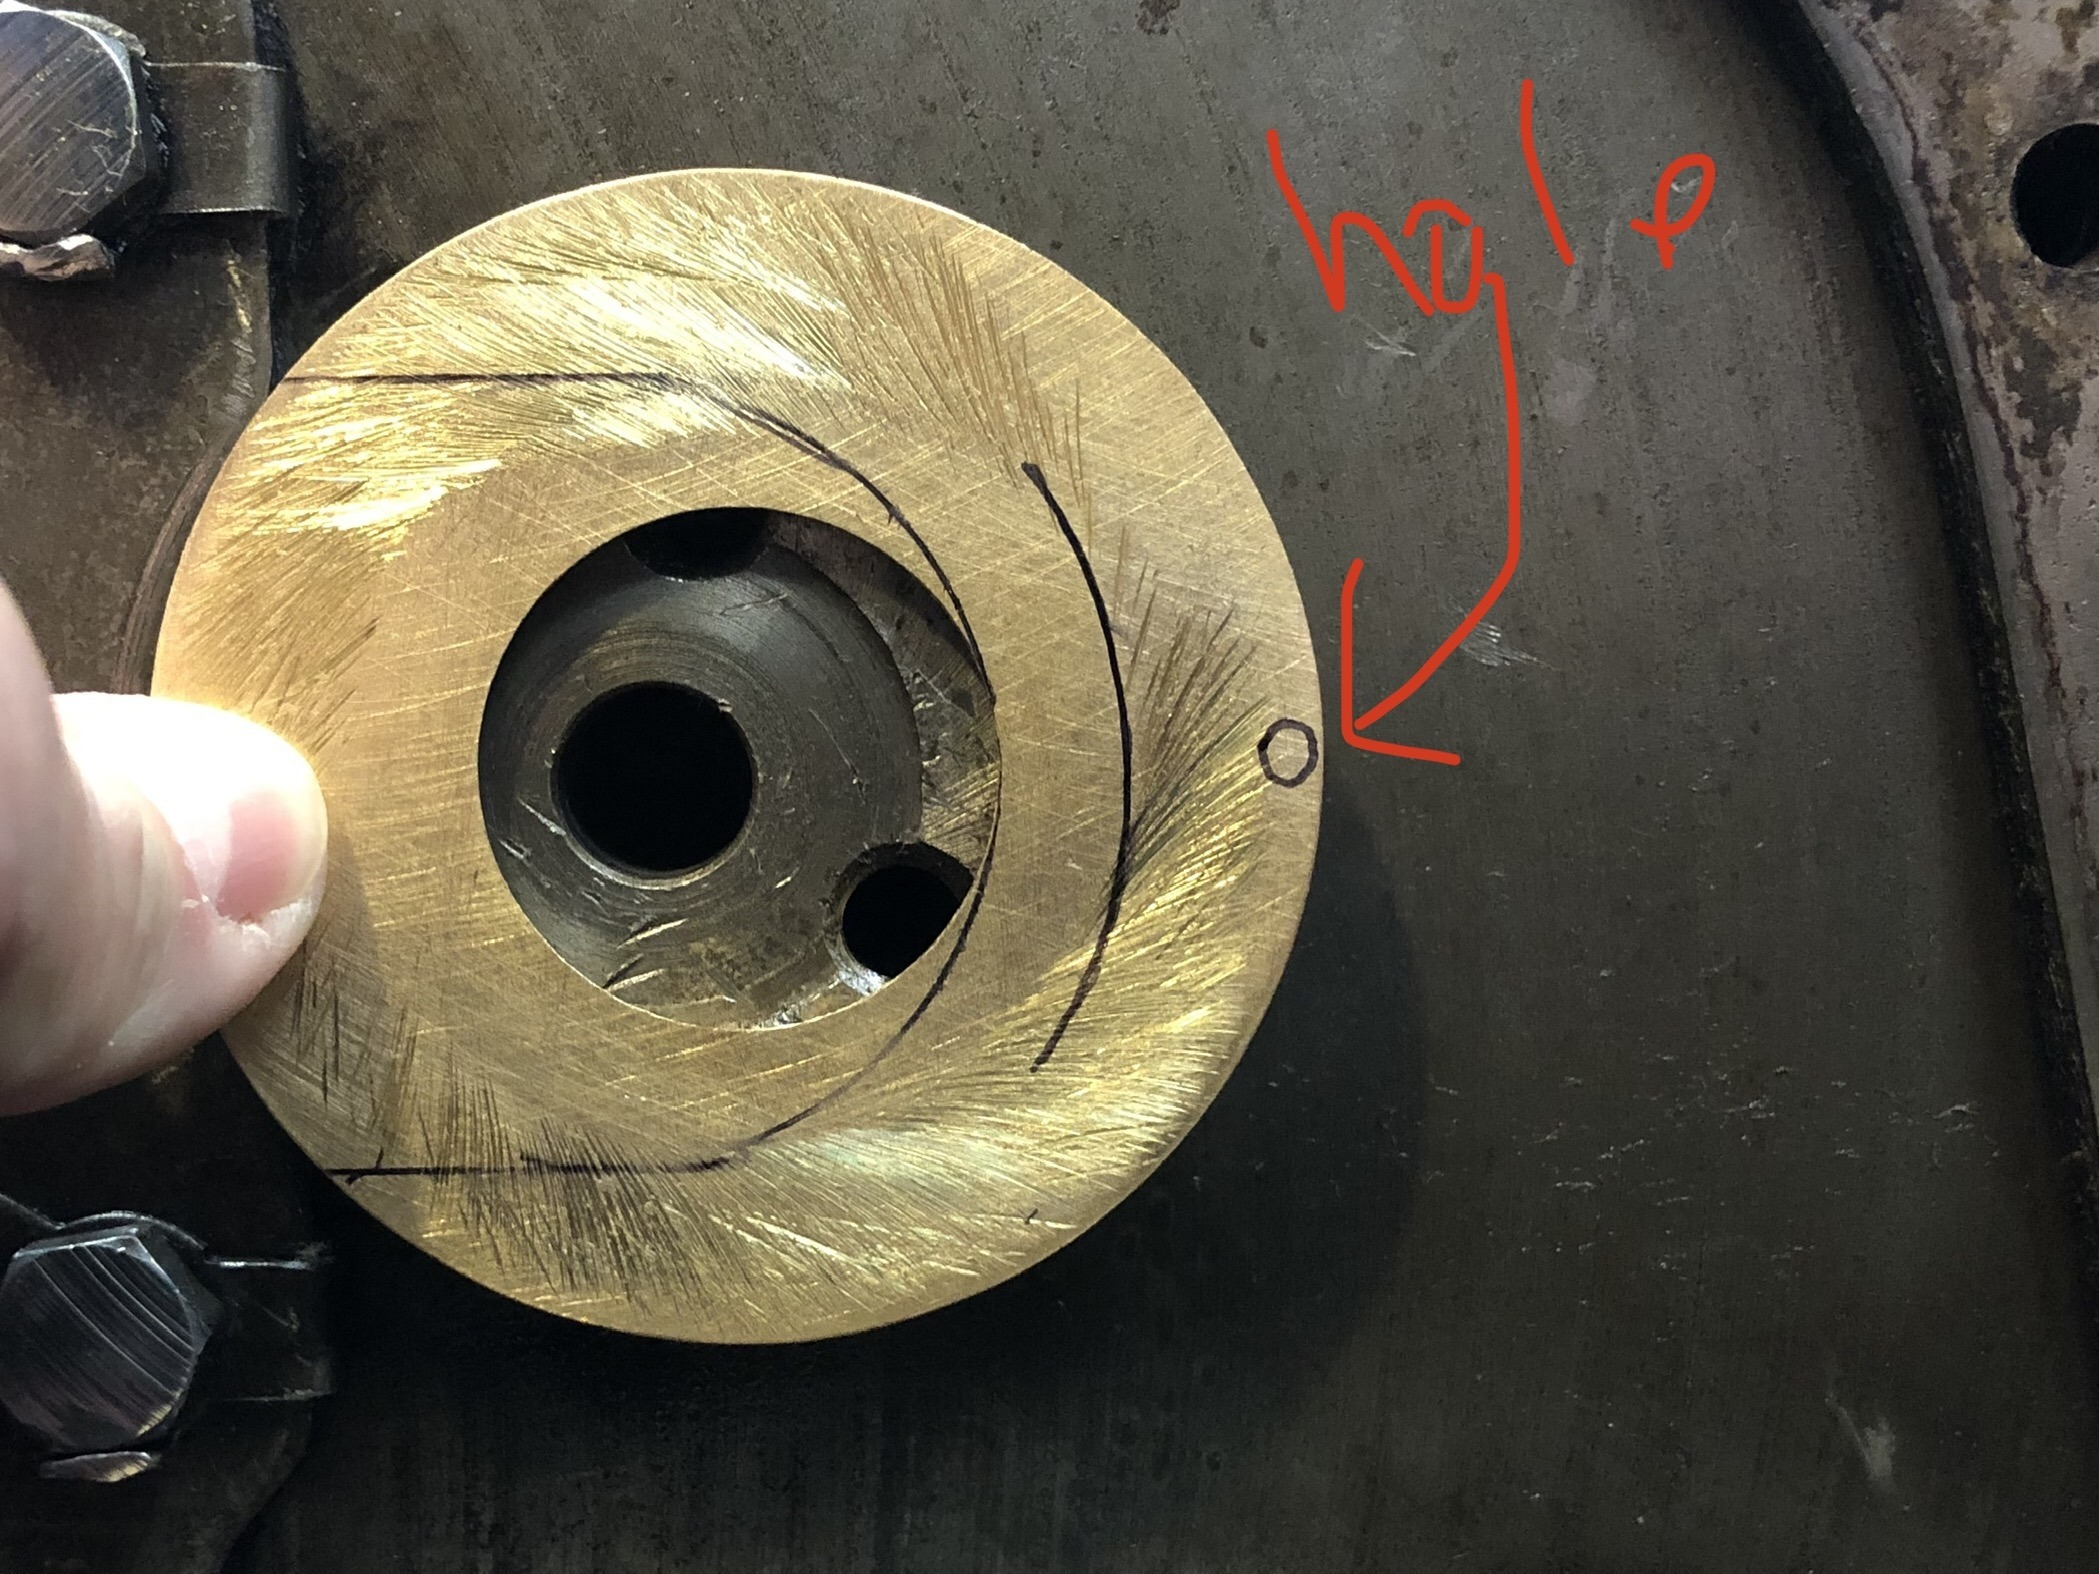
If I understand what your saying, would it be like this image? Where there are two cuts, the thin one slips in on the left side where it’s tight & the thicker one on the right side pushes in against the other. I may need to trim off the shaded black area to slip it around behind the head & in place. Then the bigger right side would slip in & hold the 1st piece from coming out as it would have the tapped screw (red dot) holding it in place from moving.

If this is correct, is it important that the right side piece fit firmly against the left side piece on both cuts?0 -
Hans, I’m definitely trying not to pull the cam right now! My main concern is that the 2.04” inner diameter maybe too small to some how get it over the 2.56” OD cam head. I imagine it would be similar to putting a ring on a piston but I’m not sure there’s enough give in the phenolic one? I do have a New replacement OEM style washer & could cut ears off of it as well.0
-
I just cut the washer straight across the last time I did it. The ends butt together, and the screw stops them from moving.0
-
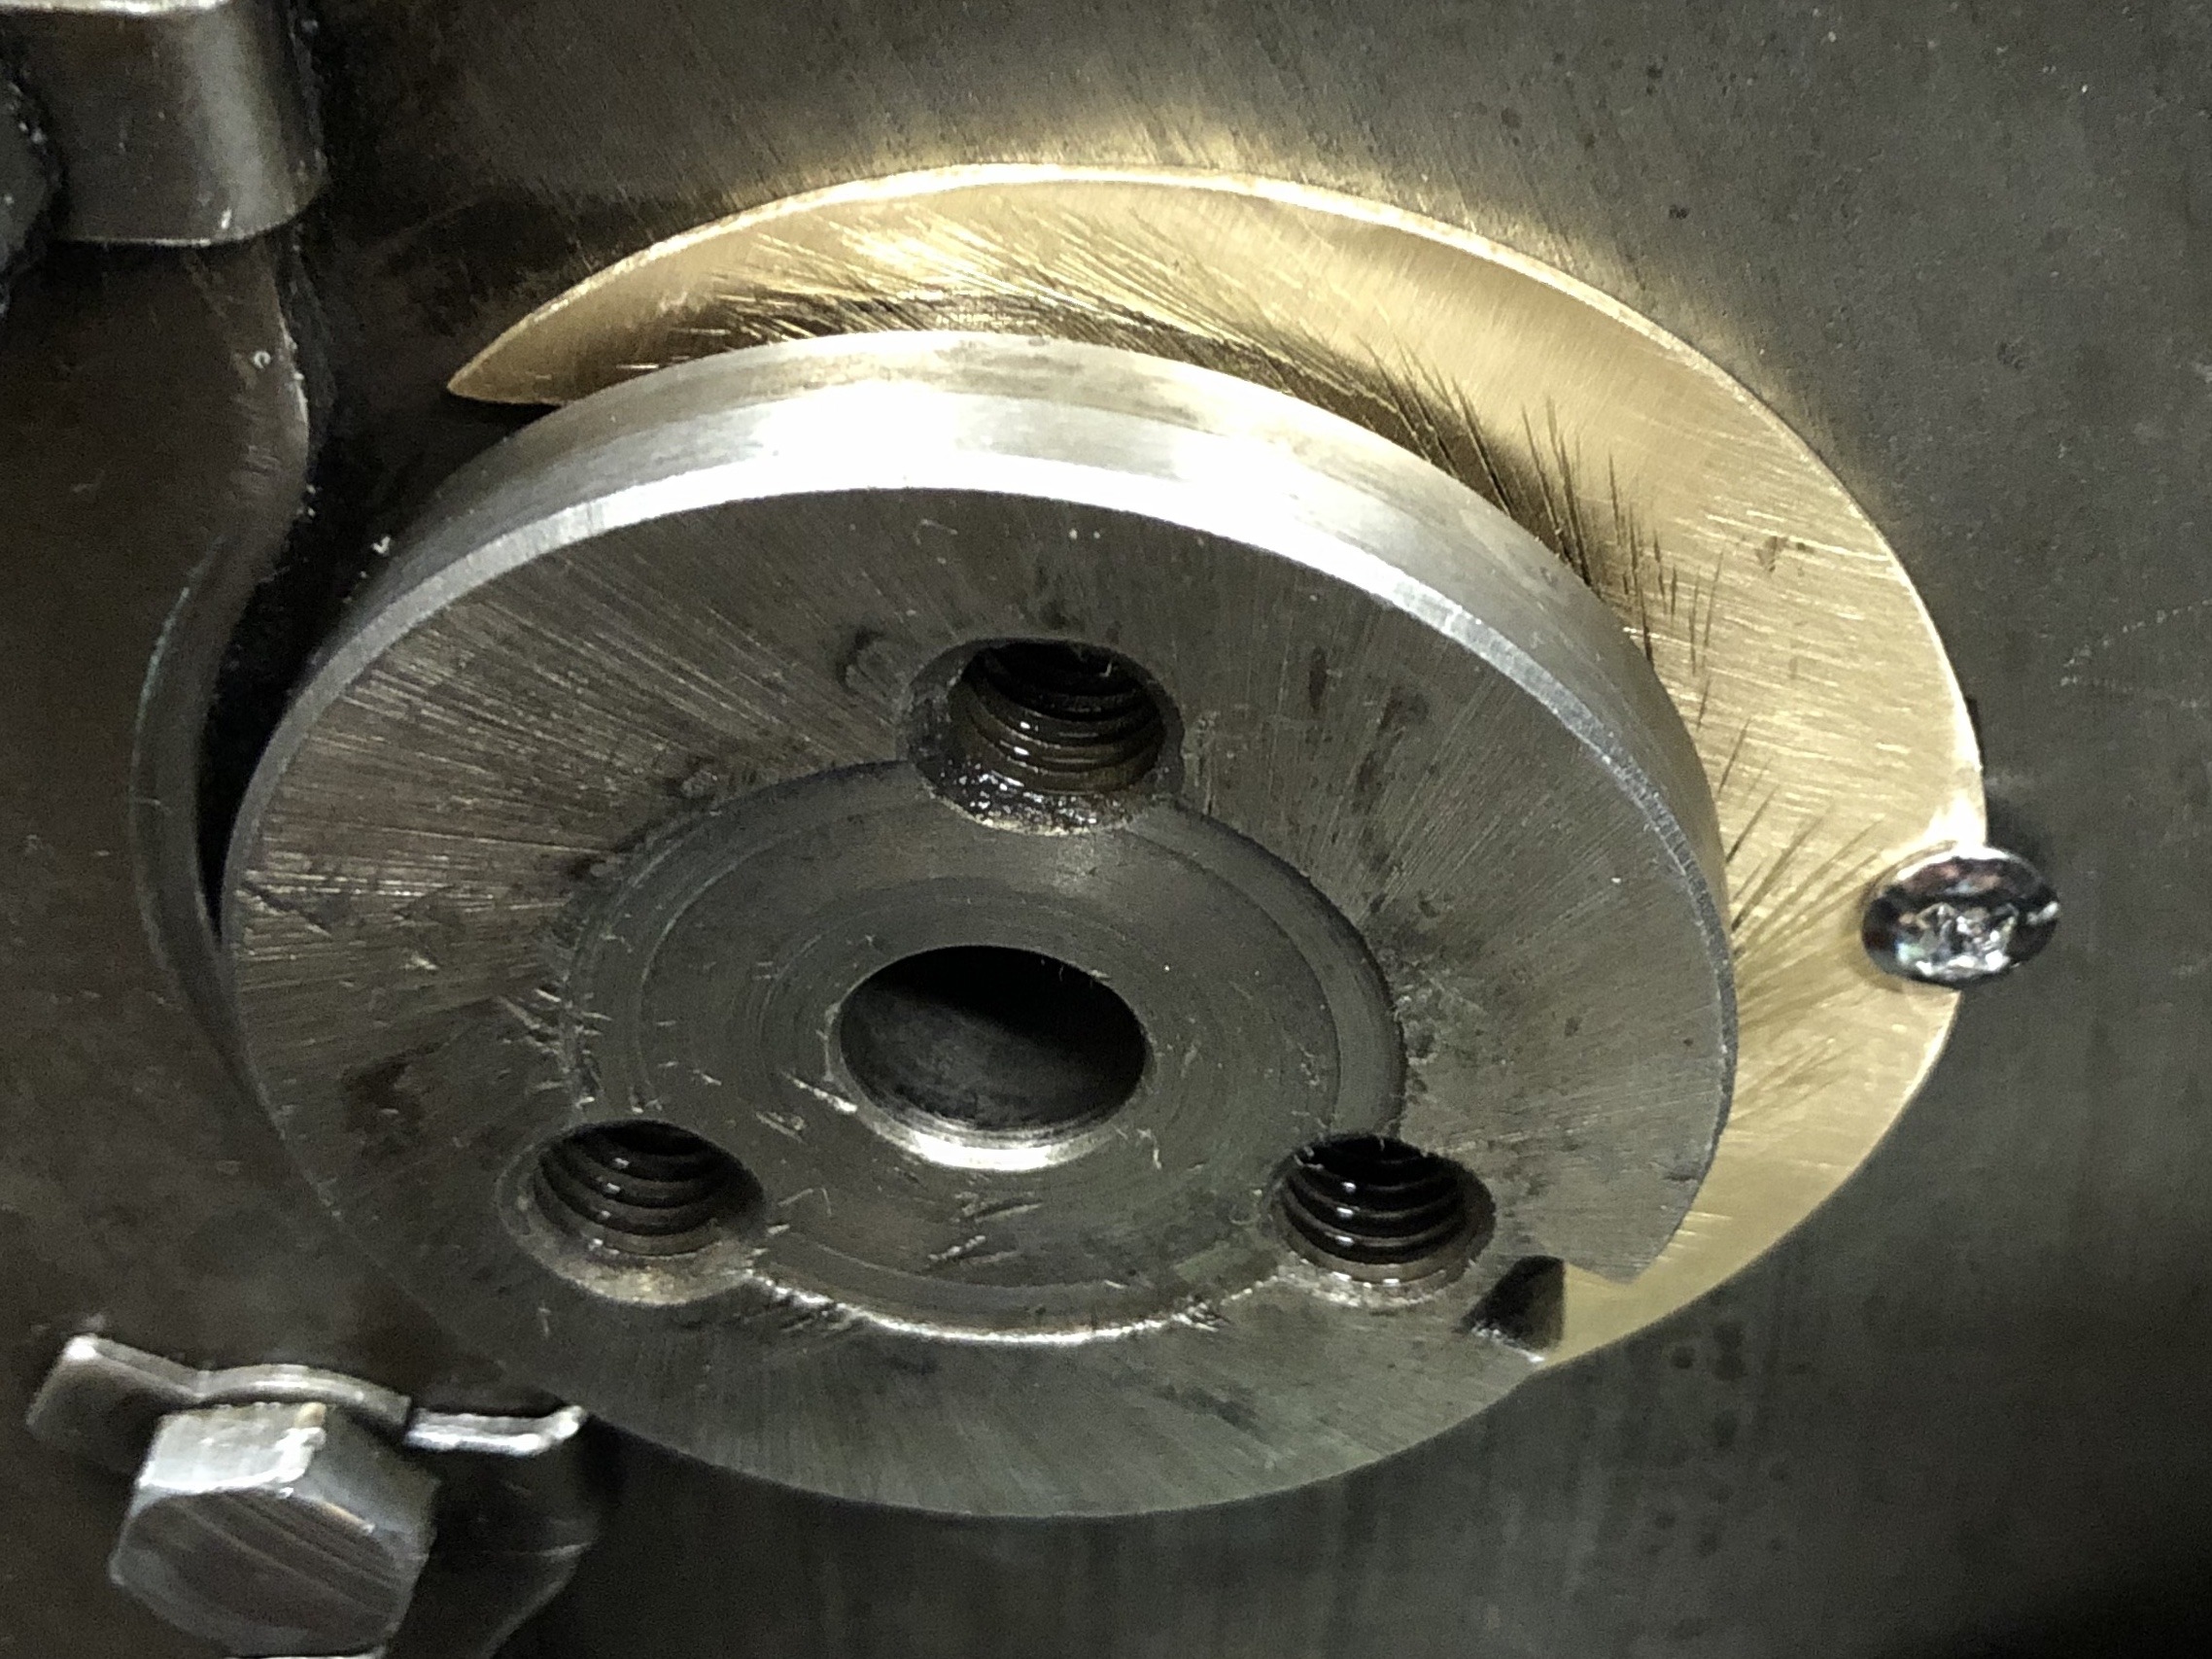
So for those who may follow what I ended up doing, here it is. Since the washer was over 1/8” thick to begin with & I used an angle grinder to thin it down to 0.068” which was 0.001 less than the new replacement washer available at 0.069”. After some sandpaper work to improve flatness, I cut the washer so that around 2/3 to 3/4 of the cam head would be in contact with it when installed. Again, this was all done to try & avoid removing the cam & subsequent components at this time. Looking for a way to securely adhere it, I chose to drill & tap a hole on the edge of the washer & used an 8-32 stove head bolt with 3/8” length.
 When drilling I didn’t intend to but ultimately did drill all the way threw the block face as it was thinner there vs at the factory holes in the block face. However there’s plenty of room behind the block face & The only thing it could hit is a crank counter weight at least an inch farther inside. During test installation of the washer with bolt, I noticed the left side of the washer was rising a tiny bit. After filing the edge at an angle for the bolt head to rest on it, it was perfectly flat.
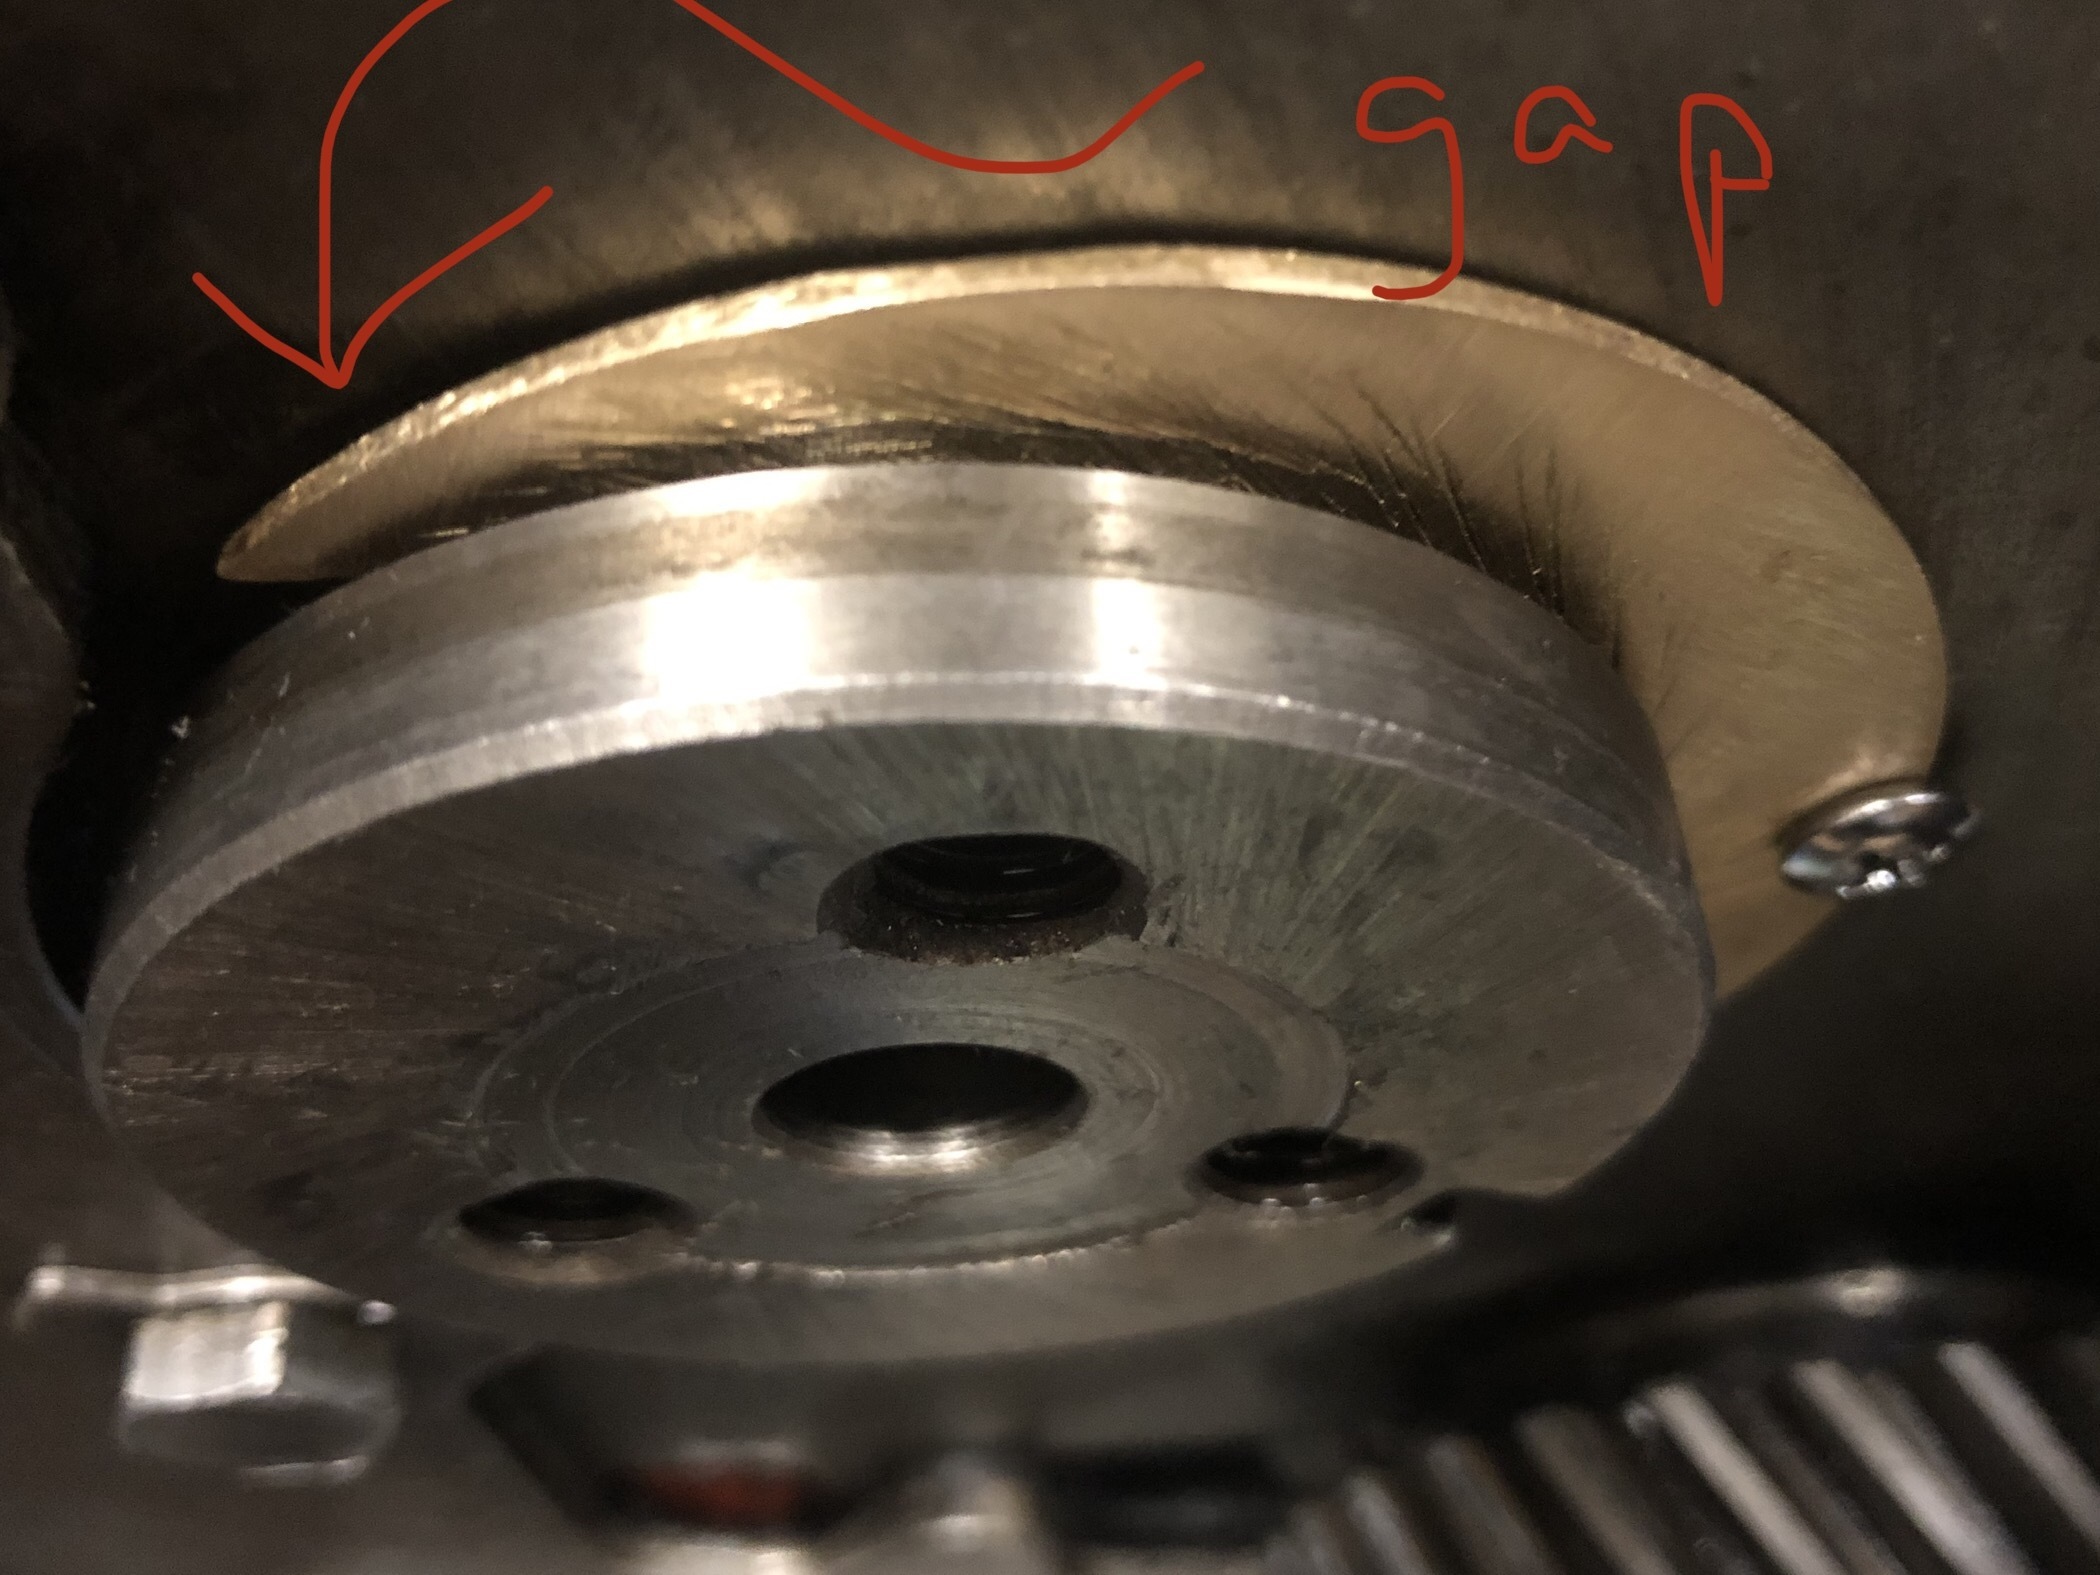
 After some assembly lube between cam head & brass washer I used painters tape to hold the washer in place so I could put some blue Loctite
on the bolt threads & screw it in place. I decided against using the short left side piece as I couldn’t keep it securely in place & didn’t want other problems coming from it down the road. A lot of new cars use only half of a cam thrust washer with a lot more thrust load than this engine, so it should be just fine.
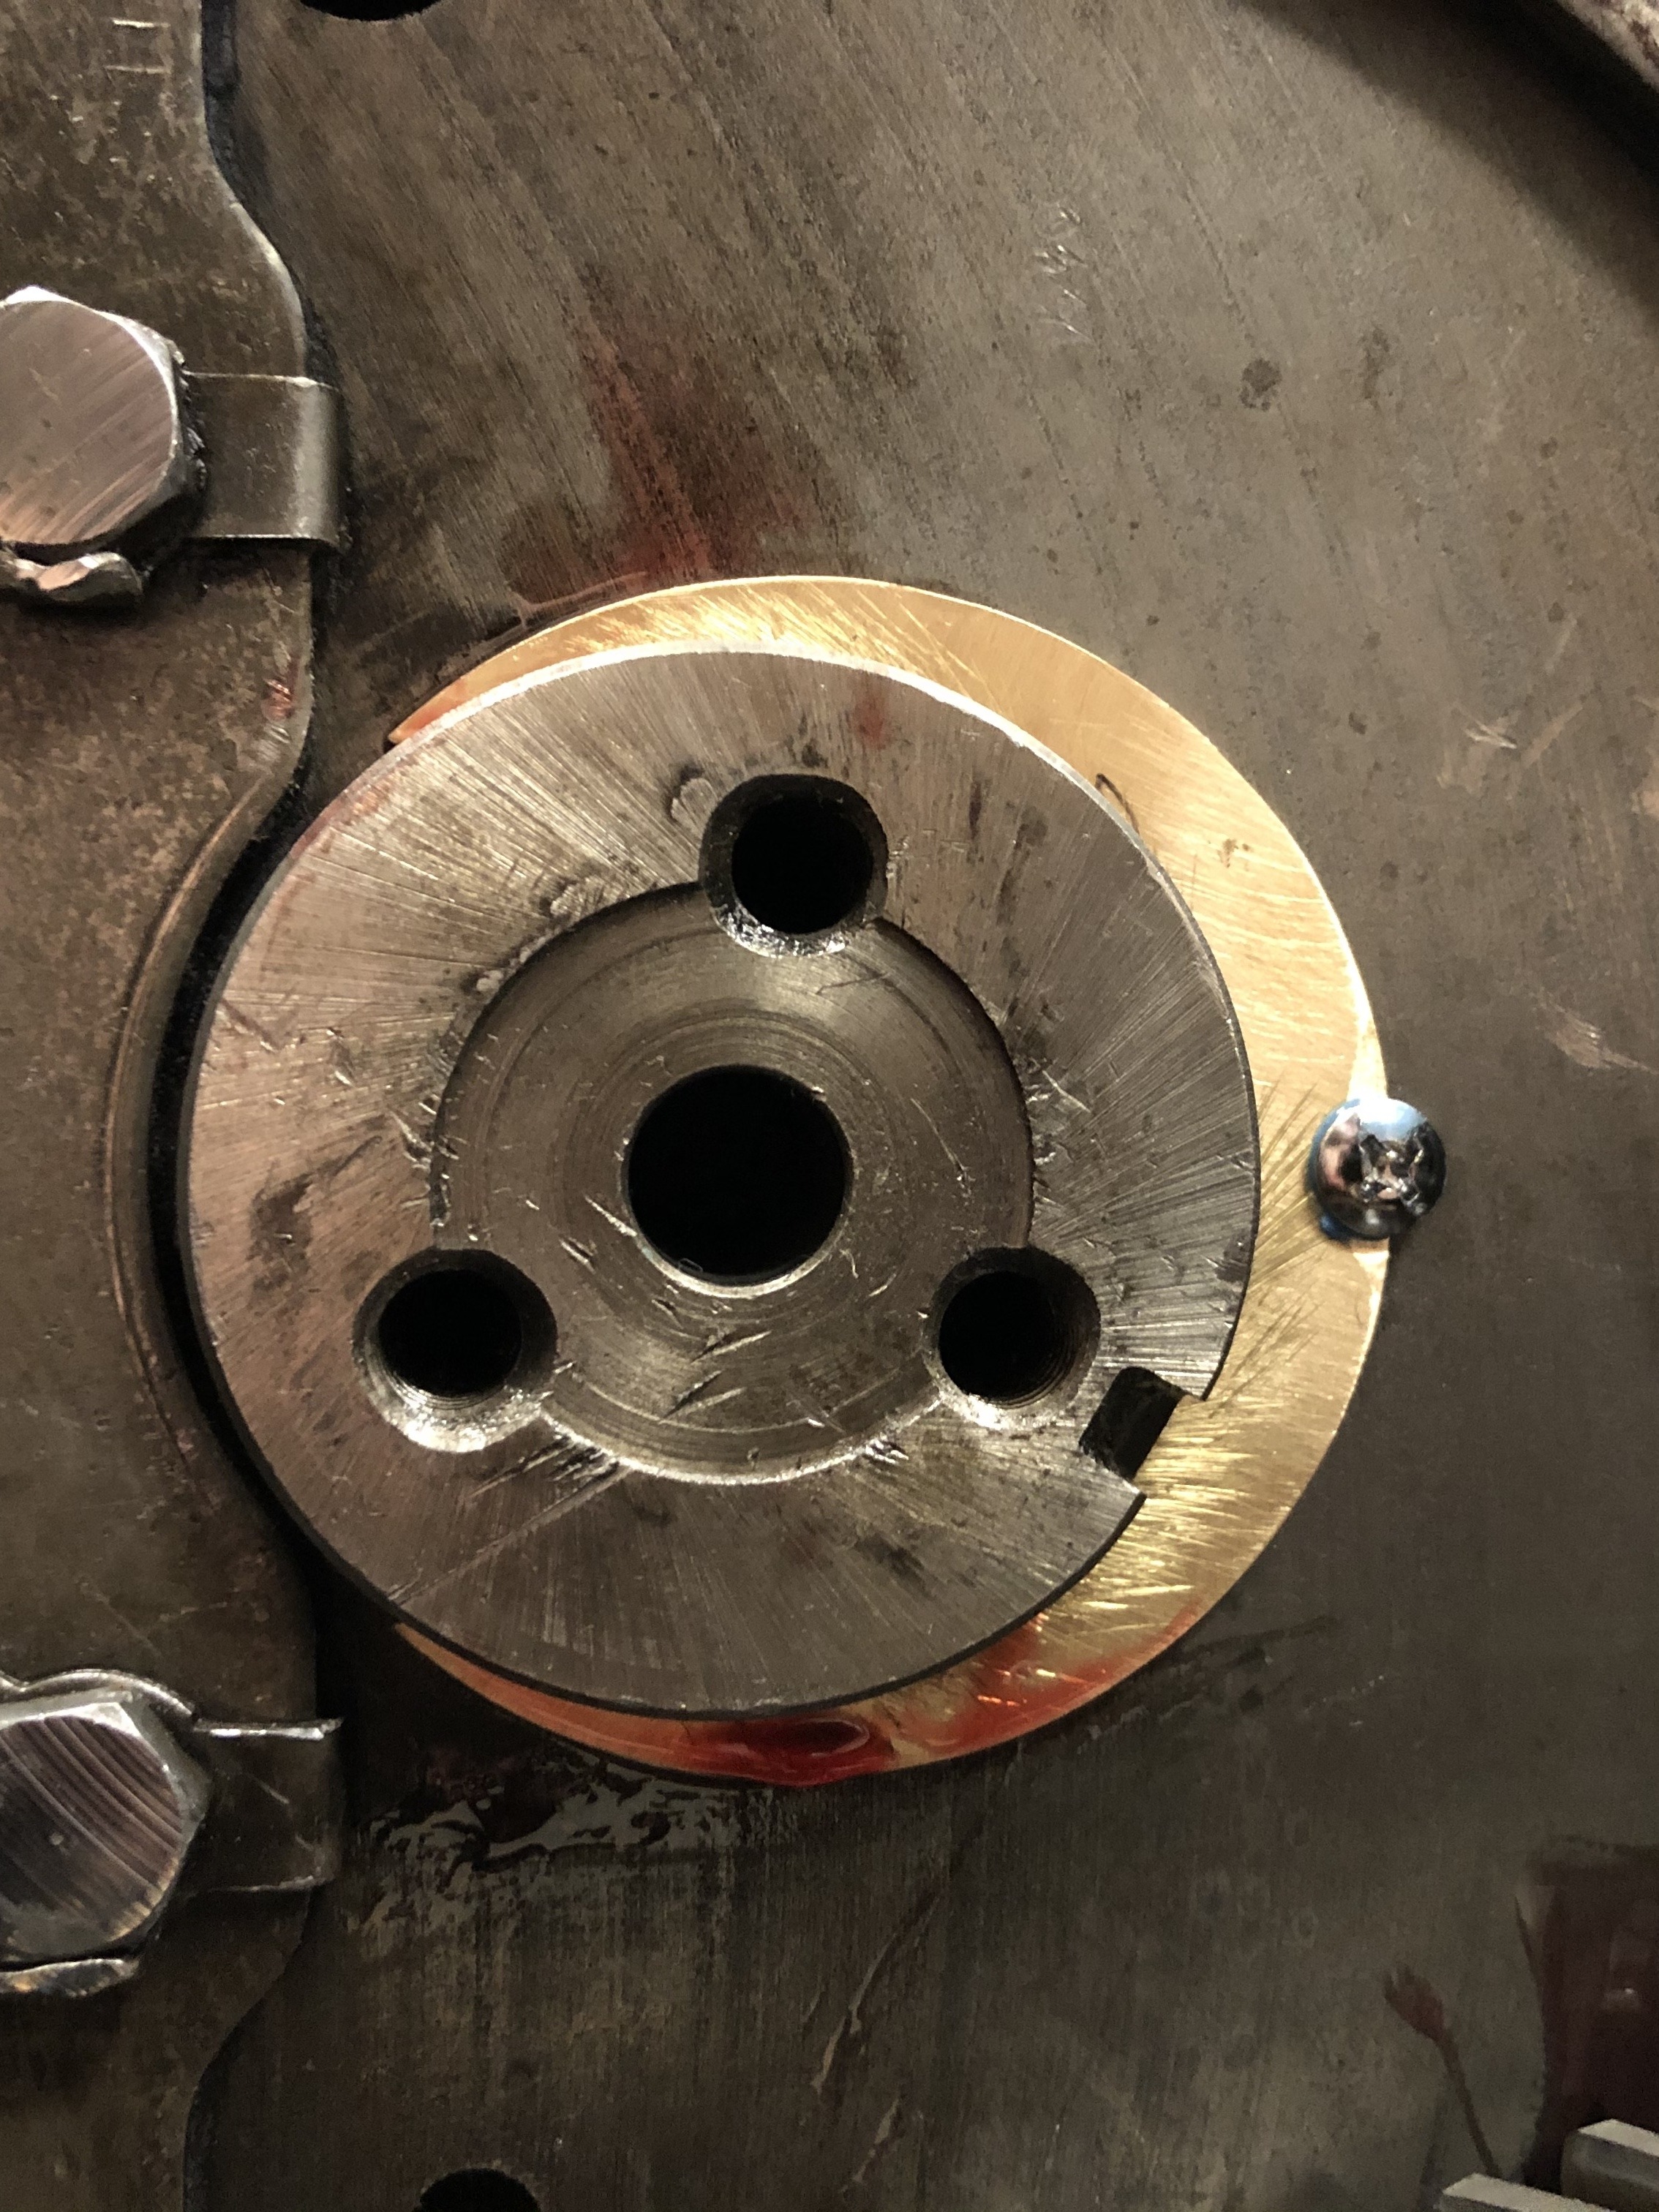 Now to remove & grind the heads down on the two bolts to the left to make sure there is no more interference now or in the future.0
 -
BigSky: your next task is to capture this stream of questions and answers and make a continuously chronicled explanation of how and why this was done. Your successors will be happy you did! Maybe a WTN how to do piece?0


Categories
- 36.6K All Categories
- 85 Hudson 1916 - 1929
- 11 Upcoming Events
- 73 Essex Super 6
- 28.3K HUDSON
- 511 "How To" - Skills, mechanical and other wise
- 989 Street Rods
- 150 American Motors
- 170 The Flathead Forum
- 47 Manuals, etc,.
- 71 Hudson 8
- 40 FORUM - Instructions and Tips on using the forum
- 2.7K CLASSIFIEDS
- 592 Vehicles
- 2.1K Parts & Pieces
- 76 Literature & Memorabilia
- Hudson 1916 - 1929 Yahoo Groups Archived Photos