Rhodora - '49 Hudson Brougham
Comments
-
I’ve chosen to order the carb gaskets at Wild Rick. I’m missing the bolts to install the carb though. Can anyone tell me what thread pattern and size the bolts should be (manifold)?
Also, if someone has an original carb throttle linkage (the one on top of the engine) I would be very interested.
0 -
I finally found some time (week holiday) to do something (and had some external motivation).The parts from Wild Rick are in and I tried some bolts in my manifold. It looks like the previous owner either forced or partly threaded the manifold to fit 8mm bolts. The manifold was used for a bolt on adapter plate.
Now there is a slight challenge: there isn’t a lot of room on the back of the carb so only 25mm long bolts fit. That means I cannot make a five layer cake plus fuel drip plate. Only two layers is already on the high side and the drip plate interferes with the throttle linkage. I’m not sure this will work.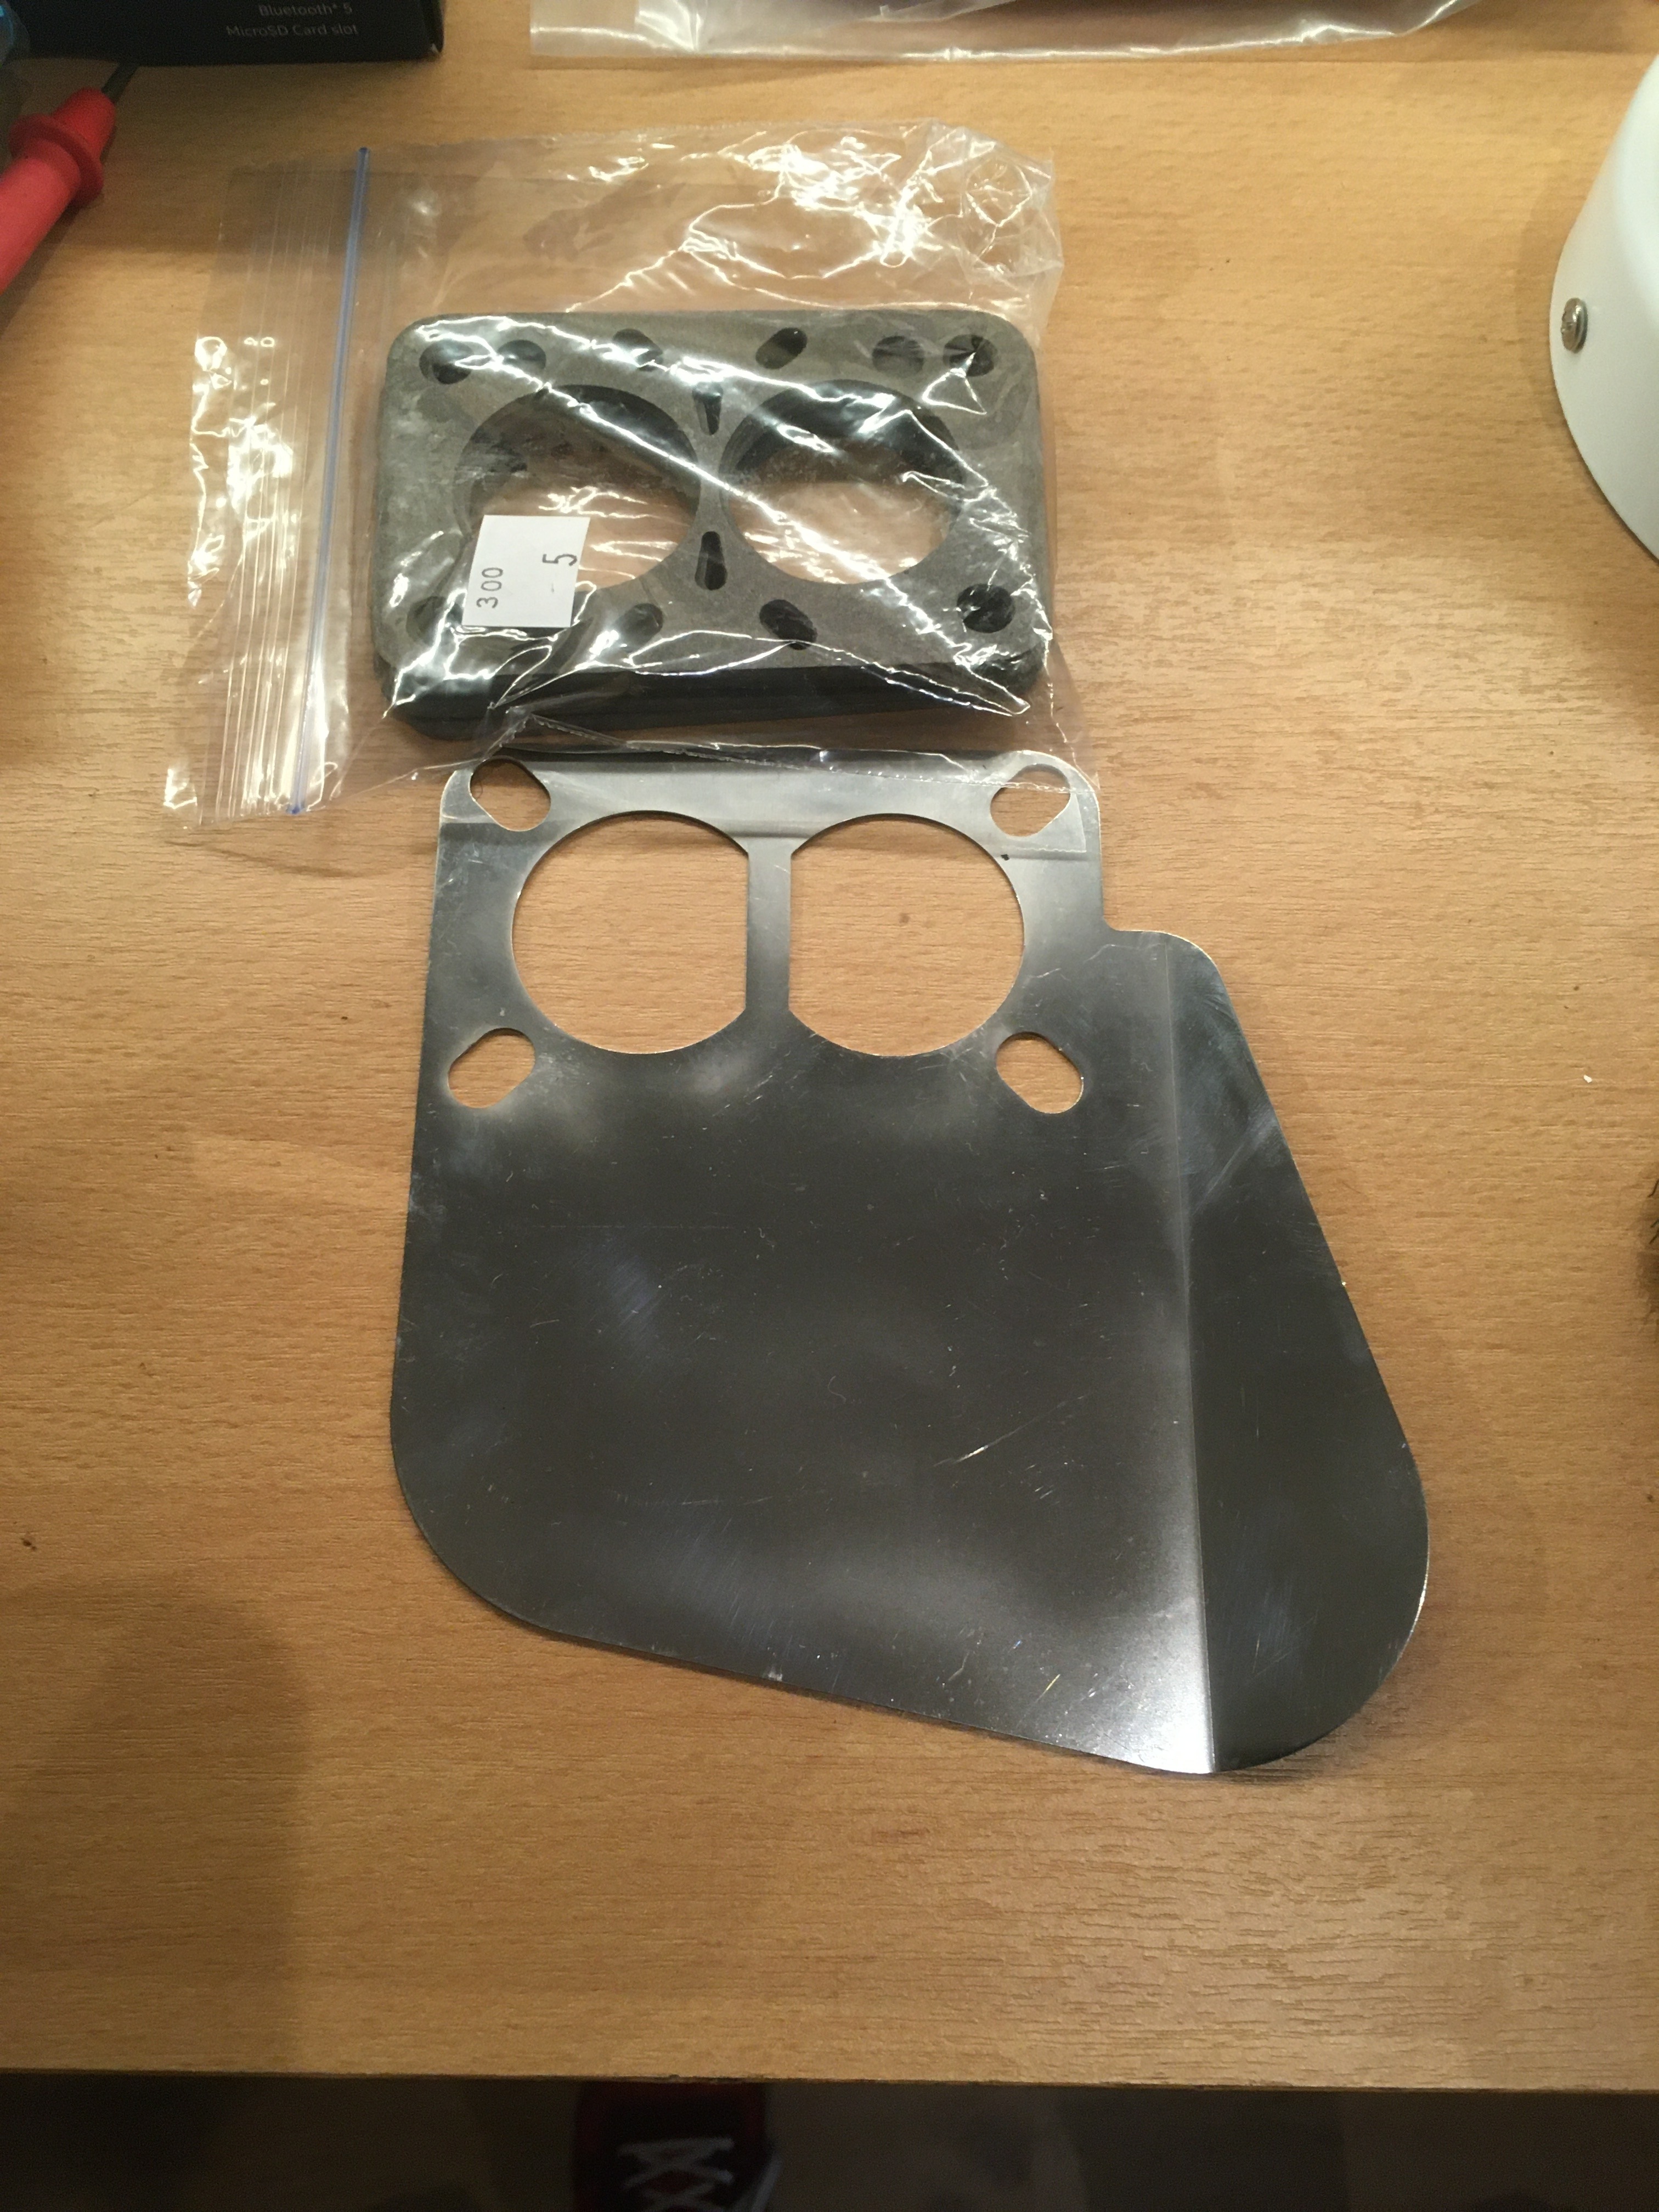
 Do I really need the height and shield?0
 -
This is another reason for studs in the manifold instead of bolts. The heat shield helps prevent boiling the fuel in the float bowl... I would do what's necessary to use it.0
-
I hear you. So that’s why I think this should be the plan:
I can try to bolt the bolts in, noting how deep they will go in. Then buy a threaded stud and cut it in pieces of a length that will cater for all gaskets, shield, ring and nut.
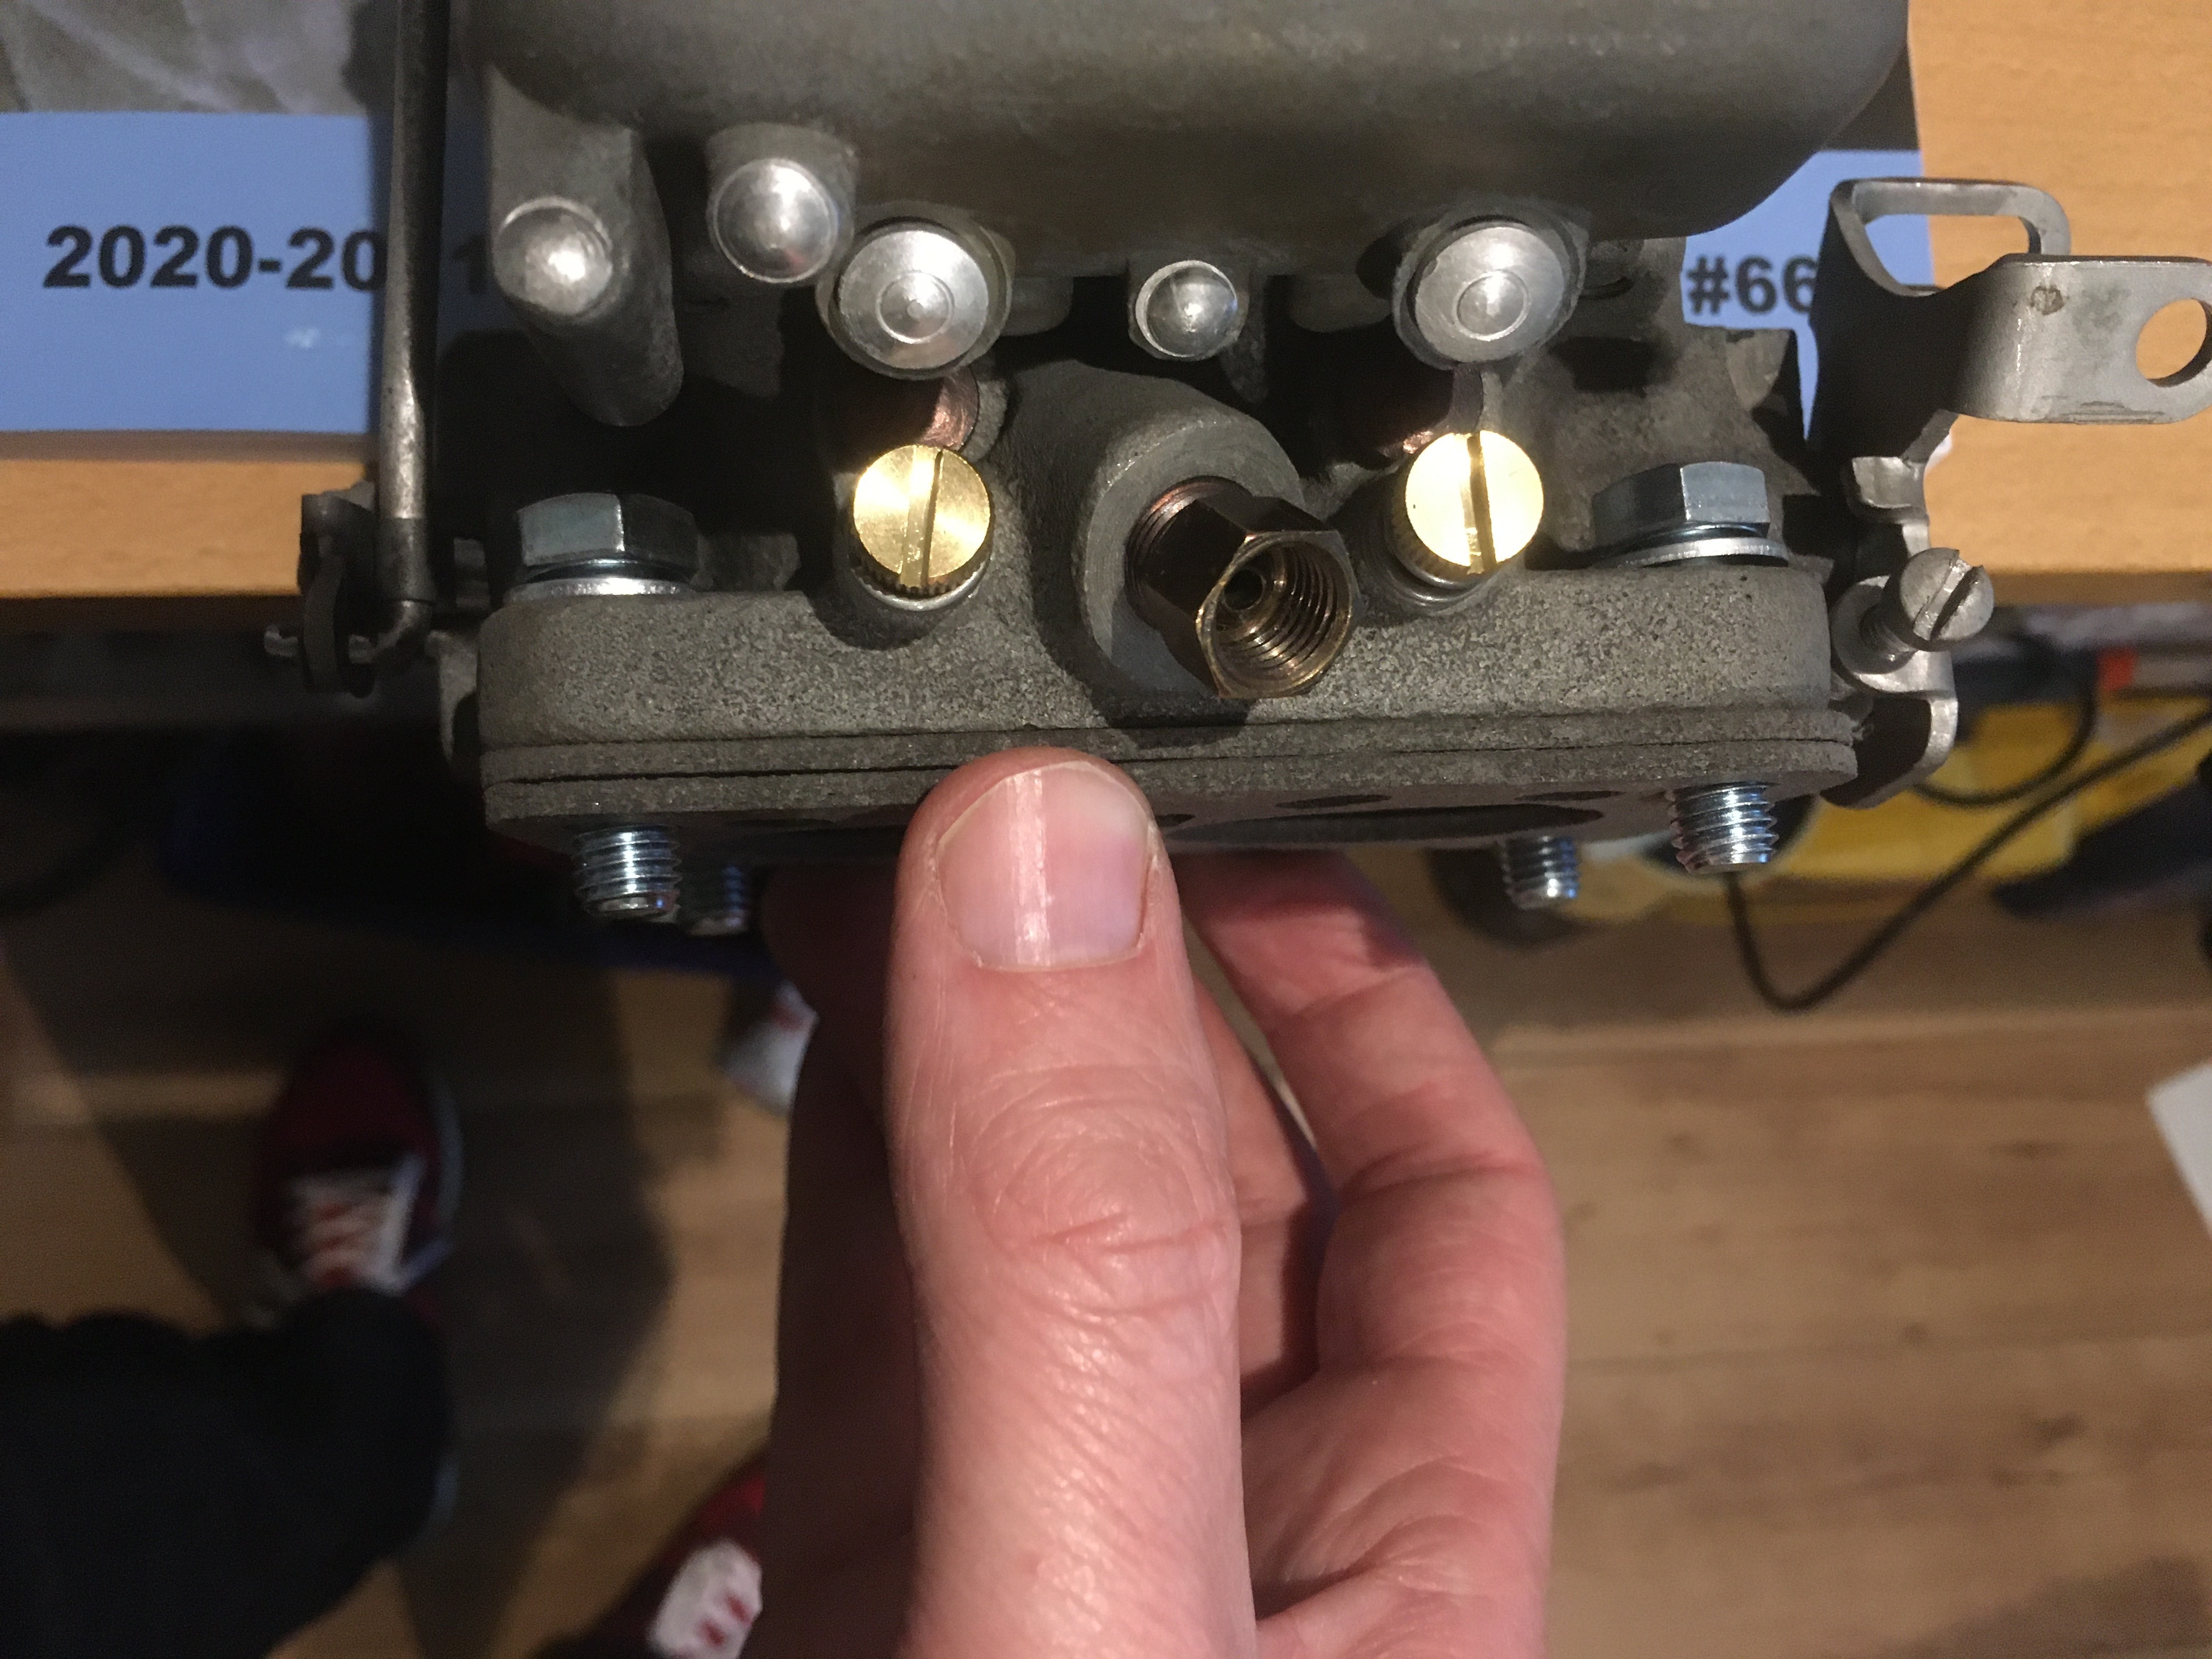
Which way should the heat shield be positioned to prevent it from interfering with the throttle? And how many gaskets should I put above and below the heat shield?0 -
The heat shield goes just like you have it in the photo above, if you are standing in front of the radiator, looking into the engine compartment.0
-
I agree with 54coupe. You need studs, not bolts.

The stud must be long enough to accommodate the proper number of spacers (insulators), the metal heat shield, and the mounting plate of the carburetor, plus enough for the nut and lock washer.
In my 1937 Terraplane, I have 4 spacers, 1 heat shield, and 4 more spacers. This required an extra-long stud, because the original studs were too short to allow for all of these spacers! Also, the carburetor must be carefully lowered down upon the stud (when attaching), so that all four nuts / lock washers can be attached to the studs, and gradually tightened, at the same time. (That is because of the limited clearance for the nuts under the body of the carburetor.)
The reward for so many spacers is that the carburetor sits high above the hot manifold, and will stay cool. In the thirty or more years since I installed all the spacers and the heat shield, my car has never stalled in the extreme heat because of "vapor lock". This summer I drove my Terraplane on a 2-hour trip with temperatures in the 90's (farenheit; that's over 32 degrees Celsius, I believe), with long pauses at stop lights. I experienced no problems on the trip.0 -
I usually put 4 gaskets above, and 4 below the heat shield. These are heat insulators as well.0
-
Rhodora, are you aware that you now have two different discussions running simultaneously, on the common theme of carburetor studs / bolts? The other one is here: https://openforum.hetclub.org/discussion/365812/carburetor-bolts-replacement#latest
Be sure to check both of them, since you are receiving replies on both.
For your own benefit, you may wish to run only one discussion per theme, in the future. It's much easier to keep track of replies, that way!0 -
Thanks. That means I do have some clearing issues.54coupe said:The heat shield goes just like you have it in the photo above, if you are standing in front of the radiator, looking into the engine compartment.
@Jon B That was not my intention, thanks for your reply. I considered that other topic as solved as I have everything but a throttle linkage now.By the way: my Hudson has an electric fuel pump and hasn’t had any percolation issues yet, even at 100F / 37,5 Celsius.0 -
A weekend getting her spinning again.0
-
It's been a while since I posted here, with covid and especially moving (new house) it took a while to get everything up to speed. I've tried posting here too a while back but the website was completely offline (for me?) for a few weeks.`
In the meantime I have placed a new fuel pump and got the engine running okay (apart from occasional misfiring). I'm also starting to make the car more driver friendly again, which means a lot of rubber will be needed (and some more stuff of course).
I have pics on my phone so I'll put some up from there later.0 -
Great to hear from you. Thanks for the update. I'm looking forward to the pictures.0
-
@Rhodora If you have website issues at all please feel free to email me at webmaster@hetclub.org
The site hasn't been offline at all0 -
I was just thinking of you and your Lady. It's been a while, like the photos. VicTor and Teri Zamora
") 0
0 -
Wow, a month flew by again! I have been very busy with work also (working abroad, long hours). So I will finally post some update pictures.@PaulButler I guess it had something to do with me living in the EU, or just my provider. I have a new one right now.It's good to see you here again, Victor. Glad everyone is okay after some tough years for us all.Okay, on with the pics already!
 0
0 -
So one of the issues I ran into with using an original carburetor with the TH700R4 was: how to connect the TV cable?
I’ve been measuring and trying to get the original geometry as close as possible. In the end I did not install a definitive setup yet so the geometry is pretty close but I can’t get the throttle past 3/4 because the TV cable may not have too much slack at idle. I also thought it may be cool to have some sort of roof rack on the car, I dunno. I bought these from eBay just in case.
 Also I ‘temporarily’ installed a VDO meter inside an original gauge as I could not get it to work proper with the TH700. The original and some second hand gauges had trouble with the mechanism and with the way off ratio.
 Aaaand some other gauges were not accurate so I bought some from eBay which work perfect.
 I’ve been installing some sound deadening material in the interior and did some normal maintenance. The car did get somewhat of a back seat after buying a house a year ago. On the other hand, with the garage in the yard she is always very close.Coming weeks a friend will install new coil springs in the front. The lowered look will then disappear but the ride quality will then hopefully be much better.For the rear suspension we will also change some things to get it better balanced and less like a water bed.0
 -
Small video I made for you guys with some of the stuff I mentioned. Oh and a fuel pump swap.0
-
When I did the 700r4 conversion in a friend's 49 convertible, I made a mounting bracket that attached to the two rear carburetor studs, and the cable attached to the throttle shaft on the other side of the carb. I wish I had a photo of it, but I don't.0
-
Sounds like a very nice setup!Stupid side question: The car is still on bias ply 15" 7.10 and when I look up the 1949 Tech Specs it says 24 PSI which sounds awfully low. I also read people putting 30 to 32 PSI in their tires.I don't want to blow out the inner tube but the more air the less loss. When I turn the wheel now it's very, very heavy at low speeds, which isn't normal. I like harder more than softer. But what is safe?0
-
I would run 30 psi and keep an eye on treadwear. If the tires show more wear in the center of the tread than on the edges, the pressure is too high.0
-
Thanks! Great advice again, much appreciated
 0
0 -
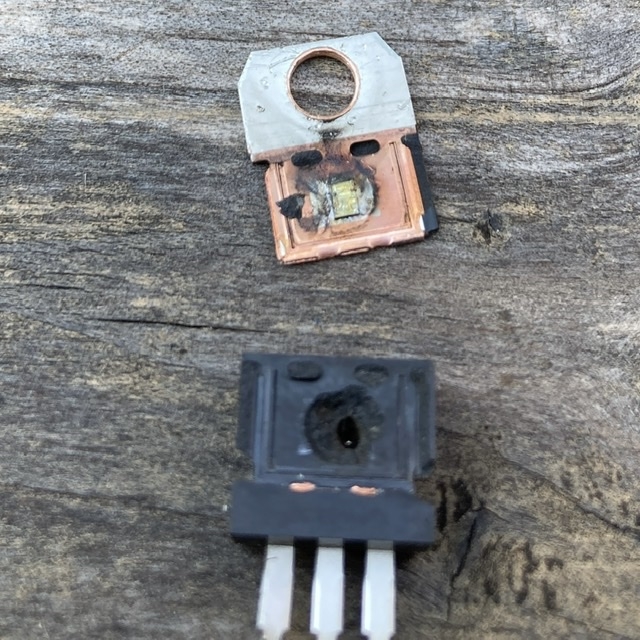
30psi did the trick - the wheels were a bit underinflated... Oops!Last Saturday I wanted to drive to a meeting but I heard a pop and smelled fire and my gauges stopped working so I returned home. The voltage regulator decided to cancel itself. It may not have had too good of a contact for cooling. These 7806 I am using are rated for 1.5 amps which I would reckon is more than enough. But to be safe I will change the setup to have two voltage regulators (one per gauge) and one in line fuse of 1 amp before the gauges. I hope that will prevent this from happening again.It's always the modern stuff that breaks down. Last few break downs were amongst others the electric fuel pump (have switched to a new one in the mean time).
 *snap, crackle & pop*0
 -
You must buy a smoke proof regulator!0
-
Normally I place the whole body against the heat conductive material but judging on my pictures I did not place it closely enough and the contact with the upper lip was not enough to cool it. User error.
I am preparing to tidy it up better now.0 -
It’s been a while again… had many problems with the fuel system (overheating and clogging) so not a lot of miles added… should be good now.
Latest issue is brake switch is dead. I bought a new one but before I screw the old one out I want to be sure I’m doing everything safe.
How do I swap the switch? I assume air can go in and/or brake fluid can come out. If I swap fast is this no problem or do I need to bleed the system and refill it?
0 -
Typically, changing the switch doesn't require bleeding. If you are using silicon brake fluid, and using a typical, off the shelf automotive hydraulic switch, you may see this problem again soon. Silicone fluid doesn't like those switches. There are switches made for Harley Davidson motorcycles that use silicone brake fluid, and use 1/8 pipe thread fitting, just like Hudson did. Paul Schuster sells them, if you don't want to go on the hunt yourself. After replacing three of them in my '36, with one from Paul 20 something years ago, I'm very happy.
0 -
Thanks for the suggestion! I must say that the switch died directly after changing the brake fluid at my friend’s (he has a lift, I can only lay down on the cold wet floor) and I didn’t ask him what kind of fluid he used. Great tip, thanks!
0


Categories
- 36.6K All Categories
- 85 Hudson 1916 - 1929
- 11 Upcoming Events
- 73 Essex Super 6
- 28.3K HUDSON
- 511 "How To" - Skills, mechanical and other wise
- 989 Street Rods
- 150 American Motors
- 170 The Flathead Forum
- 47 Manuals, etc,.
- 71 Hudson 8
- 40 FORUM - Instructions and Tips on using the forum
- 2.7K CLASSIFIEDS
- 592 Vehicles
- 2.1K Parts & Pieces
- 76 Literature & Memorabilia
- Hudson 1916 - 1929 Yahoo Groups Archived Photos