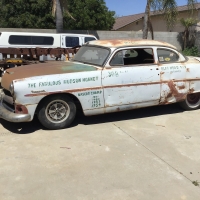
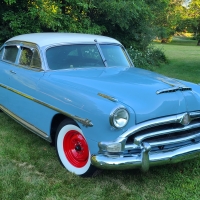
1951 Pacemaker rear glass

Comments
-
Kerry, The 51 Pacemaker came with no stainless trim around the rear window. Likely folks have started to install the rear window trim from the long wheelbase models on the Pacemaker. If you want to install it from a Hornet or Commodore it will work -no problem. I'm thinking Doug Wildrick sells only the rear window seal that will accomodate the stainless trim weather you use it or not. Years ago I think Dick Bell sold both styles with the extra lip or without it.0
-
Another question, on windshields and back glasses from other cars that I have had installed, the rope for helping to installed the seal, is first put on the glass then set the glass on the metal window flange, and pull the seal lip over the metal body flange using rhe rope to pull out and into the car interior.
On this back glass, looking at the very faded/shadowed pictures in the body manual, it looks to be done in the opposite manner. The rubber seal is first put on the metal flange, then the rear glass is started and installed from the outside of the car??0 -
Put the rubber on the glass. Pull the rope from inside the car, The seal also retains the headliner around the window opening, so it should already be in as well.0
-
make sure you lubricate the string and the rubber. Use strong string like mason's twine.
0 -
What kind of lubrication Uncle Josh?
Thanks,
Jeff
0 -
HA HA!
Thanks Ken.
I am planning on doing all the glass in my 36T. Is their any sealant used either on the glass, or the seal? If so how, and what kind?
Thanks,
Jeff
0 -
I have had good luck using the wire type clothes line that is coated in plastic.0
-
I am unable to post pictures of the process.
After watching a few YouTube videos on early mustang windshield installs, I worked up the courage to try the install by myself.
(note) I did not install with sealer as the headliner will need replacing and I want the glass to come out without more effort then necessary) No problem to run urethane sealer underneath the rubber if next owner decides not to pull it back out.
I had already cleaned, epoxy primed and painted the window surround lip area.
I started by cleaning the window and cutting the new seal to proper length. Then installed the seal on the glass. I used a small 1/4" rope that I had been soaking in dawn dish detergent. I used a caulking tube tip and put the rope thru it, then inserted the tip with rope into the seal gap for the window surround lip.
I used dawn dish detergent on the new seal and applied some to the window surround.
I then created a "damn", by putting a piece of cardboard into the upper trunk opening and setting the trunk down which "clamped" the cardboard into place. I did this in case the now slick window slipped out of my hand while setting it in place.
I then applied a suction cup made for window installation on to the window so I would have a hand hold and some leverage, placed the window with seal and rope into place. went inside the car and started slowly working the rope out each way, getting back out of the car, slapping the window down while putting downward pressure using the suction cup. Went back and forth until I got to the upper corners where I needed a little help with a nylon stick used to install auto glass, and kept working the glass into place.
Very happy with how it turned out! Rubber is good and flat in all areas.
Took about 45 minutes for the whole process of going back and forth.
The suction cup was a big help.
0 -
Don't see a way to add to the post above, but want to put this in so others will have the info if needed. This Pacemaker had not chrome trim and the headliner is out.
YouTube video I watched in preparation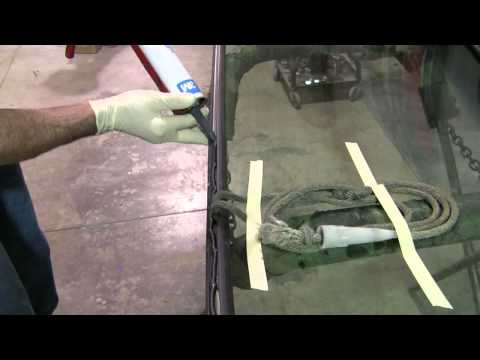 https://www.youtube.com/watch?v=vr7Prioj9Xo
notice they used 3M 8509 sealer / urethane on outside once windshield is installed.
Note to me from Doug Wildrick--Hello Kerry. Well, the big deal was sealing it in and doing it so you didn't get sealer- butyl ] on the headliner. Just installing it is rather easy. If the headliner still needs to be replaced, it is just as well you didn't seal it in. If the headliner is OK, and still somewhat presentable, then you might want to seal it. Using a tube of butyl, which is pliable and doesn't set up hard, NOT urethane, apply it around the edge of the rubber. I have been using a plastic door panel tool to lift the edge slightly as I apply it. One of the big things that creates a problem doing this is the stainless molding. One of the things that are absolutely necessary is to clean the stainless molding to perfection on the inside, and then glue it to the rubber before installing the glass. The book describes this, but doesn't tell you to glue it. We use black 3M weatherstrip adhesive, and after we have installed it, tape it in place on the glass and let it set overnight. After you have installed the glass back into the body, use the butyl to seal around the outside edge, like described, lifting the edge of the rubber slightly to apply a thin bead on it. Once that has been apply, carefully pull the tape off, and using wax and grease remover, clean any extra butyl off. With the outside now cleaned, take the butyl and slightly lift the inside rubber, apply a thin bead there, wipe off clean. After you are done, you will see the butyl sort of skin over.
A tip on how to use, you can push the butyl down into the grooves and/or voids using a rag to work it down in there. Make sure you have your box of gloves close.
Originally they used the butyl in the pinchweld groove of the rubber, and is common to find some butyl in both upper corners between the glass and rubber. I'm almost sure they had an install fixture, which was probably a simple clamp that compressed, thus opening the inside flap open, then they set it into place, pulled the fixture off on the inside. I have done countless back windows and have never seen any butyl on the headliners, just perfectly applied in the pinchweld groove.
0 -
Test picture

0


Categories
- 36.6K All Categories
- 85 Hudson 1916 - 1929
- 11 Upcoming Events
- 73 Essex Super 6
- 28.3K HUDSON
- 511 "How To" - Skills, mechanical and other wise
- 989 Street Rods
- 150 American Motors
- 170 The Flathead Forum
- 47 Manuals, etc,.
- 71 Hudson 8
- 40 FORUM - Instructions and Tips on using the forum
- 2.7K CLASSIFIEDS
- 592 Vehicles
- 2.1K Parts & Pieces
- 76 Literature & Memorabilia
- Hudson 1916 - 1929 Yahoo Groups Archived Photos