Hudson Stepdown headliner install discussion condensed

Hudson Stepdown headliner install
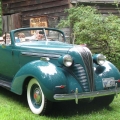
Halleluiah tomorrow our nephew is coming over and I am going to help him install the headliner in our 54 Hornet Hollywood. It has been a long wait. But the weather here is pretty cold less than 0 F and all I have for heat is a wood stove and some fans. If anybody has any hints or suggestions on headliner install please post your ideas. Our nephew is also doing the rest of the interior and all that is left is the top half of front door panels and parcel shelf. and misc. plastic pieces to sew. Hudsonly Ray
Hi Ray, I recommend you check the 1948-1954 Body Service Manual which tells you exactly how they did it back in the day. http://hetclub.org/burr/manuals/1948_-_1954_hudson_body_service_manual.pdf duncan
- Yes, I have the body service manual and I showed it to my nephew and he read it. I just thought that someone might have some tricks that would help the install. Ray
- Jon B January 2013
No tricks. It's a tricky process. As I recall, you work from the windshield back, snagging each loop on the headliner, with the cross-rod that fits it. Seems to me that the rods are keyed by color. The very back of the headliner is tightly fixed around the back window so please be very sure that your rear window gasket is tight, because you don't want water stains on the headliner, first rain that comes after you've installed it! duncan January 2013
Yes they have little dabs of paint on the
ends,
Roger Uncle Josh edited January
2013
Actually, in a stepdown, you start with the
one over the back door that locks in the vertical position, and go both ways
back and front from there, swinging each cross-rod up into position as the
headliner is pulled to back and front. Best to have the front and back windows
out, so it can be tacked into the window holes, but can be tucked into the
rubber if necessary.
Tuck and stretch into the sides as you
go. When it's done, it will still have some small wrinkles which will come out
eventually, but can be hurried by steam from the teakettle.
Yes, it will be easier to crawl around in there with the seats out.
duncan
I didn't know at the time that they were marked I took out the headliner so numbered them that was 11 years ago. But now. all I could see was rusty brown on each end of the bows. Thanks for the help. Ray
- lostmind January 2013
Instead a Tea kettle , use a spray bottle with distilled water and a hair
dryer.
Works great. - [Deleted User] January 2013
Too do the correct job, windshield and back window must be removed as the headliner is tacked to the frame at both ends. If just tucked under the rubber around the windows you will have the headliner coming down in short order. You should have 2 pieces that go over the back doors on a sedan, and over the rear quarter windows on a coupe, as this is the starting point and work to the rear. then work to the windshield and make sure you pull each liner rod tight to the front. Make sure you have the correct tool to tuck the headliner in along the sides. Don't use any sharp objects. This is one job best left to someone with experience. Walt.
- duncan PostsJanuary 2013
Hi everybody in Hudsonland. Well our nephew came this morning and installed the headliner in the 54 hornet Hollywood it worked out very well glued above rear window and used the original glazier points above windshield there was no holes above windshield. Glazier points above windshield still have to be bent back and rear window tacks still have to be installed. I still have to install windshield moldings and wide aluminum strip from rear quarter beltline all around windshield to other quarter beltline. also install rearview mirror and cover for roof antenna. Thank you so much for your responses to my posts. Hudsonly Ray PS Our nephew said we do not need to use a steamer the headliner looks excellent. I bought the headliner from SMS auto Fabric Portland Org. Could have been a 1 inch wider at quarter window but worked out well.
- Browniepetersen February 2013 Was the headliner cloth or the vinyl?
- duncan February 2013 Our headliner is cloth cream color.
- [Deleted User] February 2013
I need to replace the headliner in my 49C soon. I got one from Kanter. The headliner installation seems pretty straight forward, what I am concerned with is the wind lace. My old wind lace had a cord stitched to it, I presume that I need to do the same, and stuff it up into the pronged side rails. I'm hoping that I can do this after the headliner is all hung but the little rails at the sides of the dash have me worried. Any tips out there? lostmind February 2013
I think the wind lace is tacked in place before the headliner. Going by memory, but you will know when you remove the head liner. Mark the bow locations for reassembly. [Deleted User] February 2013
I concur with ''lostmind''. I installed all wind lace first, before the Kanter headliner, which I used also. (54 hornet). Was difficult to figure out how to secure the wind lace and ended up using a good strong glue from a trim shop. This held it in place well and after all the panels and top retainers were replaced, it has held up well. Just go slow to do as best you can. This will save you a good $500.00 labor. [Deleted User] February 2013
Thanks for the tip. I think I'll try a little bit of the edge with just some ordinary fabric I'll steal from my wife before I do the whole headliner. I found some good install tips on Youtube using office clips and marking with chalk by the way.
- [Deleted
User] February 2013
I used hot glue in the places where
the headliner should be tacked before tacking it, this helped a lot to be
able to fix it in place, when i stretched it all around the rear window
and the front part. If something doesn't turn out as you want it is easy
to warm the glue for removing and redo the stretch. I did the "mistake"
of making my headliner myself instead of buying a ready one, but it turned
out really good. But i would not recommend that, because the pre-done
headliner (e.x. Kanter) is actually cheaper than to buy the fabric and
threads you need, and then the time and bad language that was needed to
sow the headliner could have been spared. The only thing that’s good about
making your own headliner is that you can choose any color and style you
want and you actually learn a lot and get a lot of ideas about installing
it.
I also learned that there are no worries if the headliner doesn't sit exactly perfect when you're done. It will shrink and all smaller crinkles will disappear.
But as said before, remove the seats will help a lot. Start from the middle and work your way out.
It is not hard at all, you just need to be thorough and let it take some time (i spent almost 10-15 effective hours installing my headliner. If not even more.
Another tip is to replace the rubber around the windows when you remove them. I cannot even think about how it would feel to spend all that time to install a headliner just to have it ruined the first day of rain. - Chris Smith March 2013
I am getting ready to install the headliner in my 54 club coupe and have a few questions. With the glass out, does the fabric wrap around the sheet metal to the outside of the body and then cemented to the steel followed by the glass and seal? Uncle Josh mentions that one of the bows locks into place? I don't see that on my coupe, maybe that’s 4 door only? I want to insulate under the headliner before install, does anyone have a recommendation on what to use? I have used the aluminum covered Dynamat in my Ranchero but there may be something better out there.
- Richard E. March 2013 I do not believe that it is necessary to remove either front or rear window in stepdown to install headliner. I had mine done recently by a good upholstery guy and he did a great job with both windows in. My '50C6 sedan has the split back window and I have been warned not to take it out if I can avoid it as it is a b____ to get back in!!
Comments
-
Thanks for compiling and publishing this!0
Categories
- 36.6K All Categories
- 85 Hudson 1916 - 1929
- 11 Upcoming Events
- 73 Essex Super 6
- 28.3K HUDSON
- 511 "How To" - Skills, mechanical and other wise
- 989 Street Rods
- 150 American Motors
- 170 The Flathead Forum
- 47 Manuals, etc,.
- 71 Hudson 8
- 40 FORUM - Instructions and Tips on using the forum
- 2.7K CLASSIFIEDS
- 592 Vehicles
- 2.1K Parts & Pieces
- 76 Literature & Memorabilia
- Hudson 1916 - 1929 Yahoo Groups Archived Photos