Timing Marks & Initial Timing w/o light!

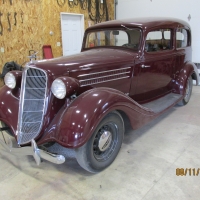
While the old girl (37 Hudson stock 6 cyl engine) is running she was stumbling if I tried to give her gas. I thought I had some wires crossed & after the change it would not even start. Looking at the firing order I returned the two swapped wires & swapped two others & now have the correct firing order, 153624 in clockwise rotation. But before I started it again I wanted to try to figure out if timing was close or if anything else was off. I didn’t want to damage the engine.
Thus trying to work at this without a timing light and not near enough knowledge. So here’s what Ive done: 1st I lined up the timing marks on the flywheel as I thought they should be, but I’m not sure that was done correctly. Then I looked to see where the distributor is pointing & if points are open.
It looks like its timed off of the # 6 plug (cylinder) but something doesn’t feel right, can anyone spot what im doing wrong? Note all photos were taken without any changes between shots.
0
Comments
-
Line pointer between the two hash marks on the fly wheel then be sure #1 piston is all the way up and your rotor points to number one plug wire. Remove your coil wire (from the cap) hold about a 1/4 inch from ground. ( I used stud on my intake) turn distributor (counter clockwise I believe) until spark jumps. Lock down distributor at that point You car should now start. If you have your owners manual it should tell you how to do it. But the 212 in my 39 is done that way.0
-
How does one find top dead center of a piston one cannot see? I was told looking down spark plug tube I only see valves.
I just tried running it again & it ran terrible when I give it gas.0 -
They make a whistle that you can use. It screws into the spark plug hole. If you don't have one use a straw or screwdriver but be carful0
-
As I was told the spark plug is over one of the valves & “not” over the piston so how will putting something in the hole help me? I’m sorry but I’m not seeing how I can tell.0
-
Well the compression whistle will stop when you piston reached TDC. This is best when working alone. You have to feel for it with Straw and/or Screw driver. This worked well for me. Spark pug is over piston to my knowledge. Look it up in manual or pics on net. The procedure I gave is what worked for me and my 39. You should be fine following it. As I said check your manual for certainty.0
-
 I’m still fighting with this thing & now my generator light won’t come on. Ugh!
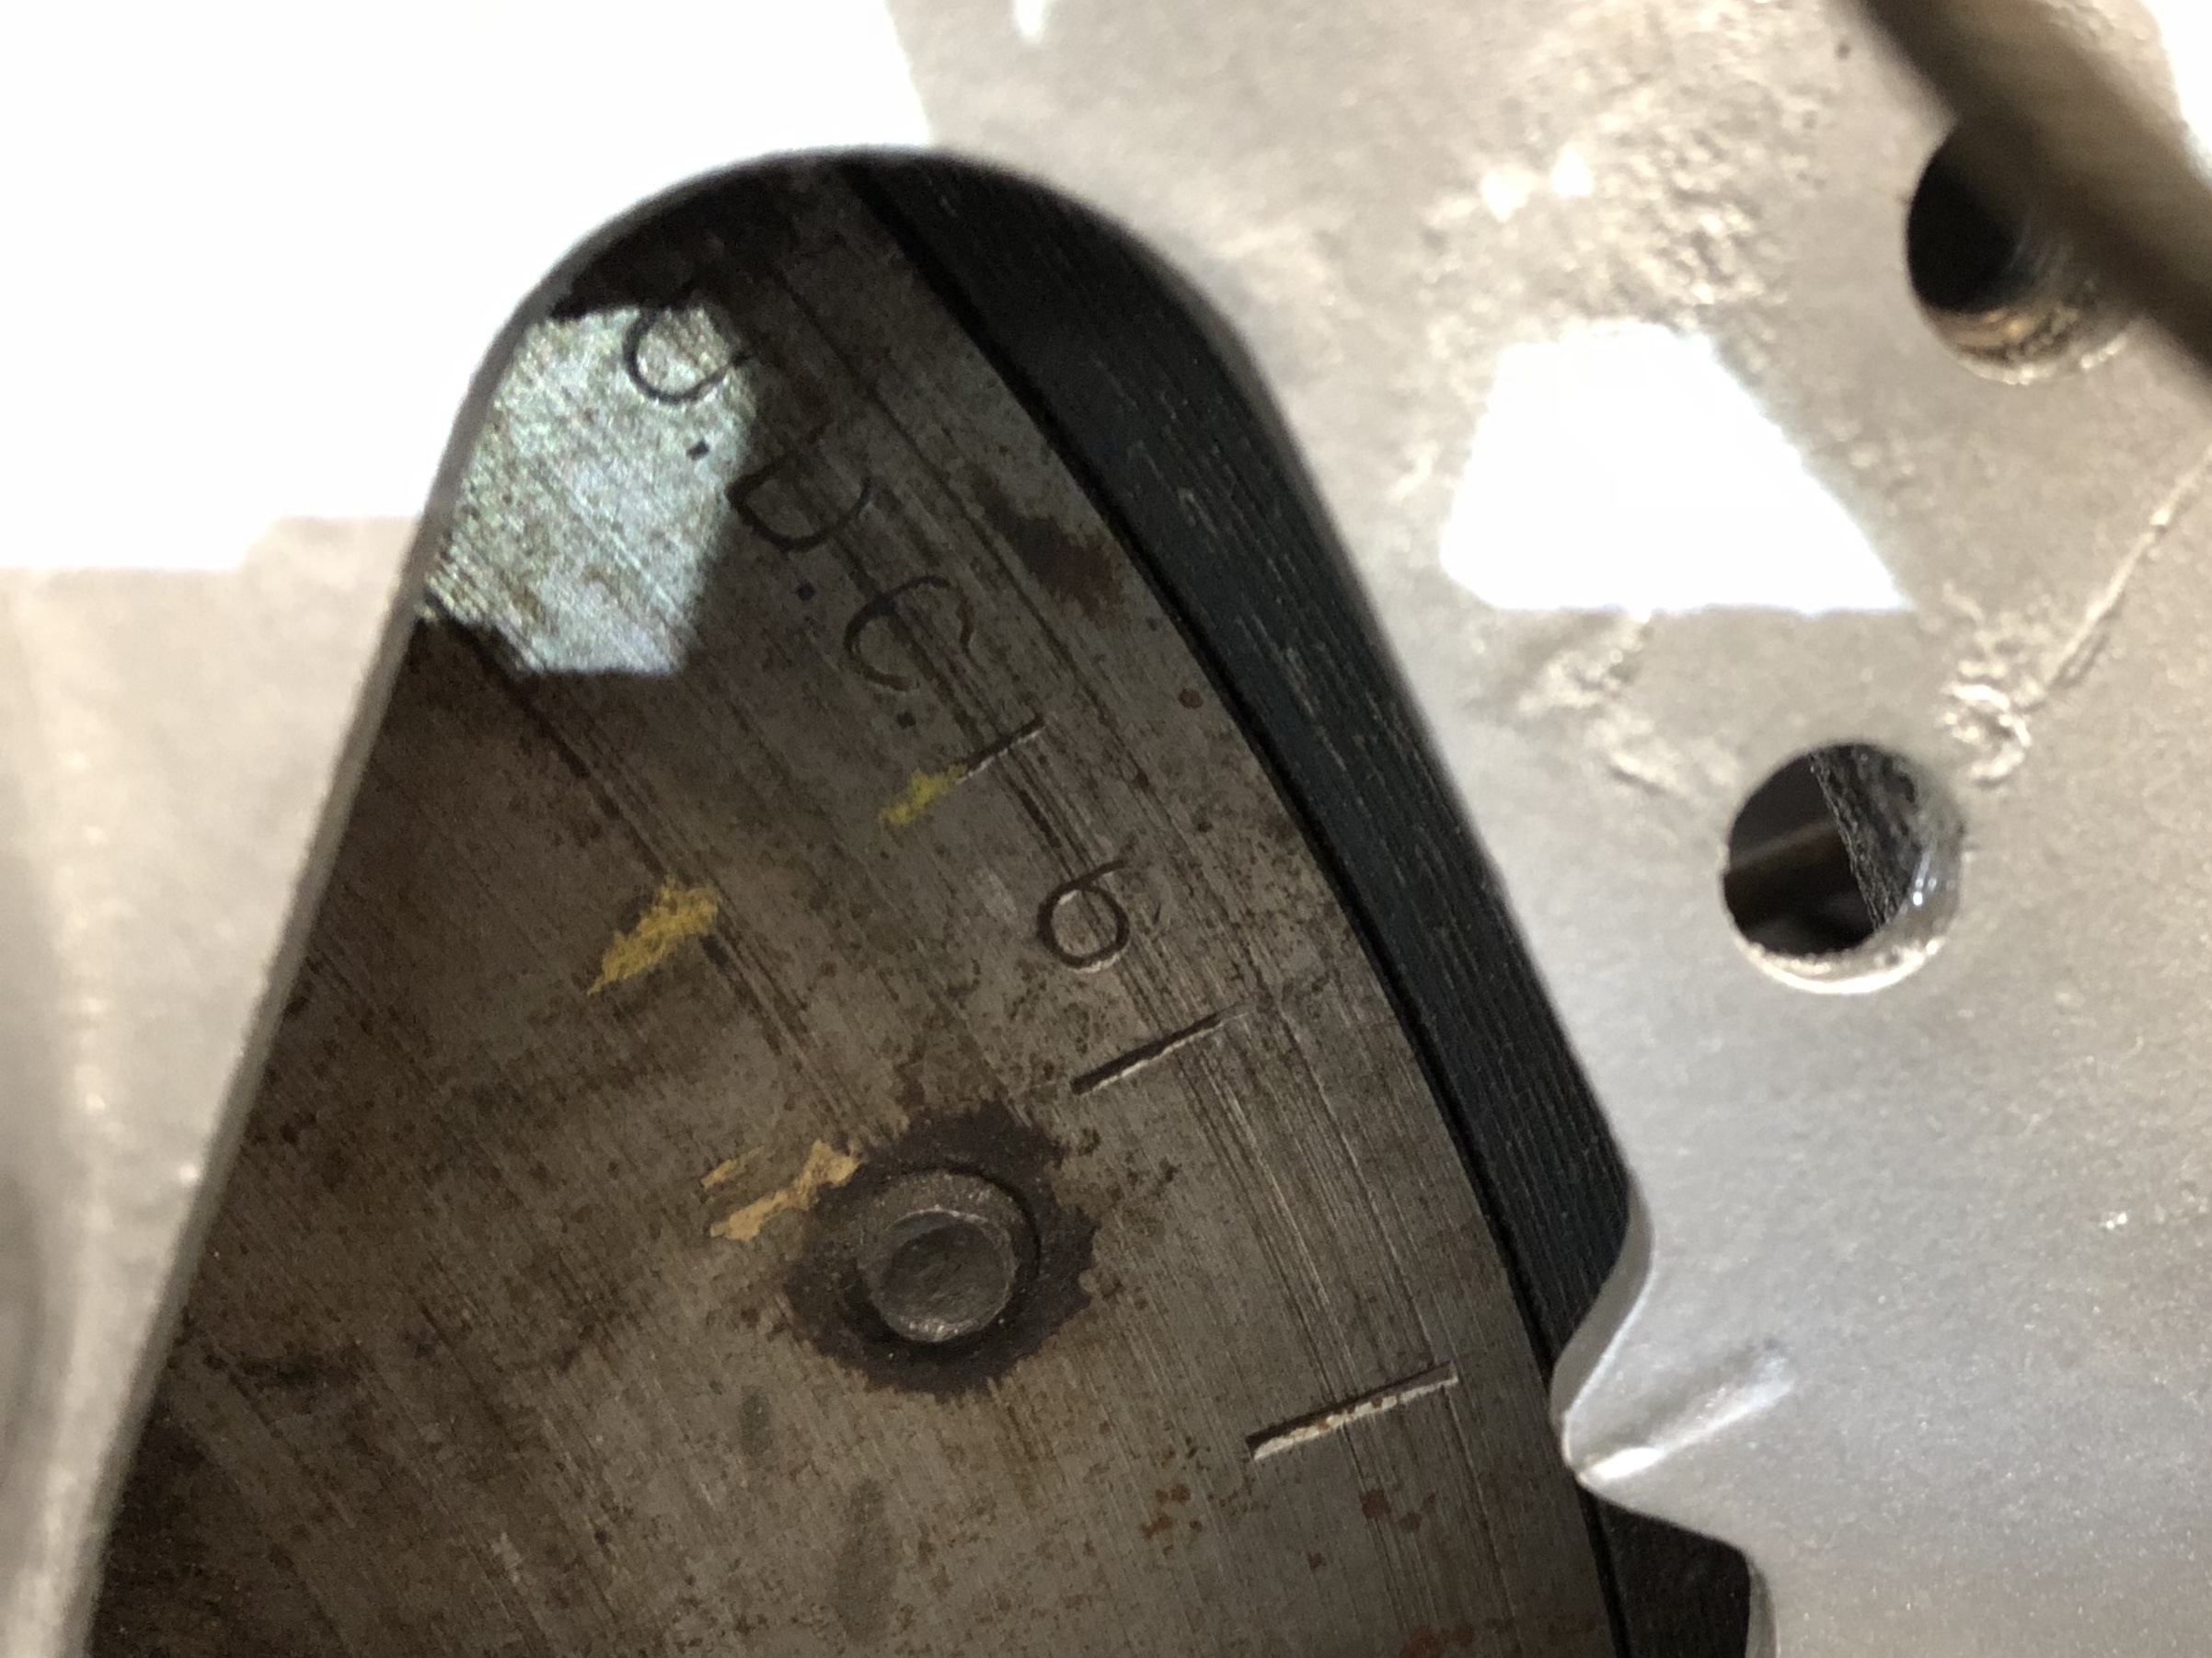
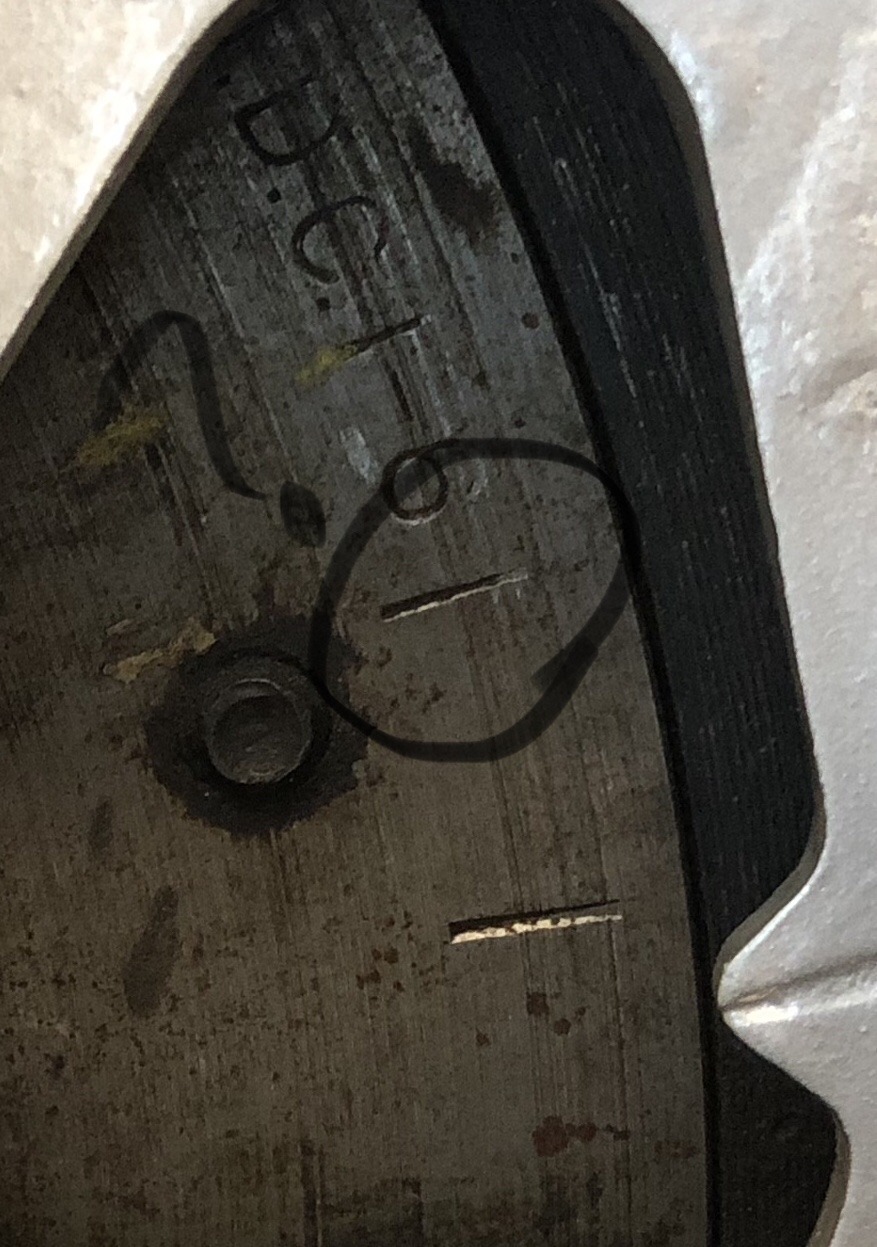
Which line is used as top dead center in this photo of the flywheel? Is it the one circled or not circled? I’m trying to work towards a solution only after getting the marks on the flywheel lined up for top dead center using this method.0 -
Anyone know why there are two marks?
I’ve heard or read a number of things such as:
- one mark is for high altitude,
- one mark is for the use of a timing light & other for turning the flywheel by hand to line up.
- one mark is for #1 plug wire & the other for number 6 plug wire - in terms of which plug wire the rotor under the cap is pointing at.
Im starting to lean towards the last idea because before the two hash marks it says “DC 1-6”, perhaps one has is for timing off plug # 1 & the other off plug # 6, since it can be timed either way, as I have been told.
0 -
If you don't have a whistle, just hold your thumb on the plug hole and you'll feel the compression when the piston comes up. Note that the timing mark is #1 and #6 as there is a 2:1 ratio between the crankshaft and the camshaft/distributor0
-
Today I was taught “over the phone” by Les Roth (who is recovering extremely well from double knee replacements about 30 days ago) how to do the initial timing “the old fashioned way without a timing light.” Hopefully this write up will help a newbie like myself out there!
Initial Timing Process:
I rotated the crank by hand with a screw driver in the crank bolt slot.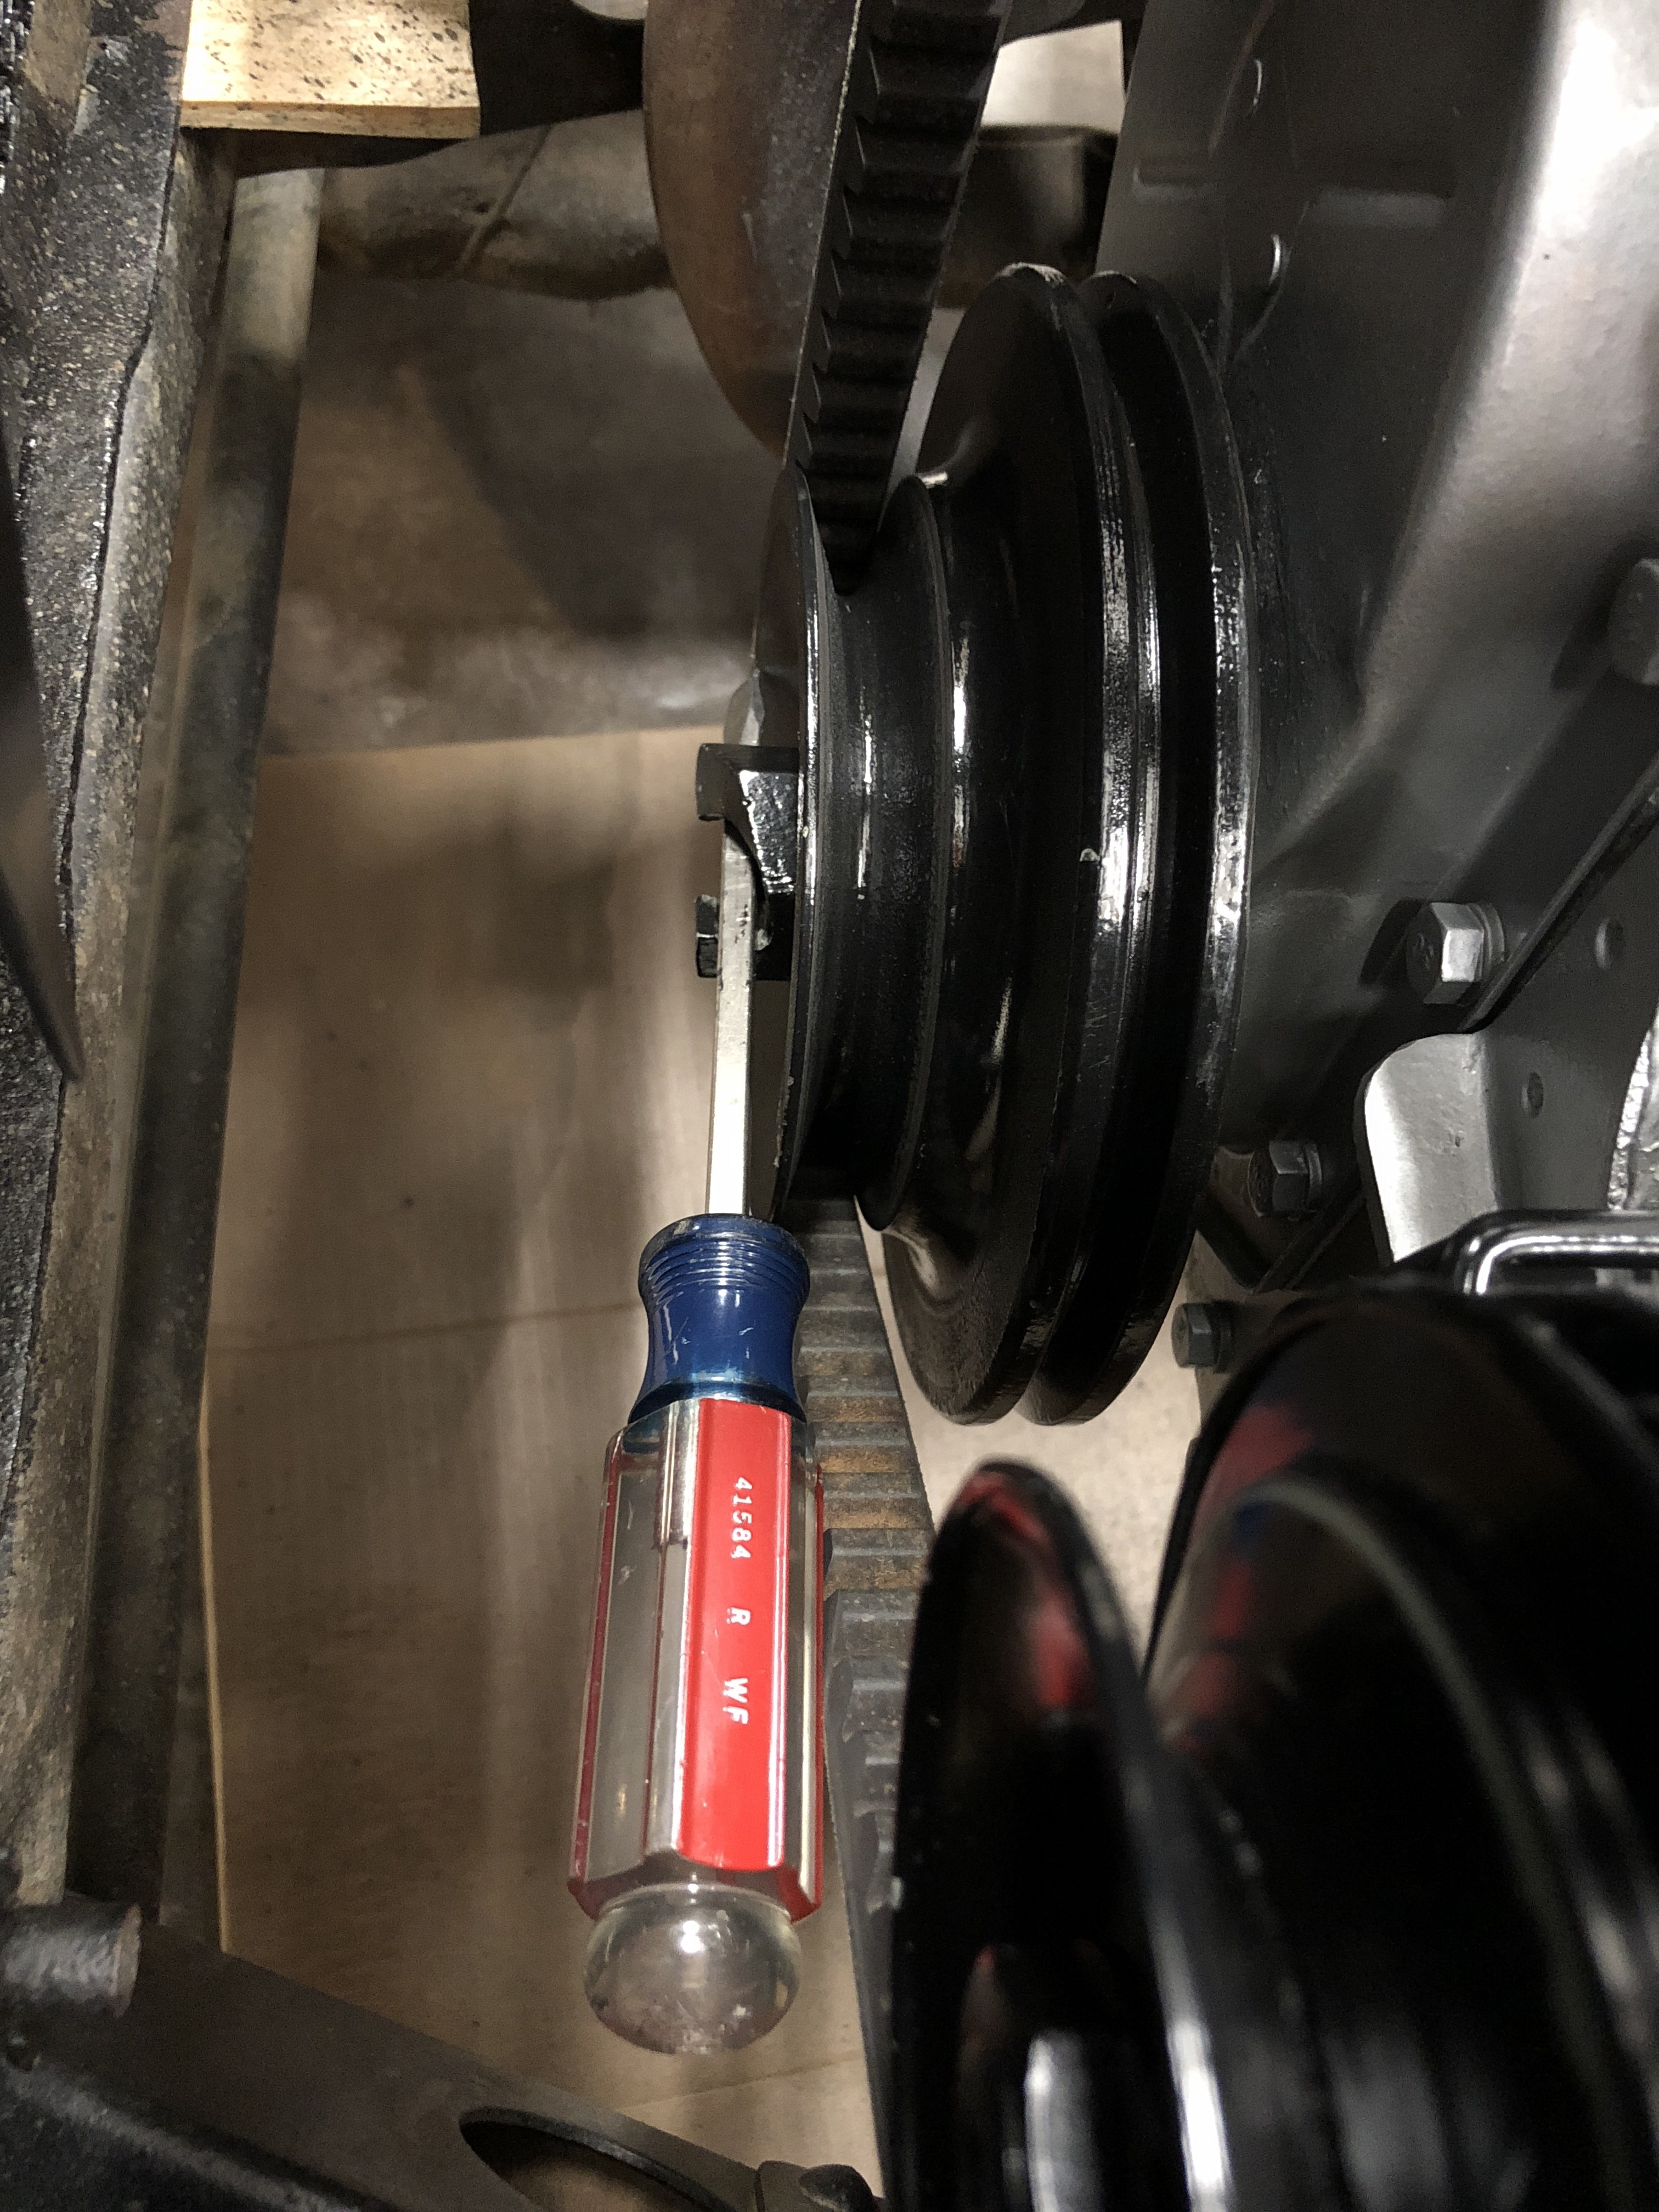
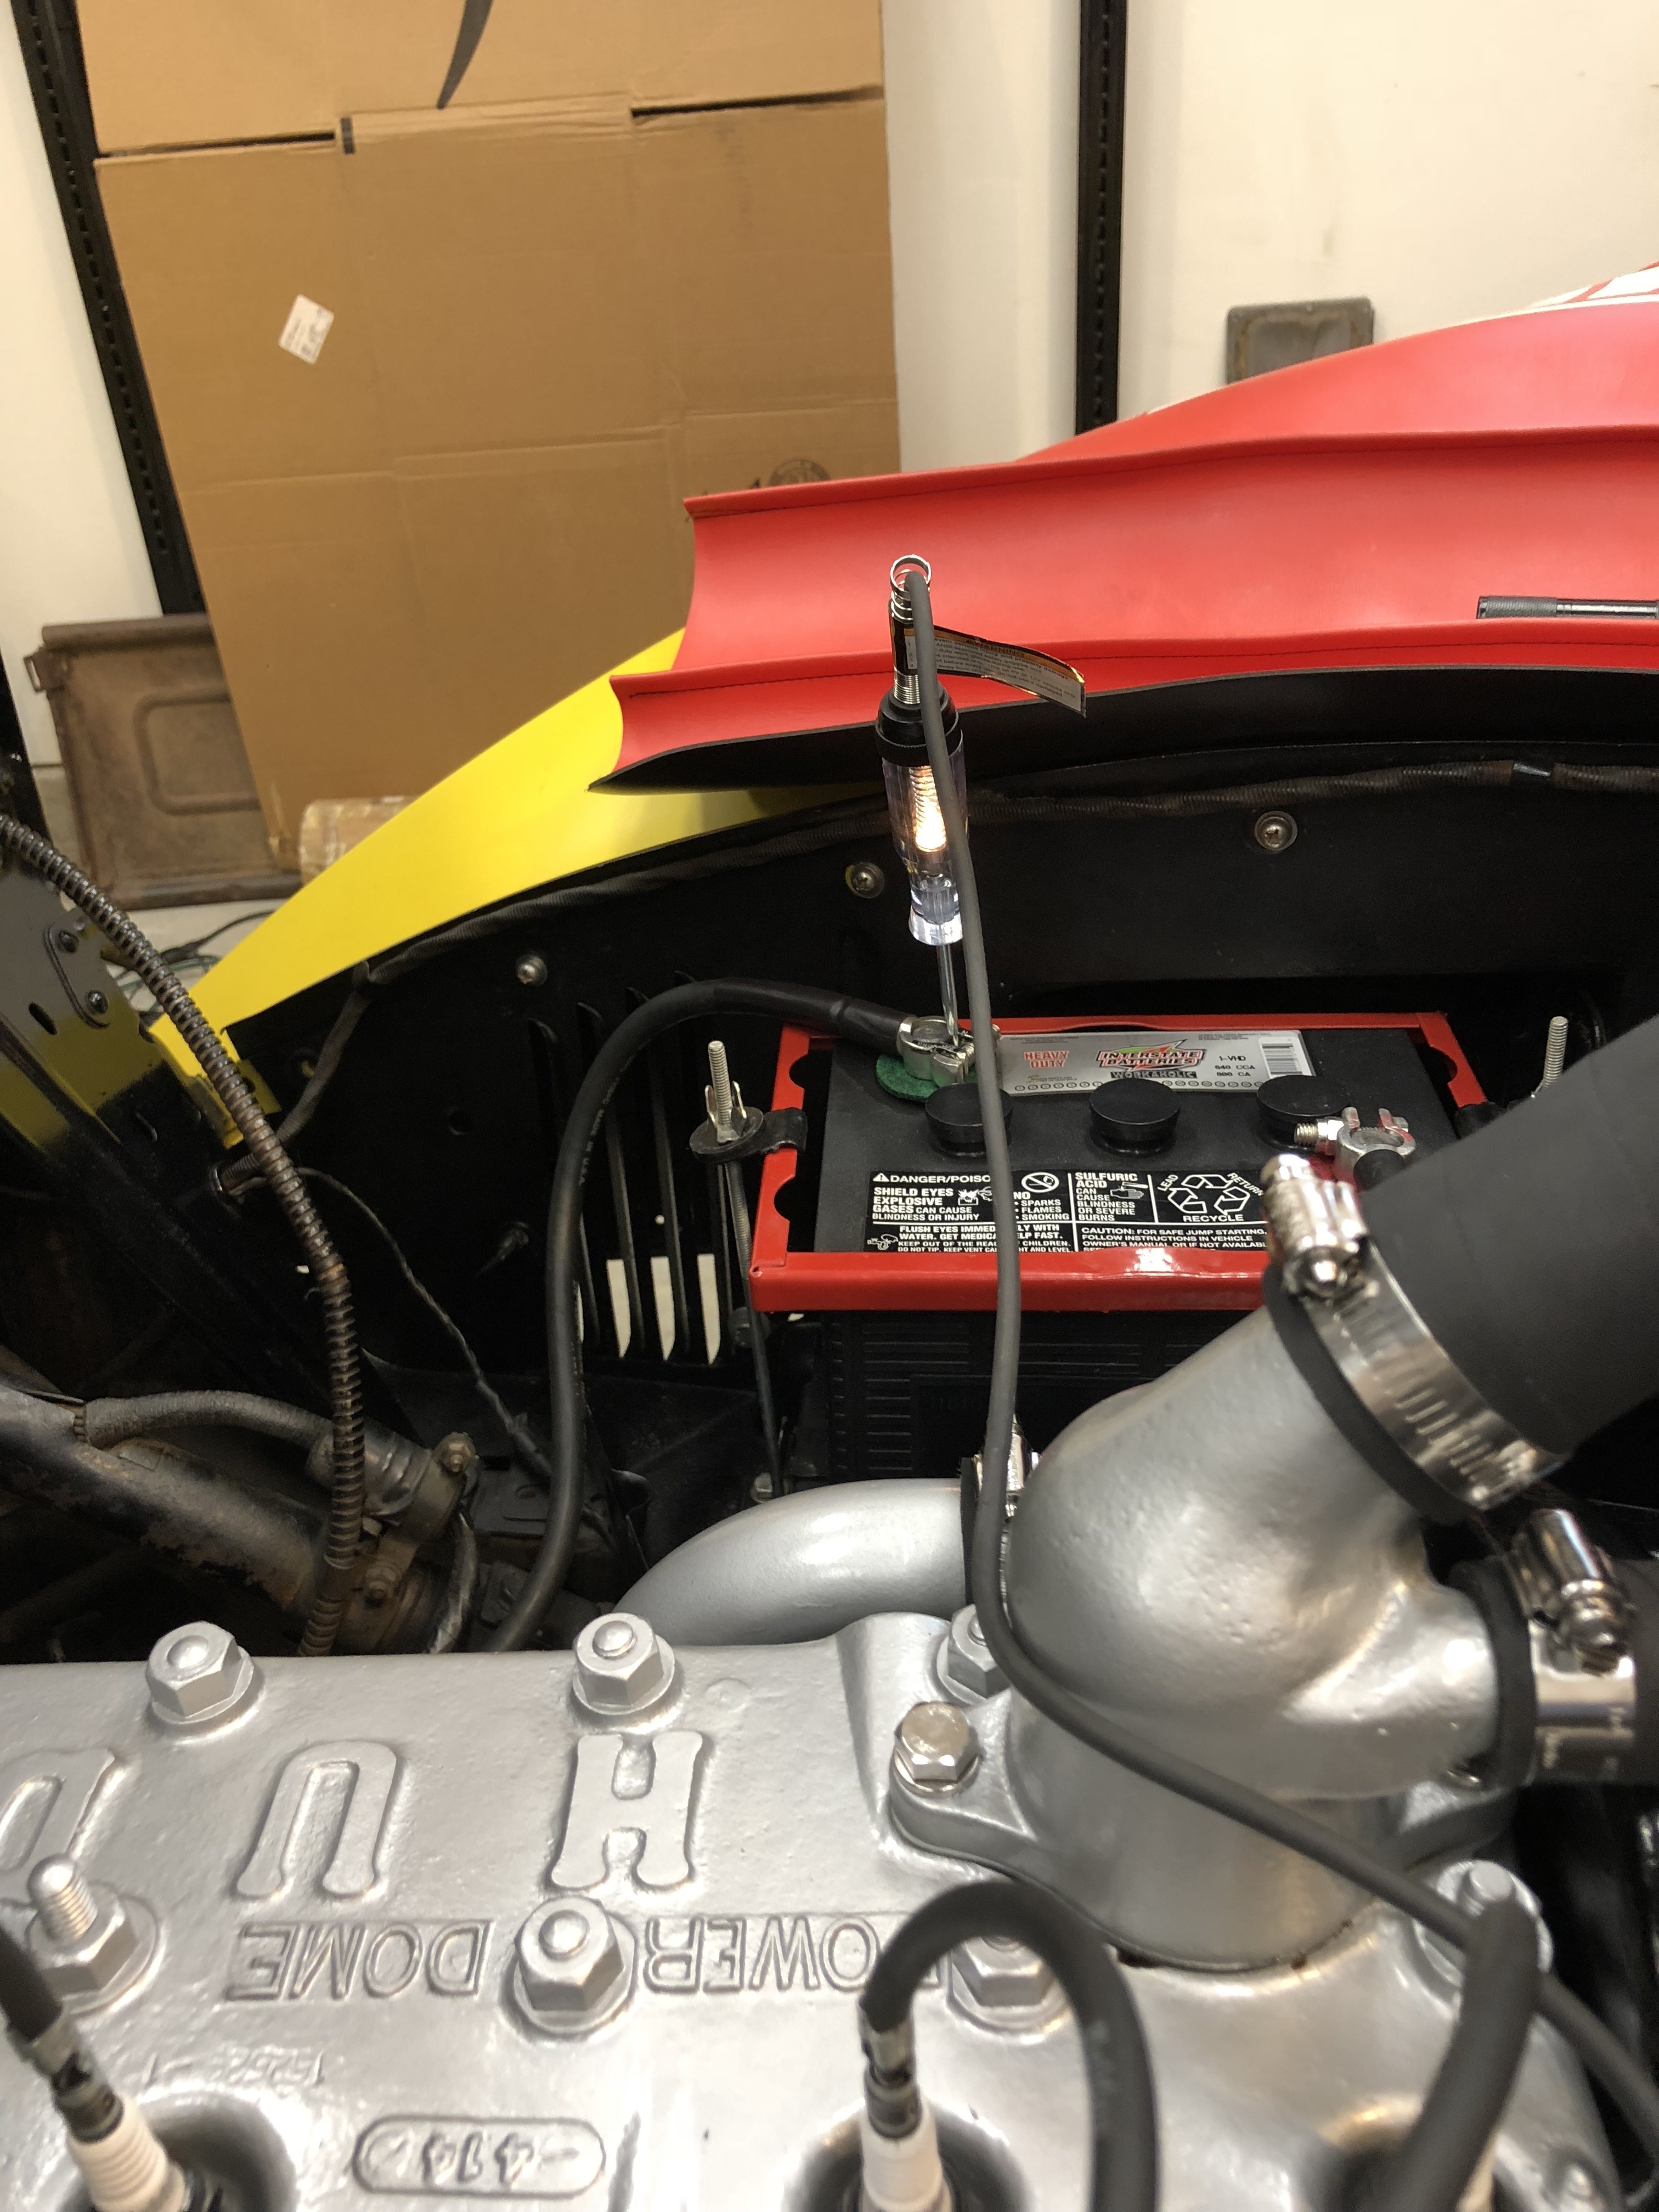
I rotated the crank clockwise until I lined the marks up between the flywheel & window pointer. The 1st line you come upon when rotating the crank is the one both Ken & Les suggested I use. Now I had Top Dead Center or a slightly advanced TDC. Thank you Ken. (Doesn’t my girl have a shinny engine & starter!)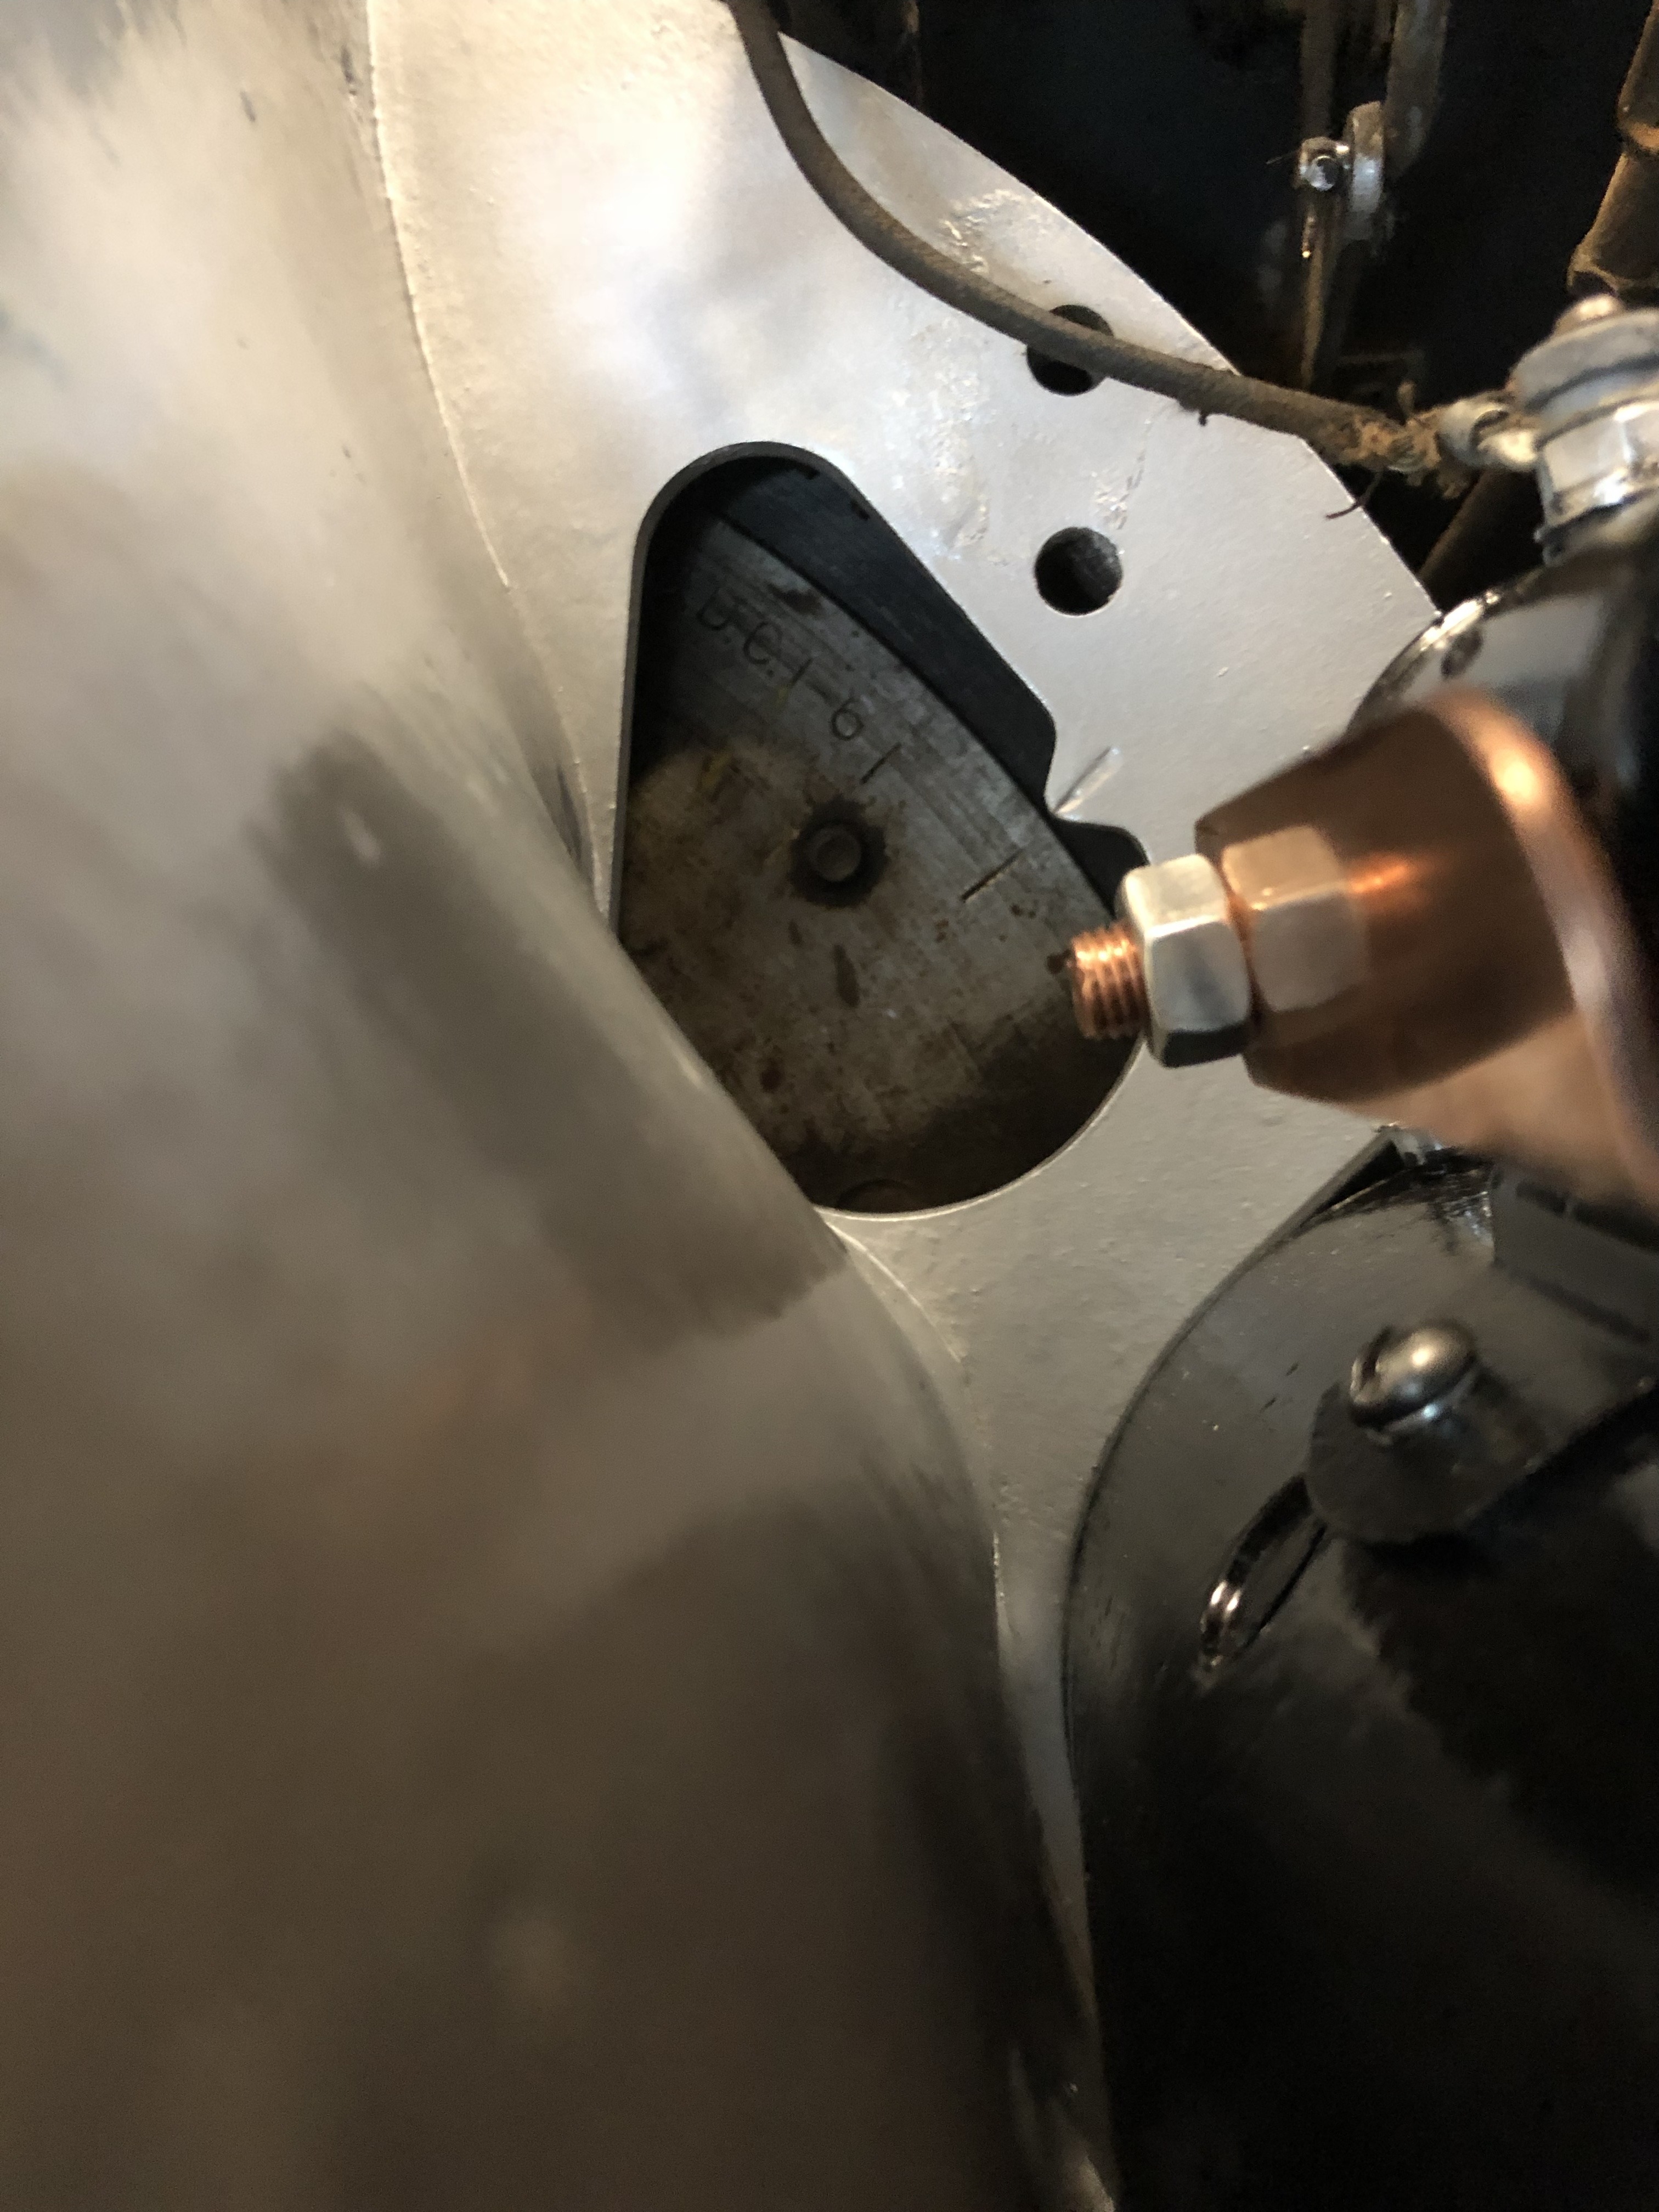
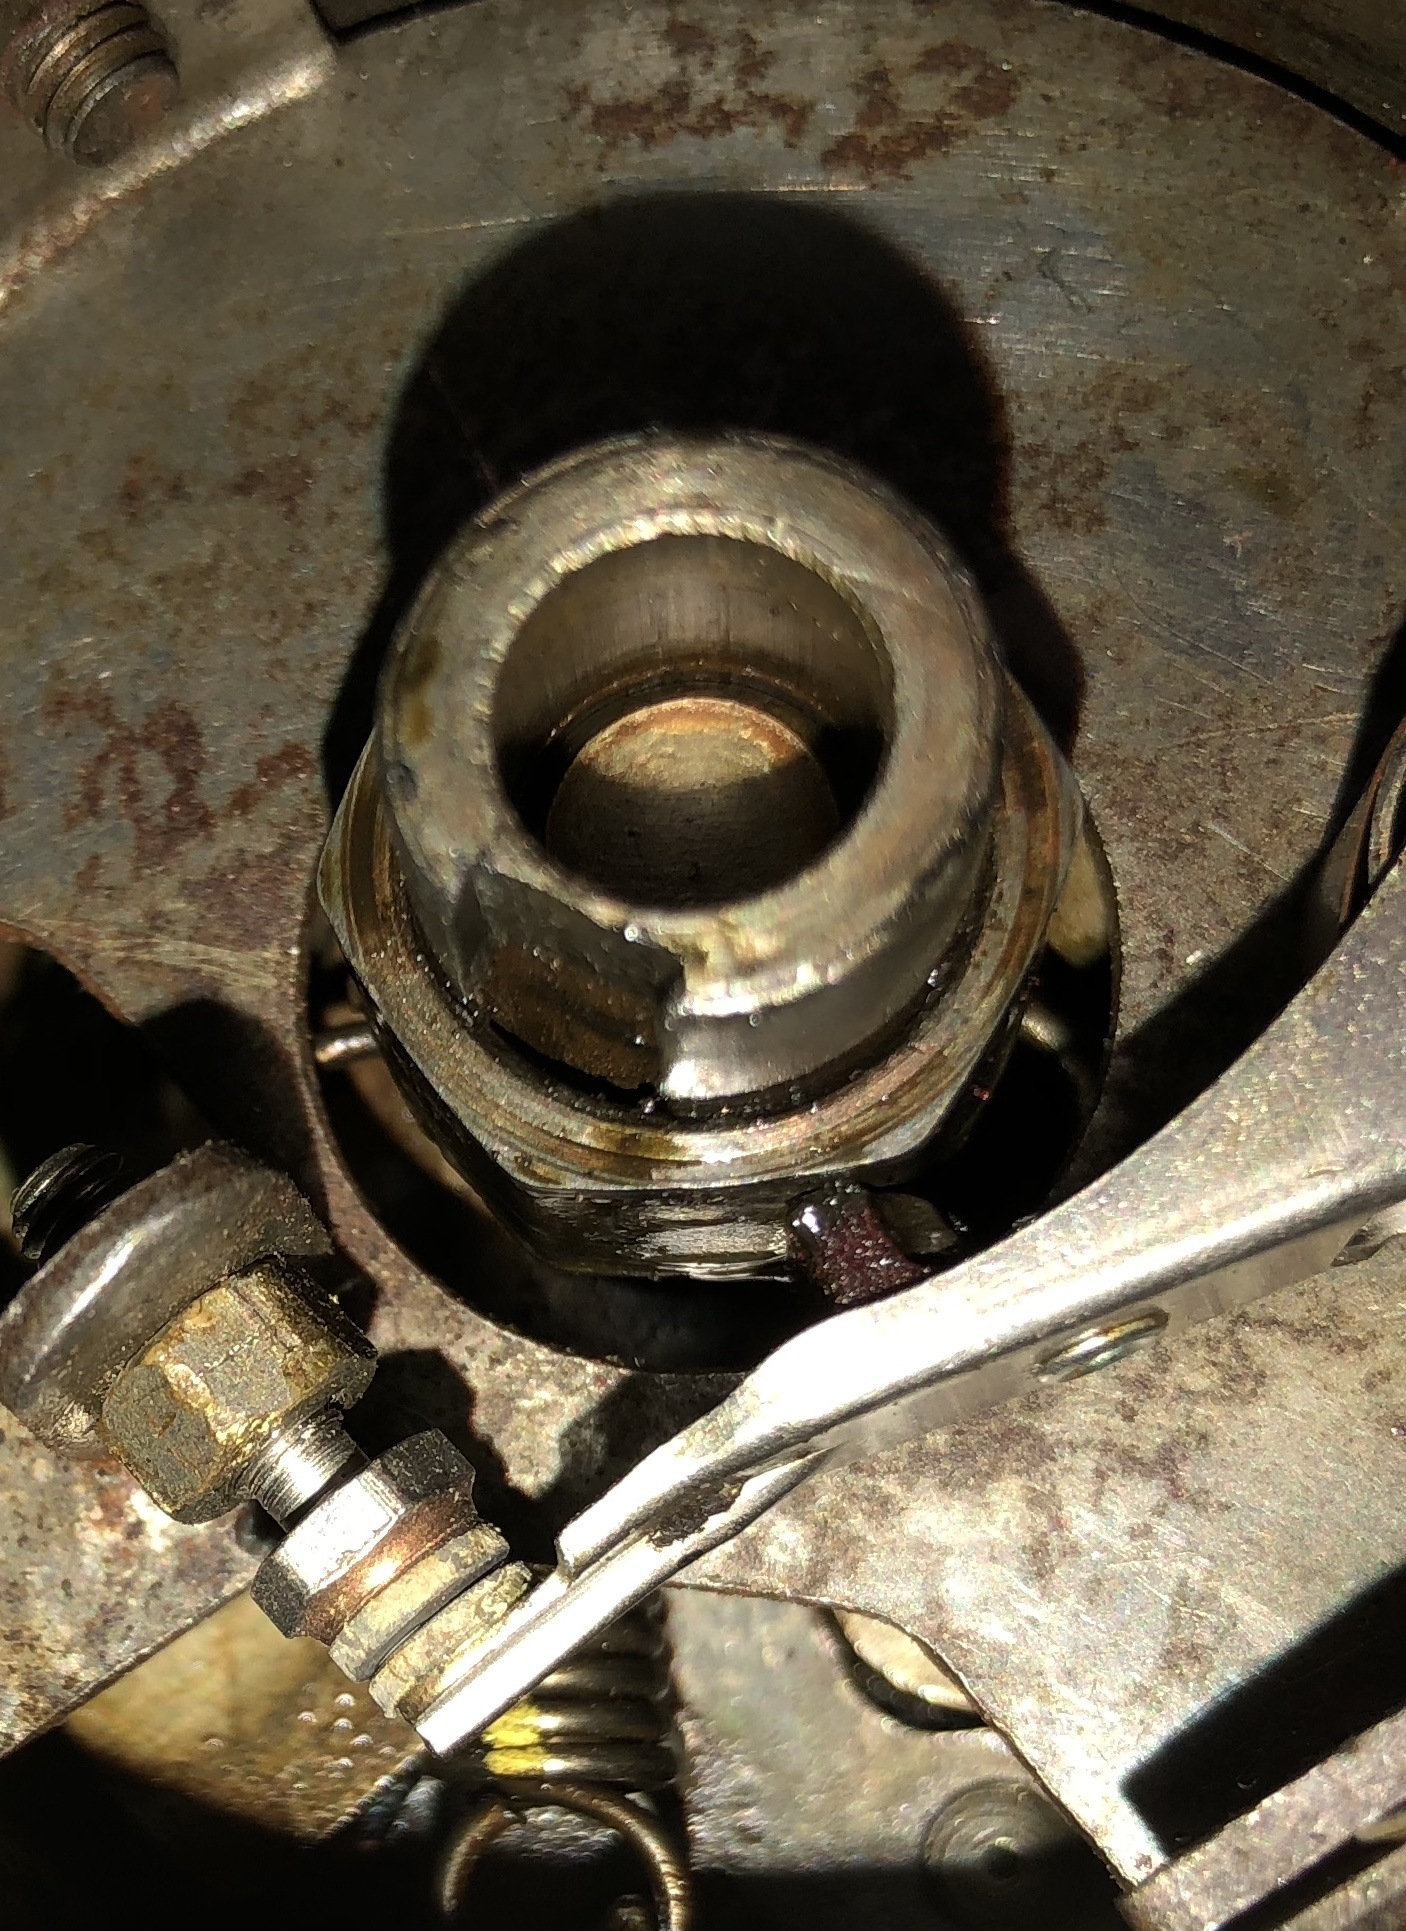
Next I took a test light from the neg battery terminal (positive grounded system) to the bolt which goes through the distributor housing & connected them. I circled the bolt & attached test light clip. To make it easier I also removed the cap, rotor & any wires to this bolt from the condenser & the coil.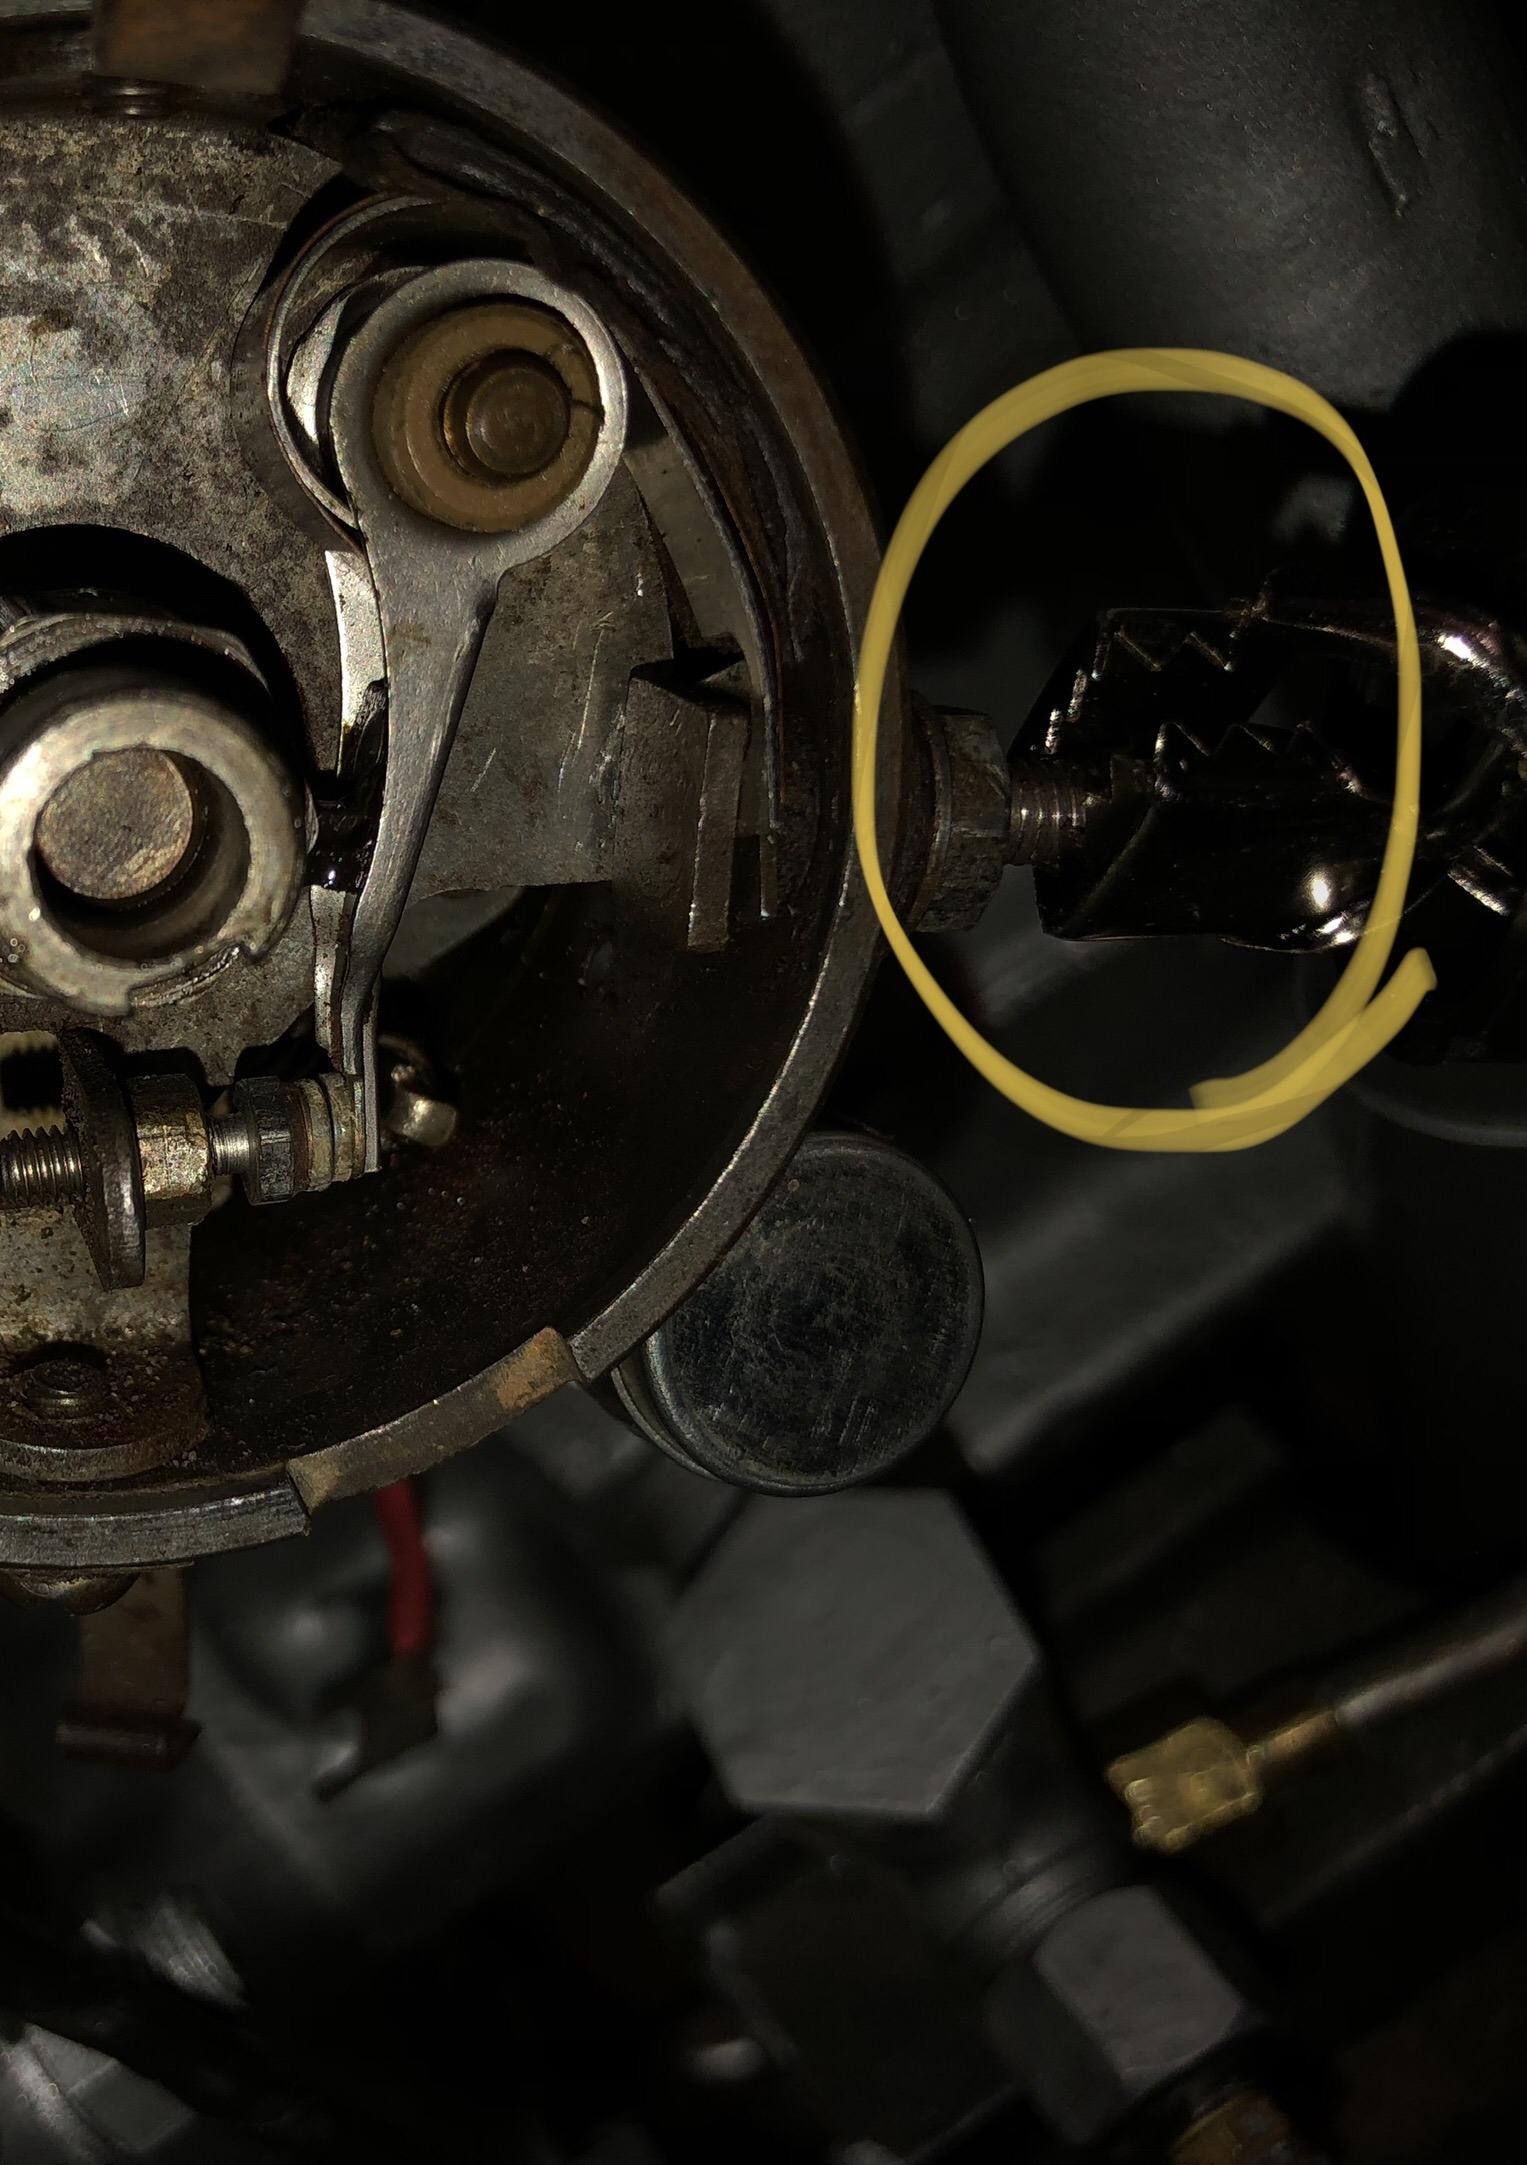
I next loosened the hex head bolt (below pic) and adjusted the distributor by turning it so the bolt was in the middle of the copper adjustment on the right side of the distributor & retightened the bolt back down. You may end up going clockwise or counter clockwise depending on how your is sitting when you start.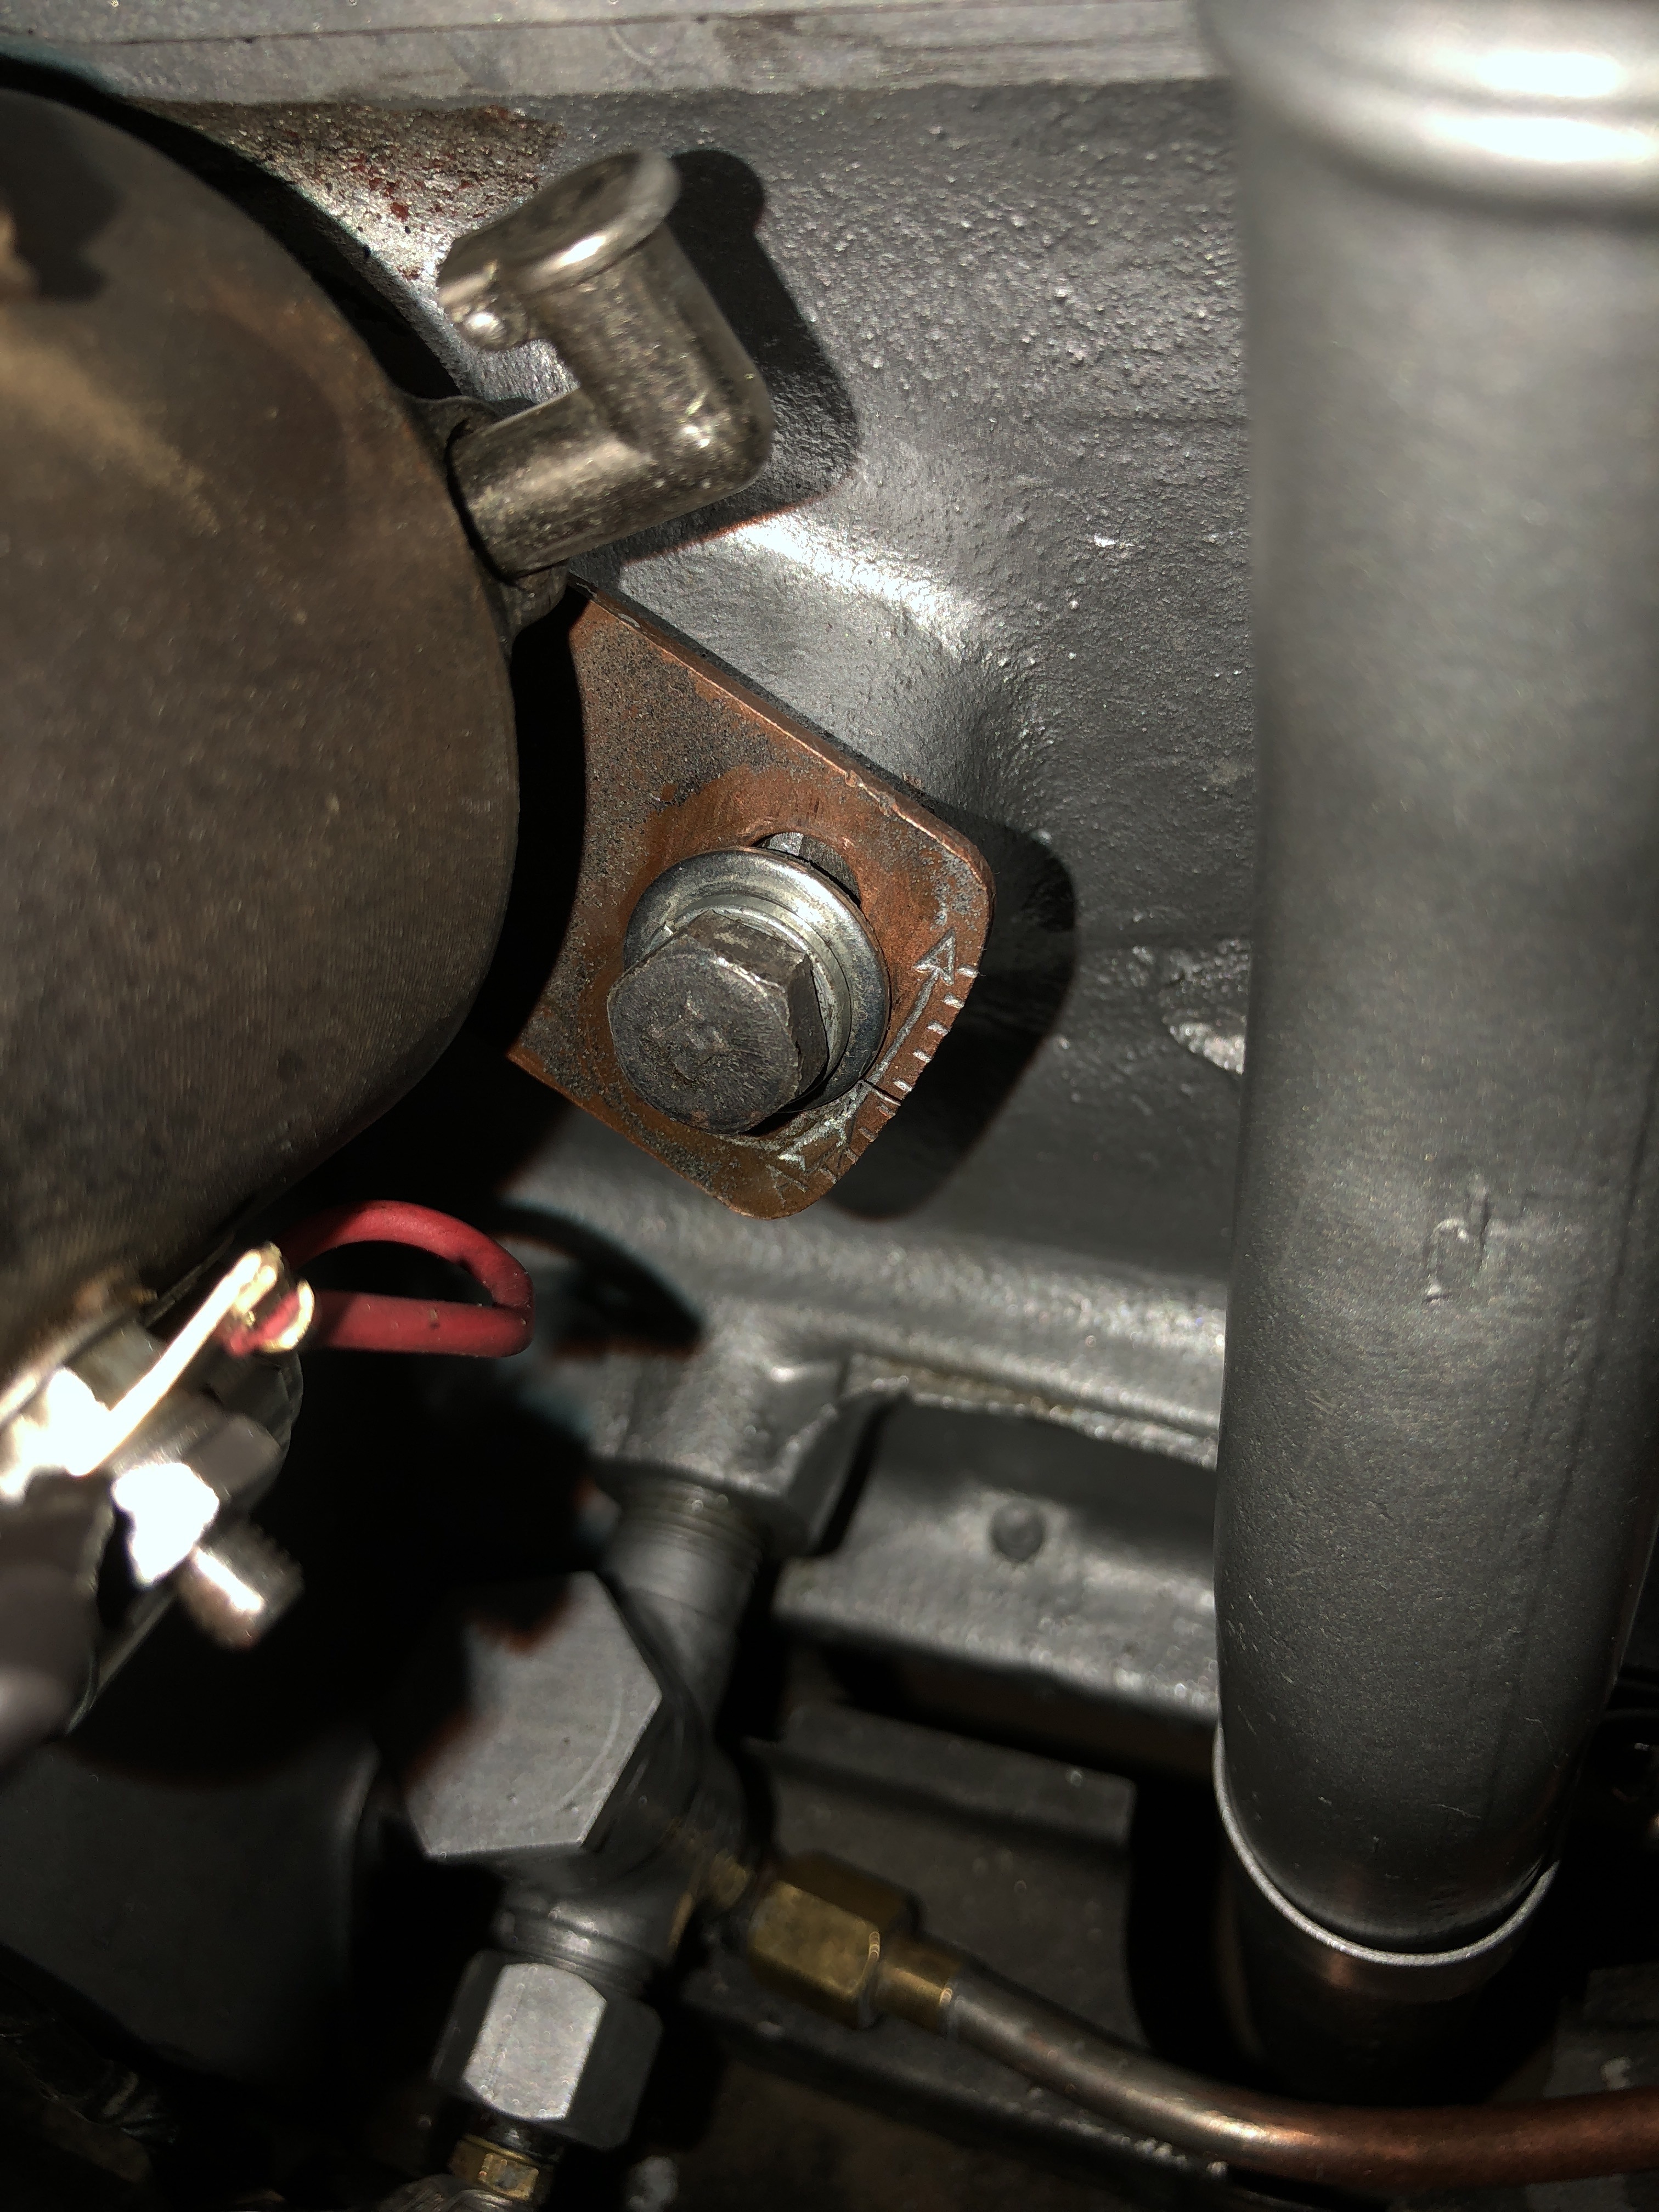
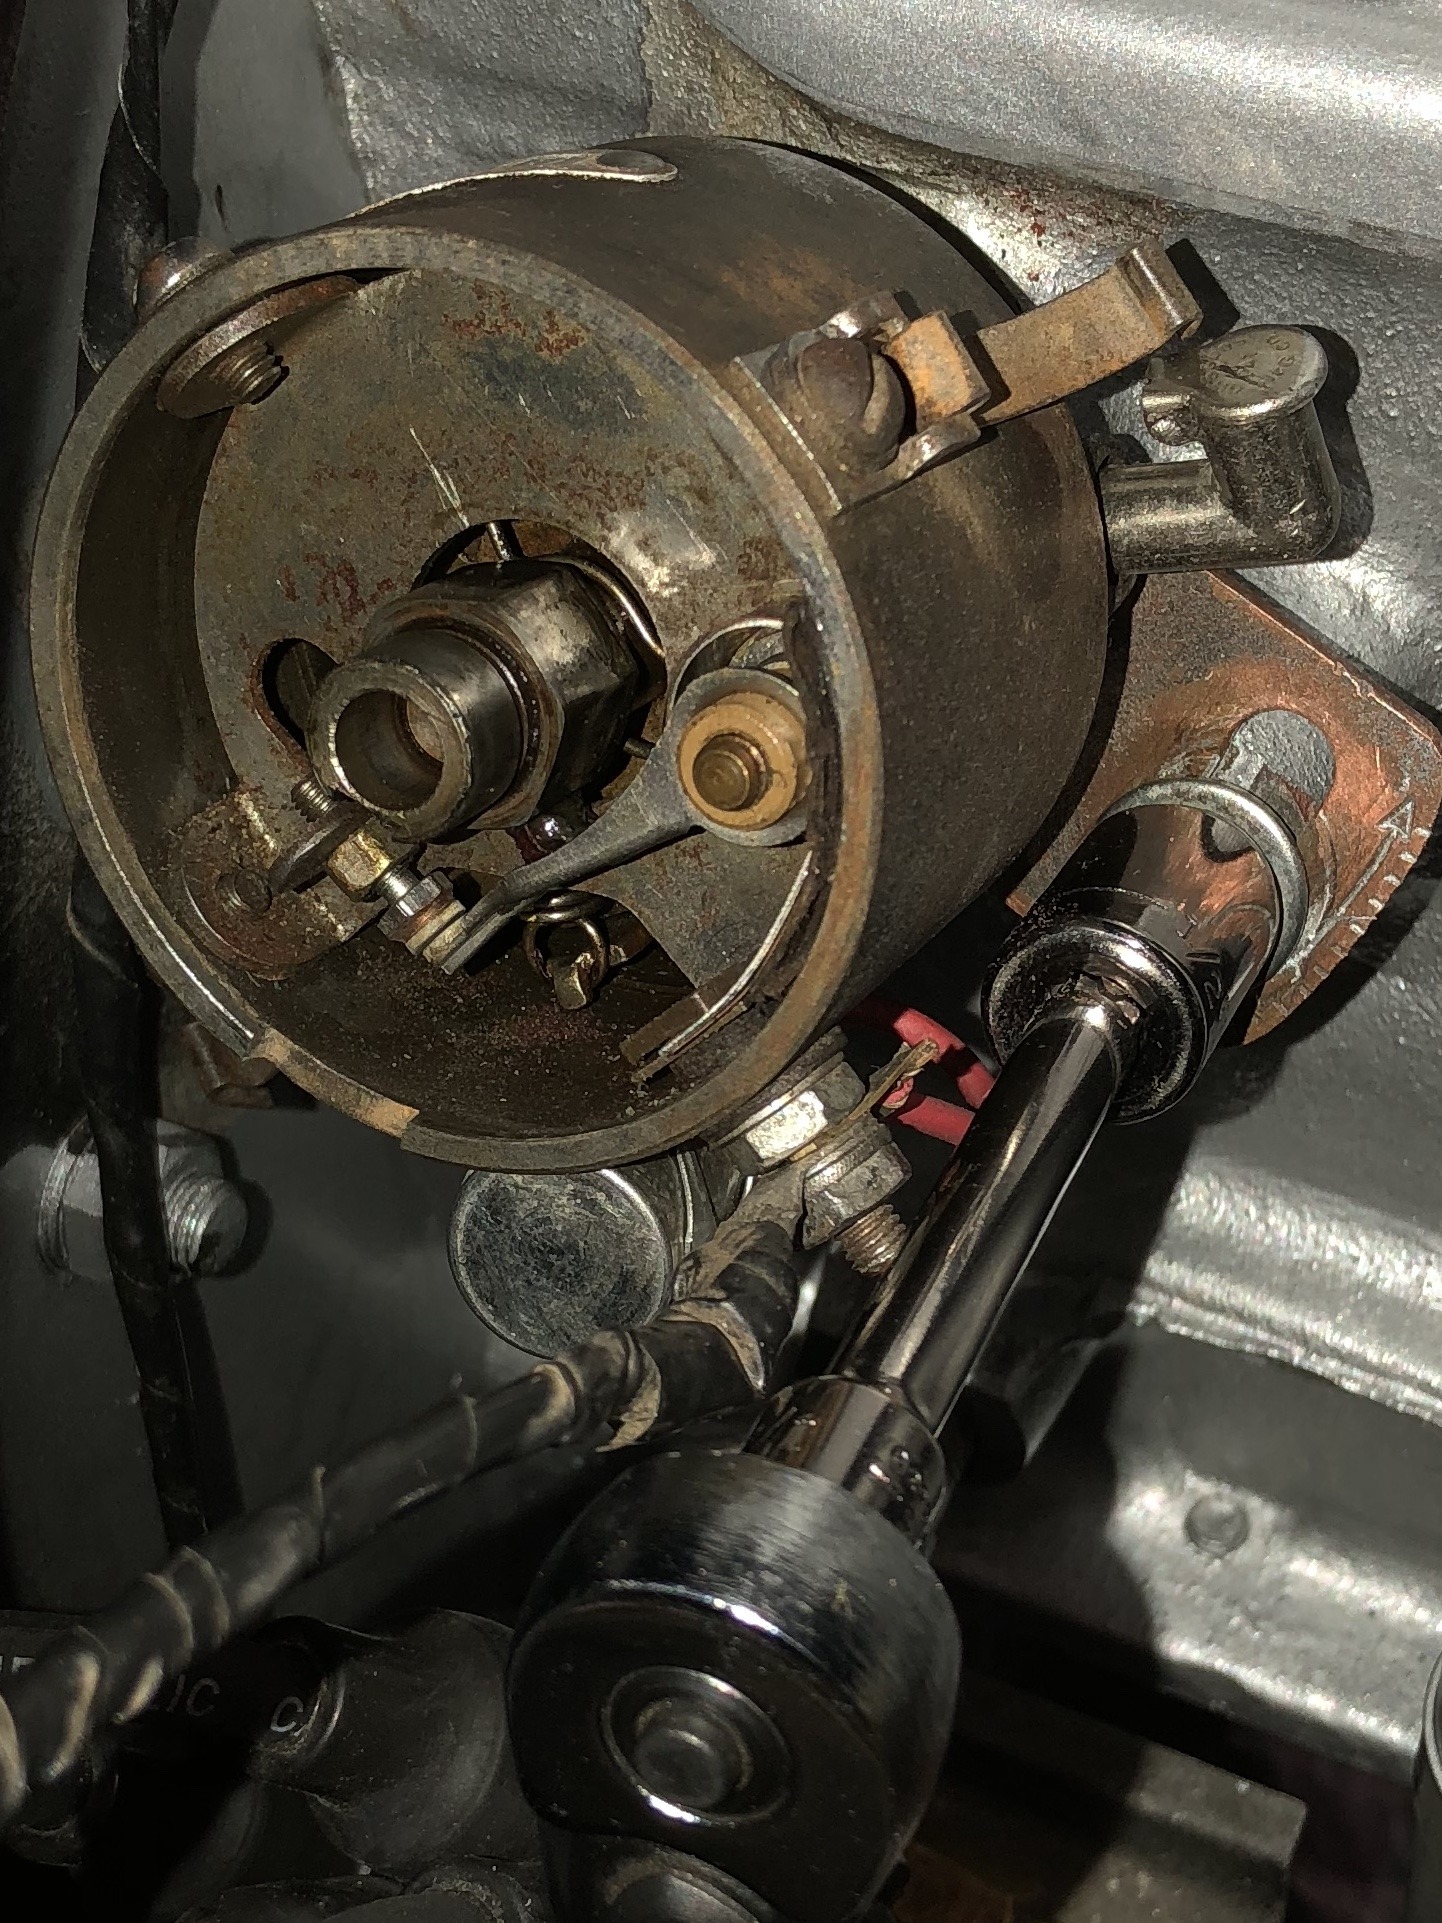
After that I loosened the “other bolt” of adjustment which was under my distributor with a flathead screwdriver, see below photo of circled bolt. This allowed me rotation of the distributor that I needed & to keep the hex head bolt adjustment to the right of the distributor positioned in the middle for future timing tweaks either direction.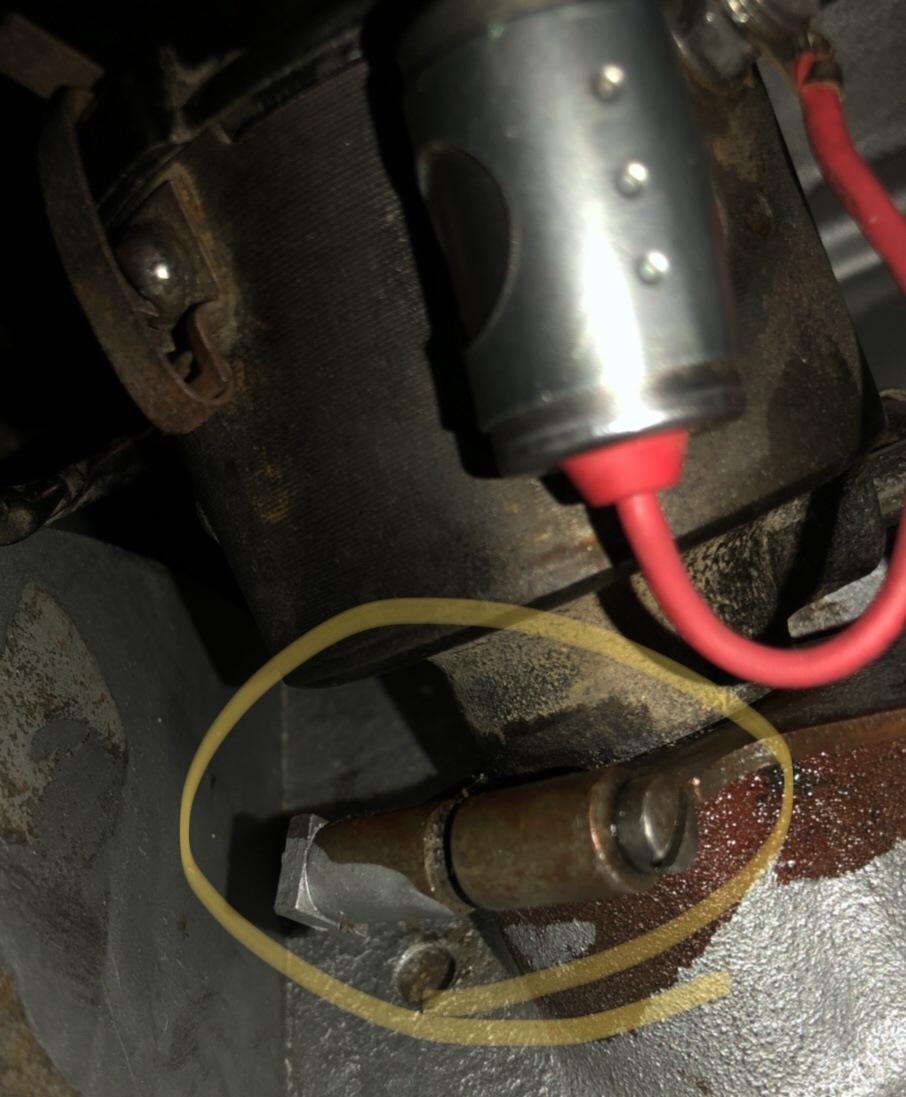
I then rotated the distributor counter-clockwise to make sure the points were closed. Note the test light will be on when the points are making contact. Then I rotated the distributor clockwise just until the test light turned off, which is when the points just break contact. I then very carefully tightened down the distributor (bolt underneath distributor) with out rotating the distributor & put everything back together. The picture below is of the points (circled) separated much more than they will be when the test light goes out but it’s just to show where the points make contact. After it was all put back together I double checked it again with the test light at the same contact points & test light was still out, all was good.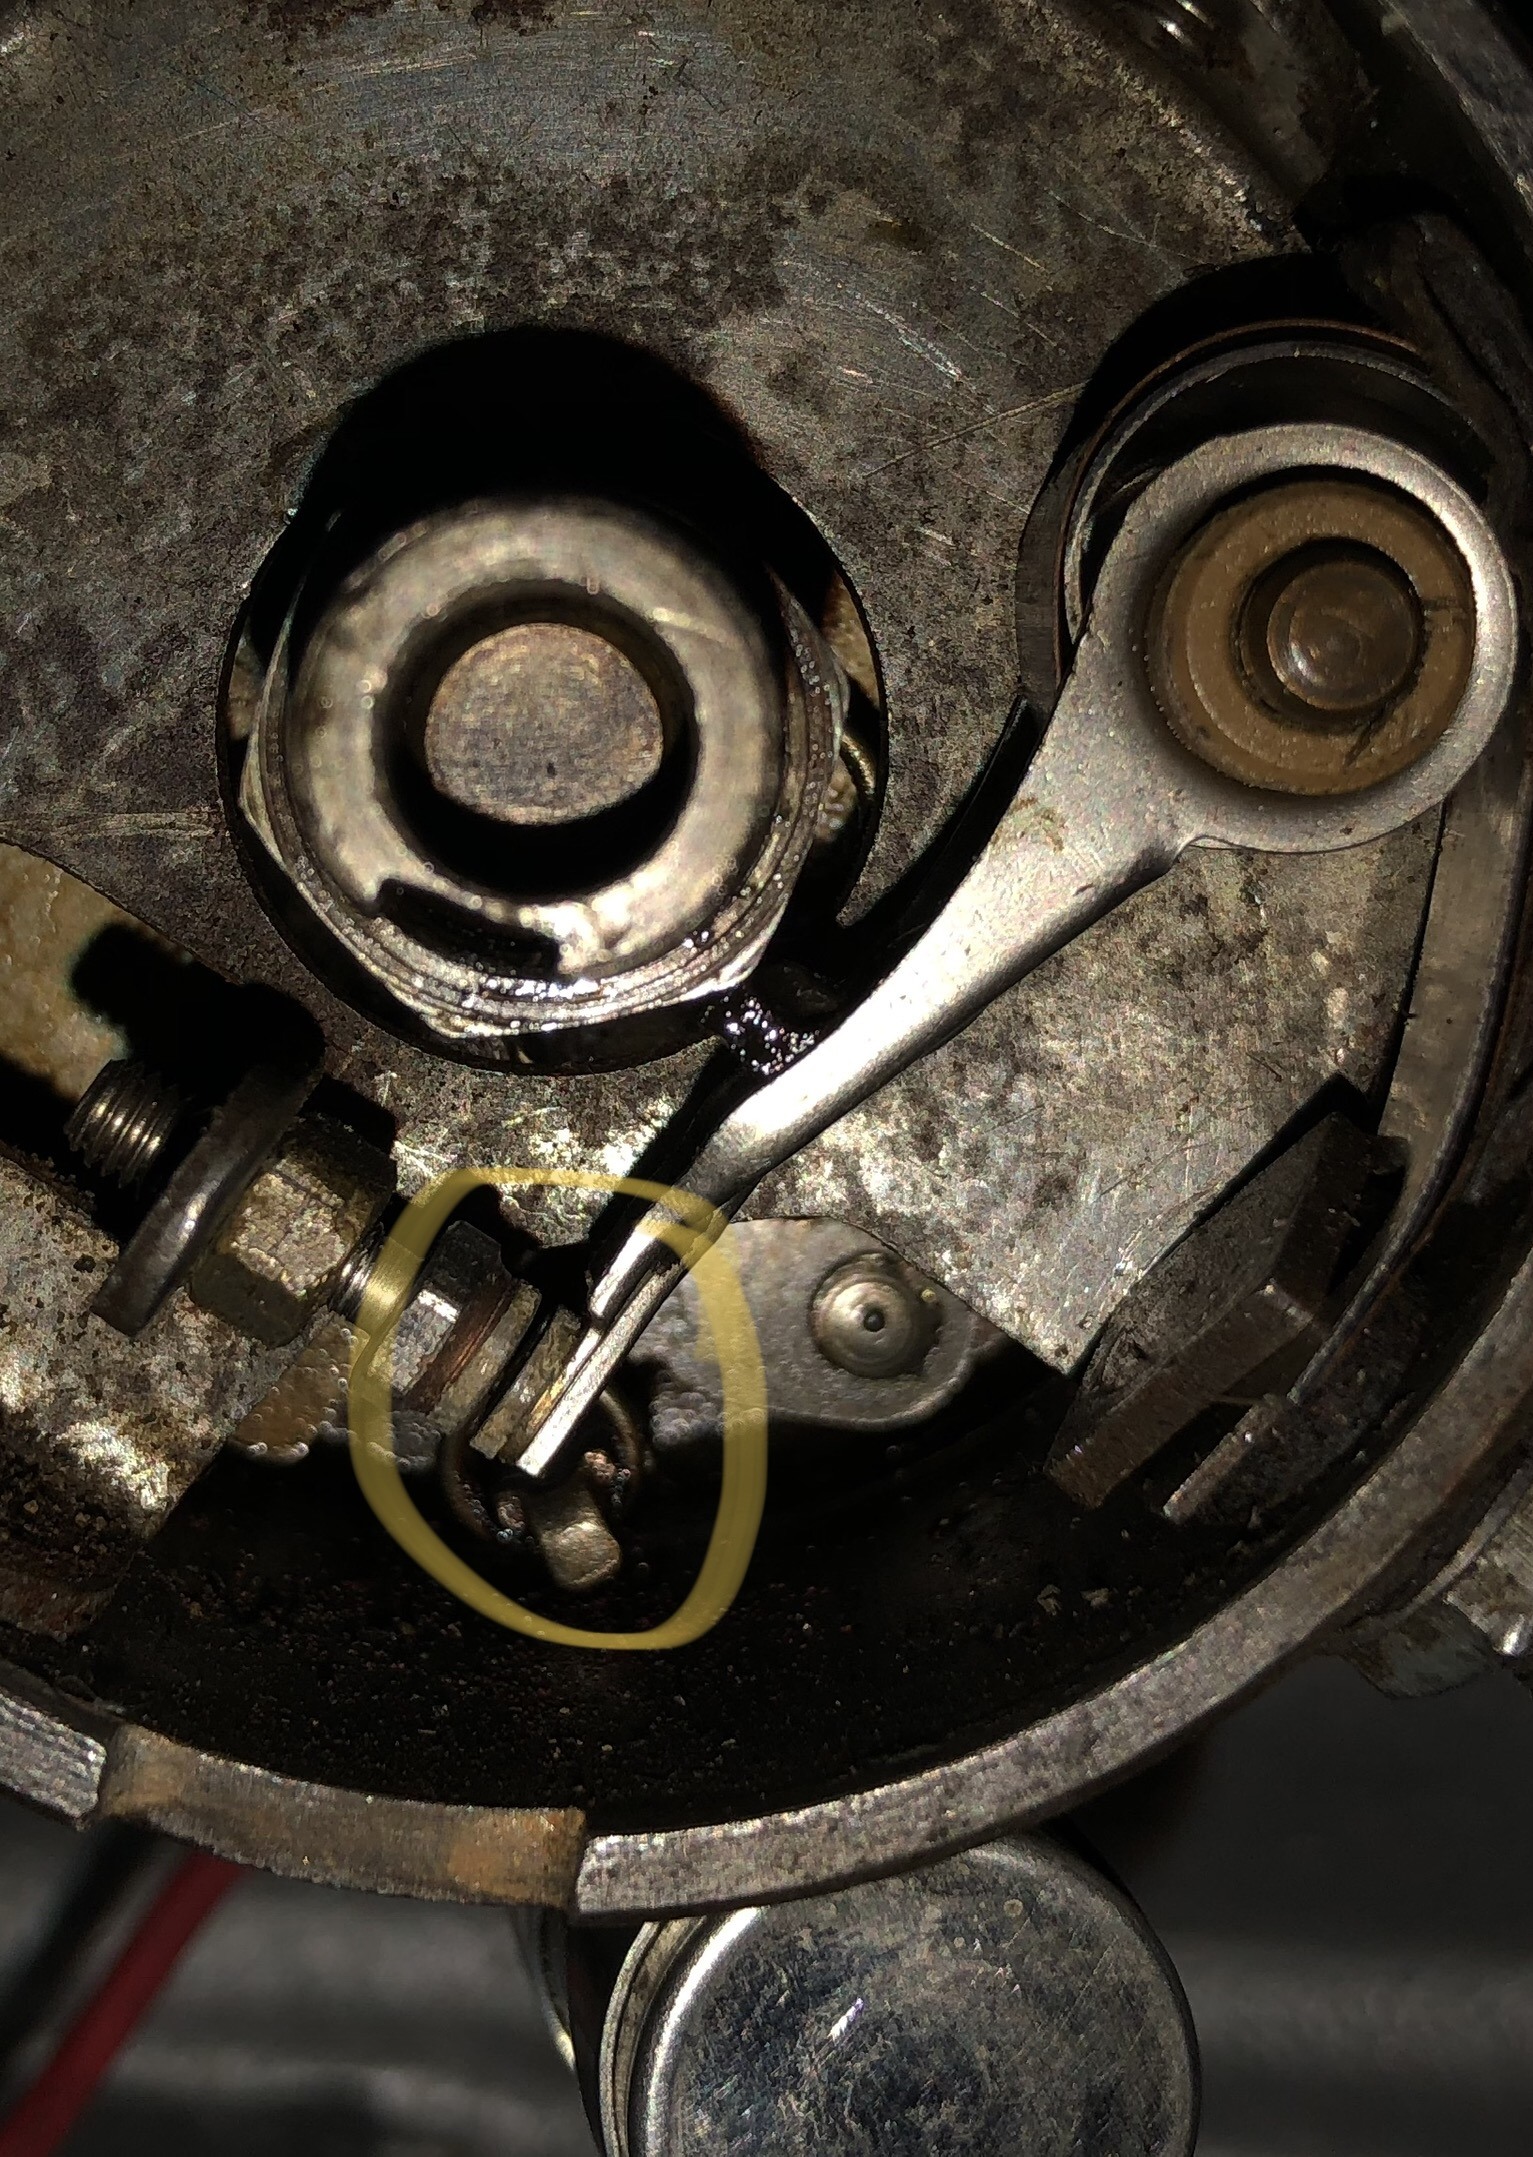
If your distributor is tilted to another angle different than mine under the cap, please note my engine is timed off of #6 plug wire vs #1 wire which may be the cause. This isn’t typically the case but I’m not ready to pull the distributor & correct it right now. So timing off of #6 works just fine, as I was told it would. By #6 or #1, I’m referring to the plug wire which the rotor underneath the cap is pointing at. Plugs are in sequential order; #1 plug is closest to radiator & # 6 plug closest to firewall. On my 37 Hudson 212ci 6cyl engine the distributor rotation is clockwise & firing order is 153624.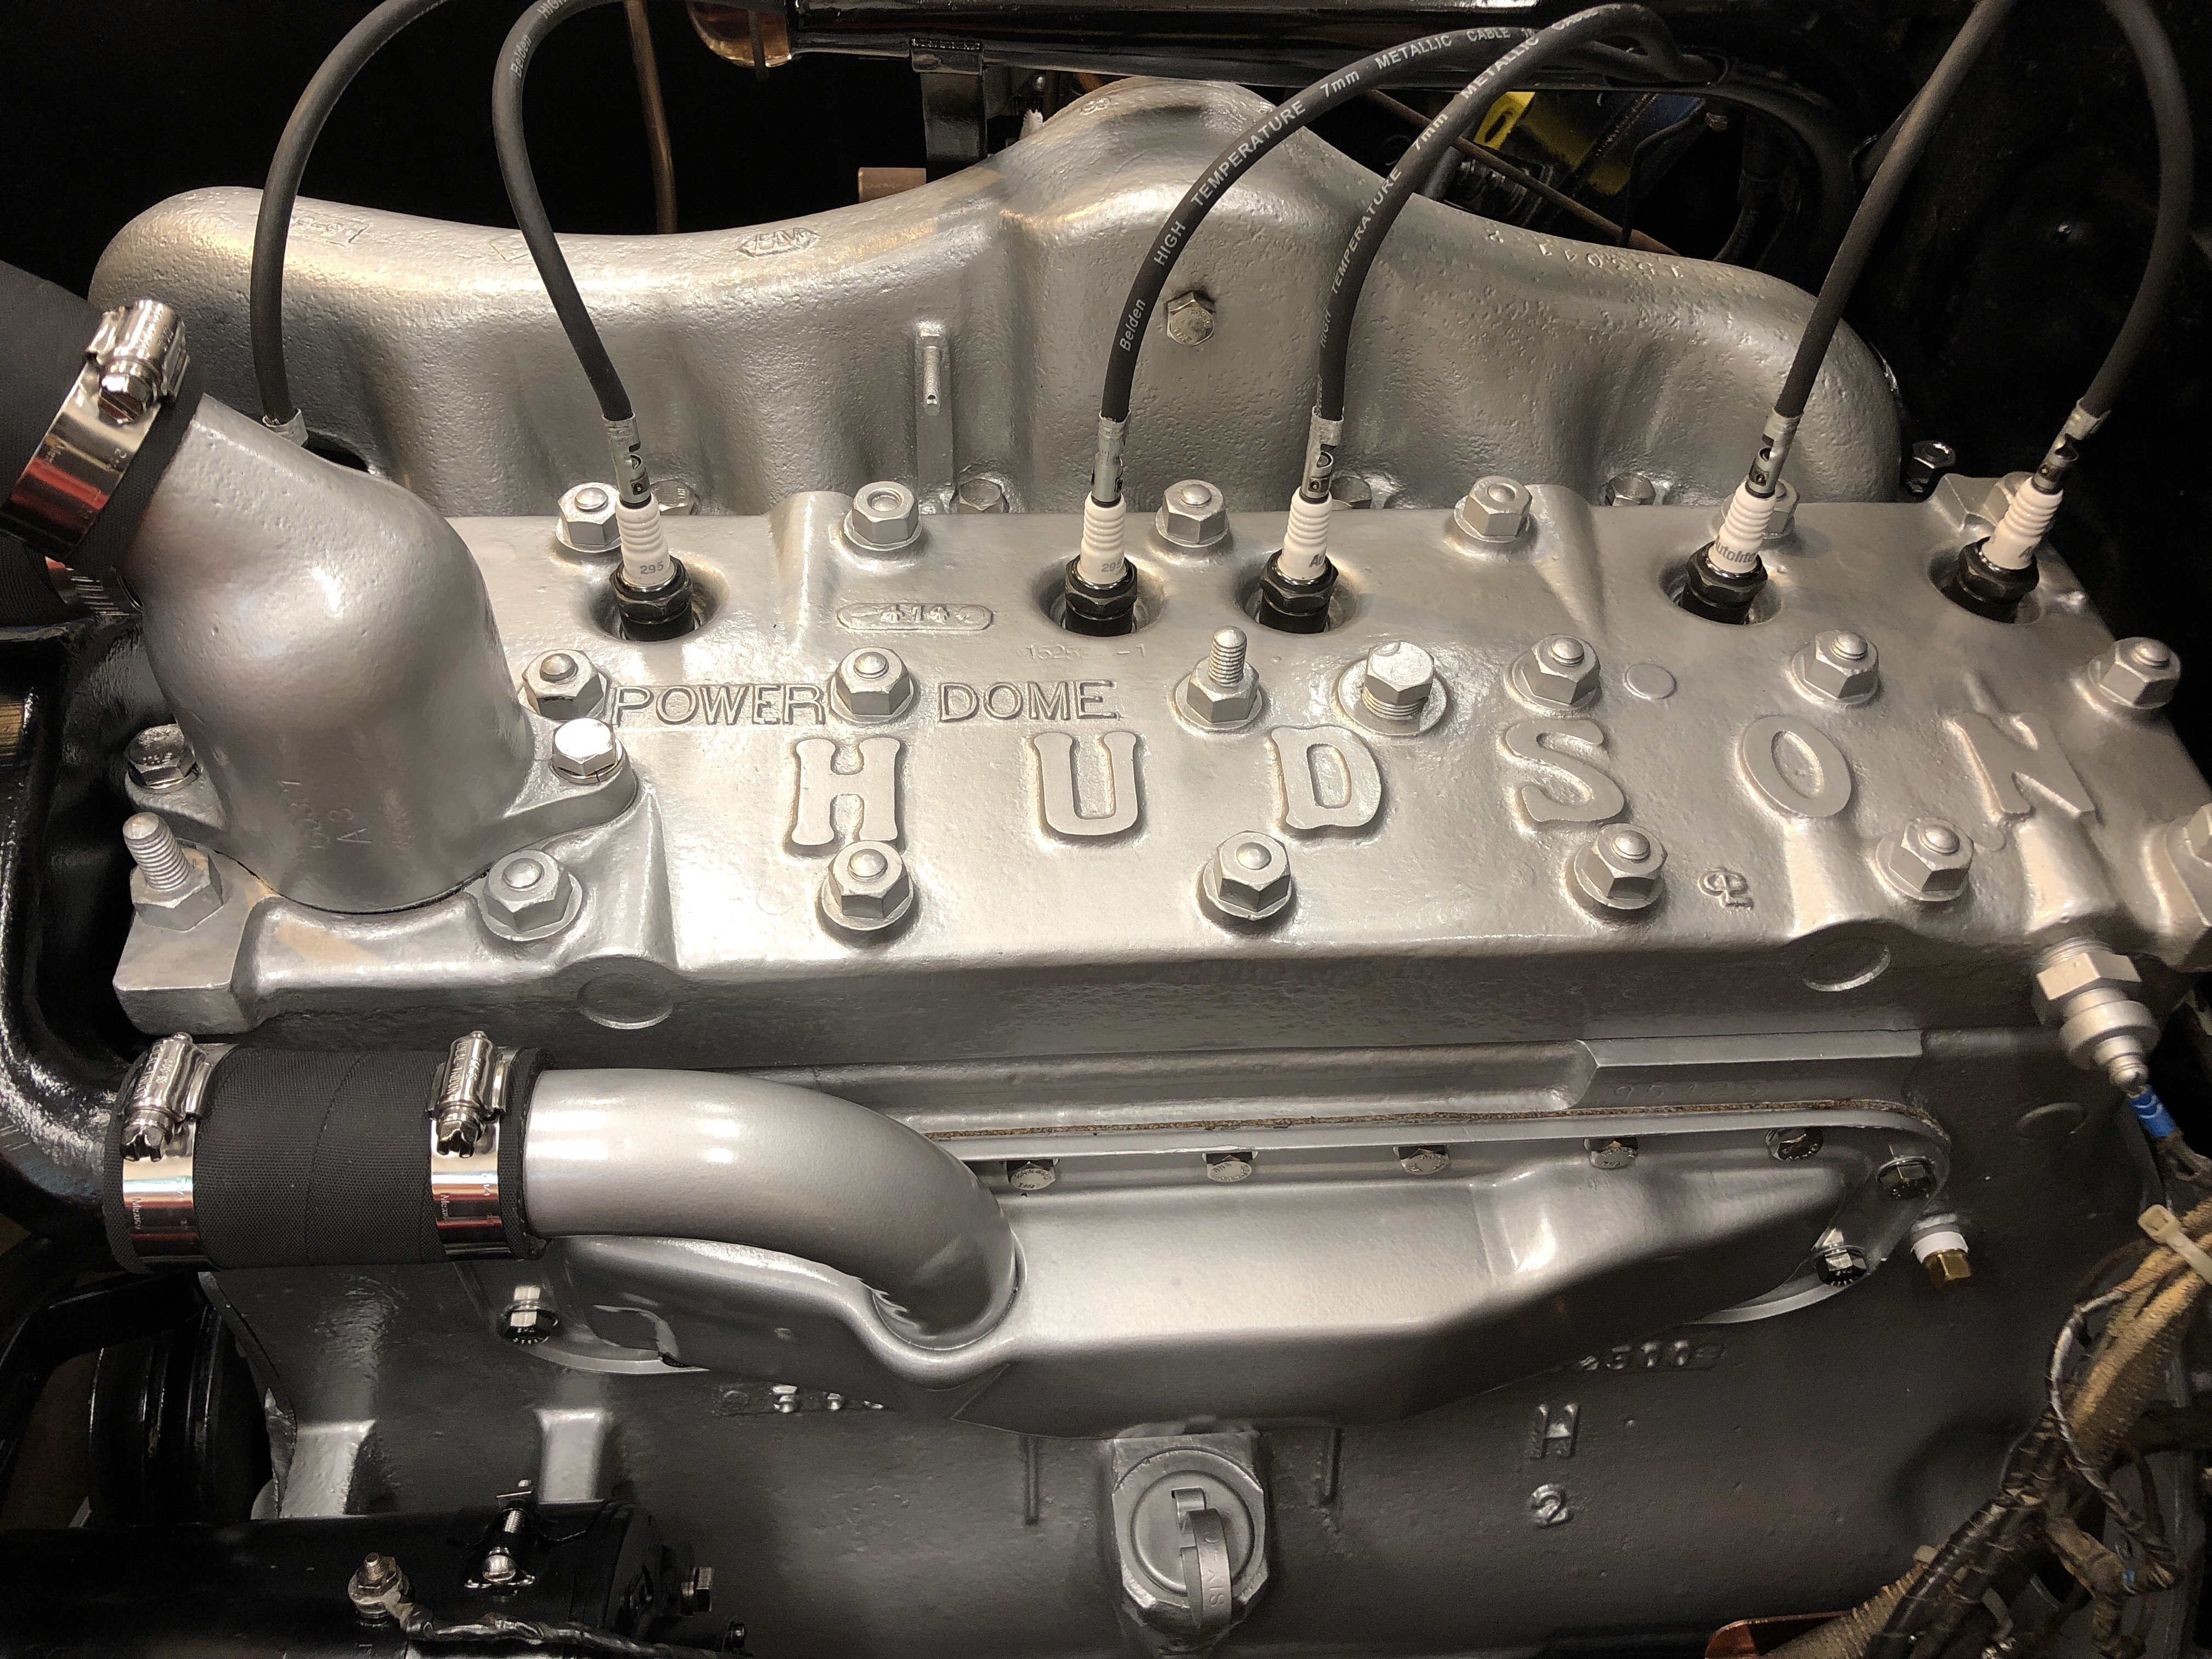
Now I am enjoying a quick start & smooth idle.
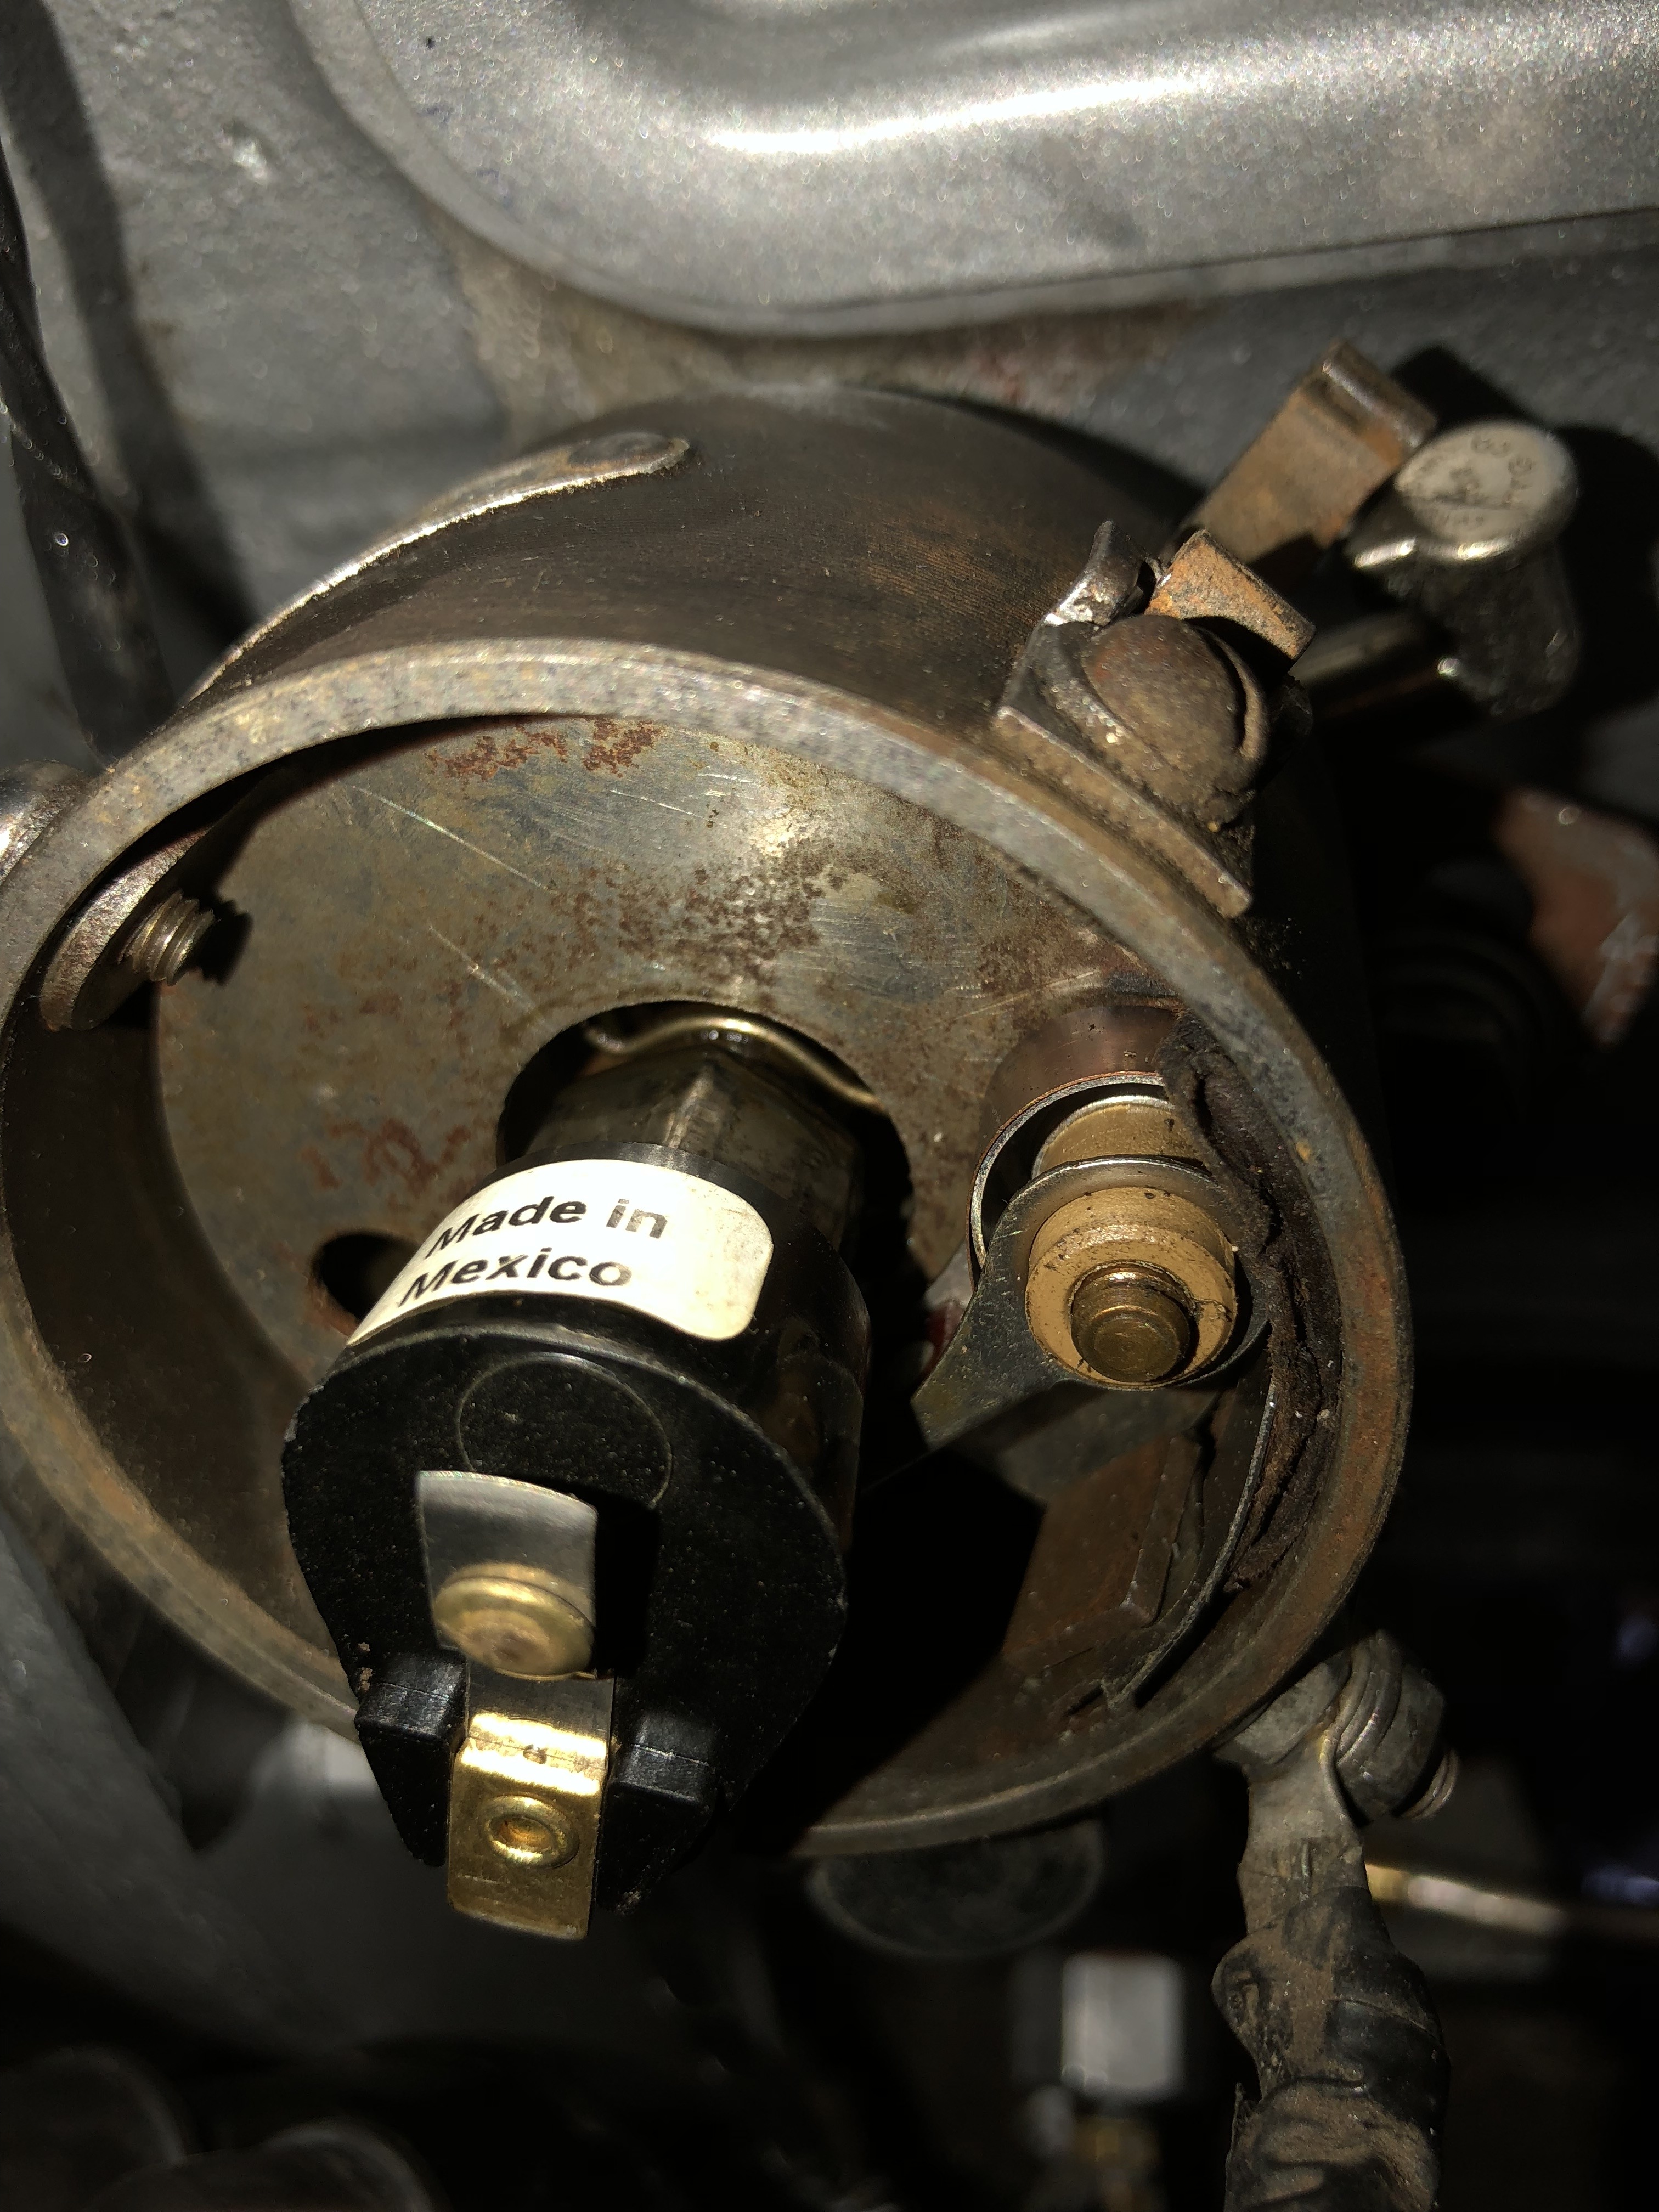
OH! I almost forgot to mention a little bobble I did which caused the test light to “not” turn off during this process. The distributor bolt which I attached the test light to became twisted because it was a slight bit loose. The head is square & one side should be on a parallel plane with the edge/lip of the distributor that the cap meets, mine wasn’t. Mine twisted enough that one point of the square head was grounding out inside the distributor. This caused a few hours of calls to Les & thankfully his skilled eye caught it! Thus I straightened it up & tightened the holding nut & was careful to not over crank the second nut on this bolt which holds the condenser & coil wires. Thanks Les!!!
Below is bolt head grounding out: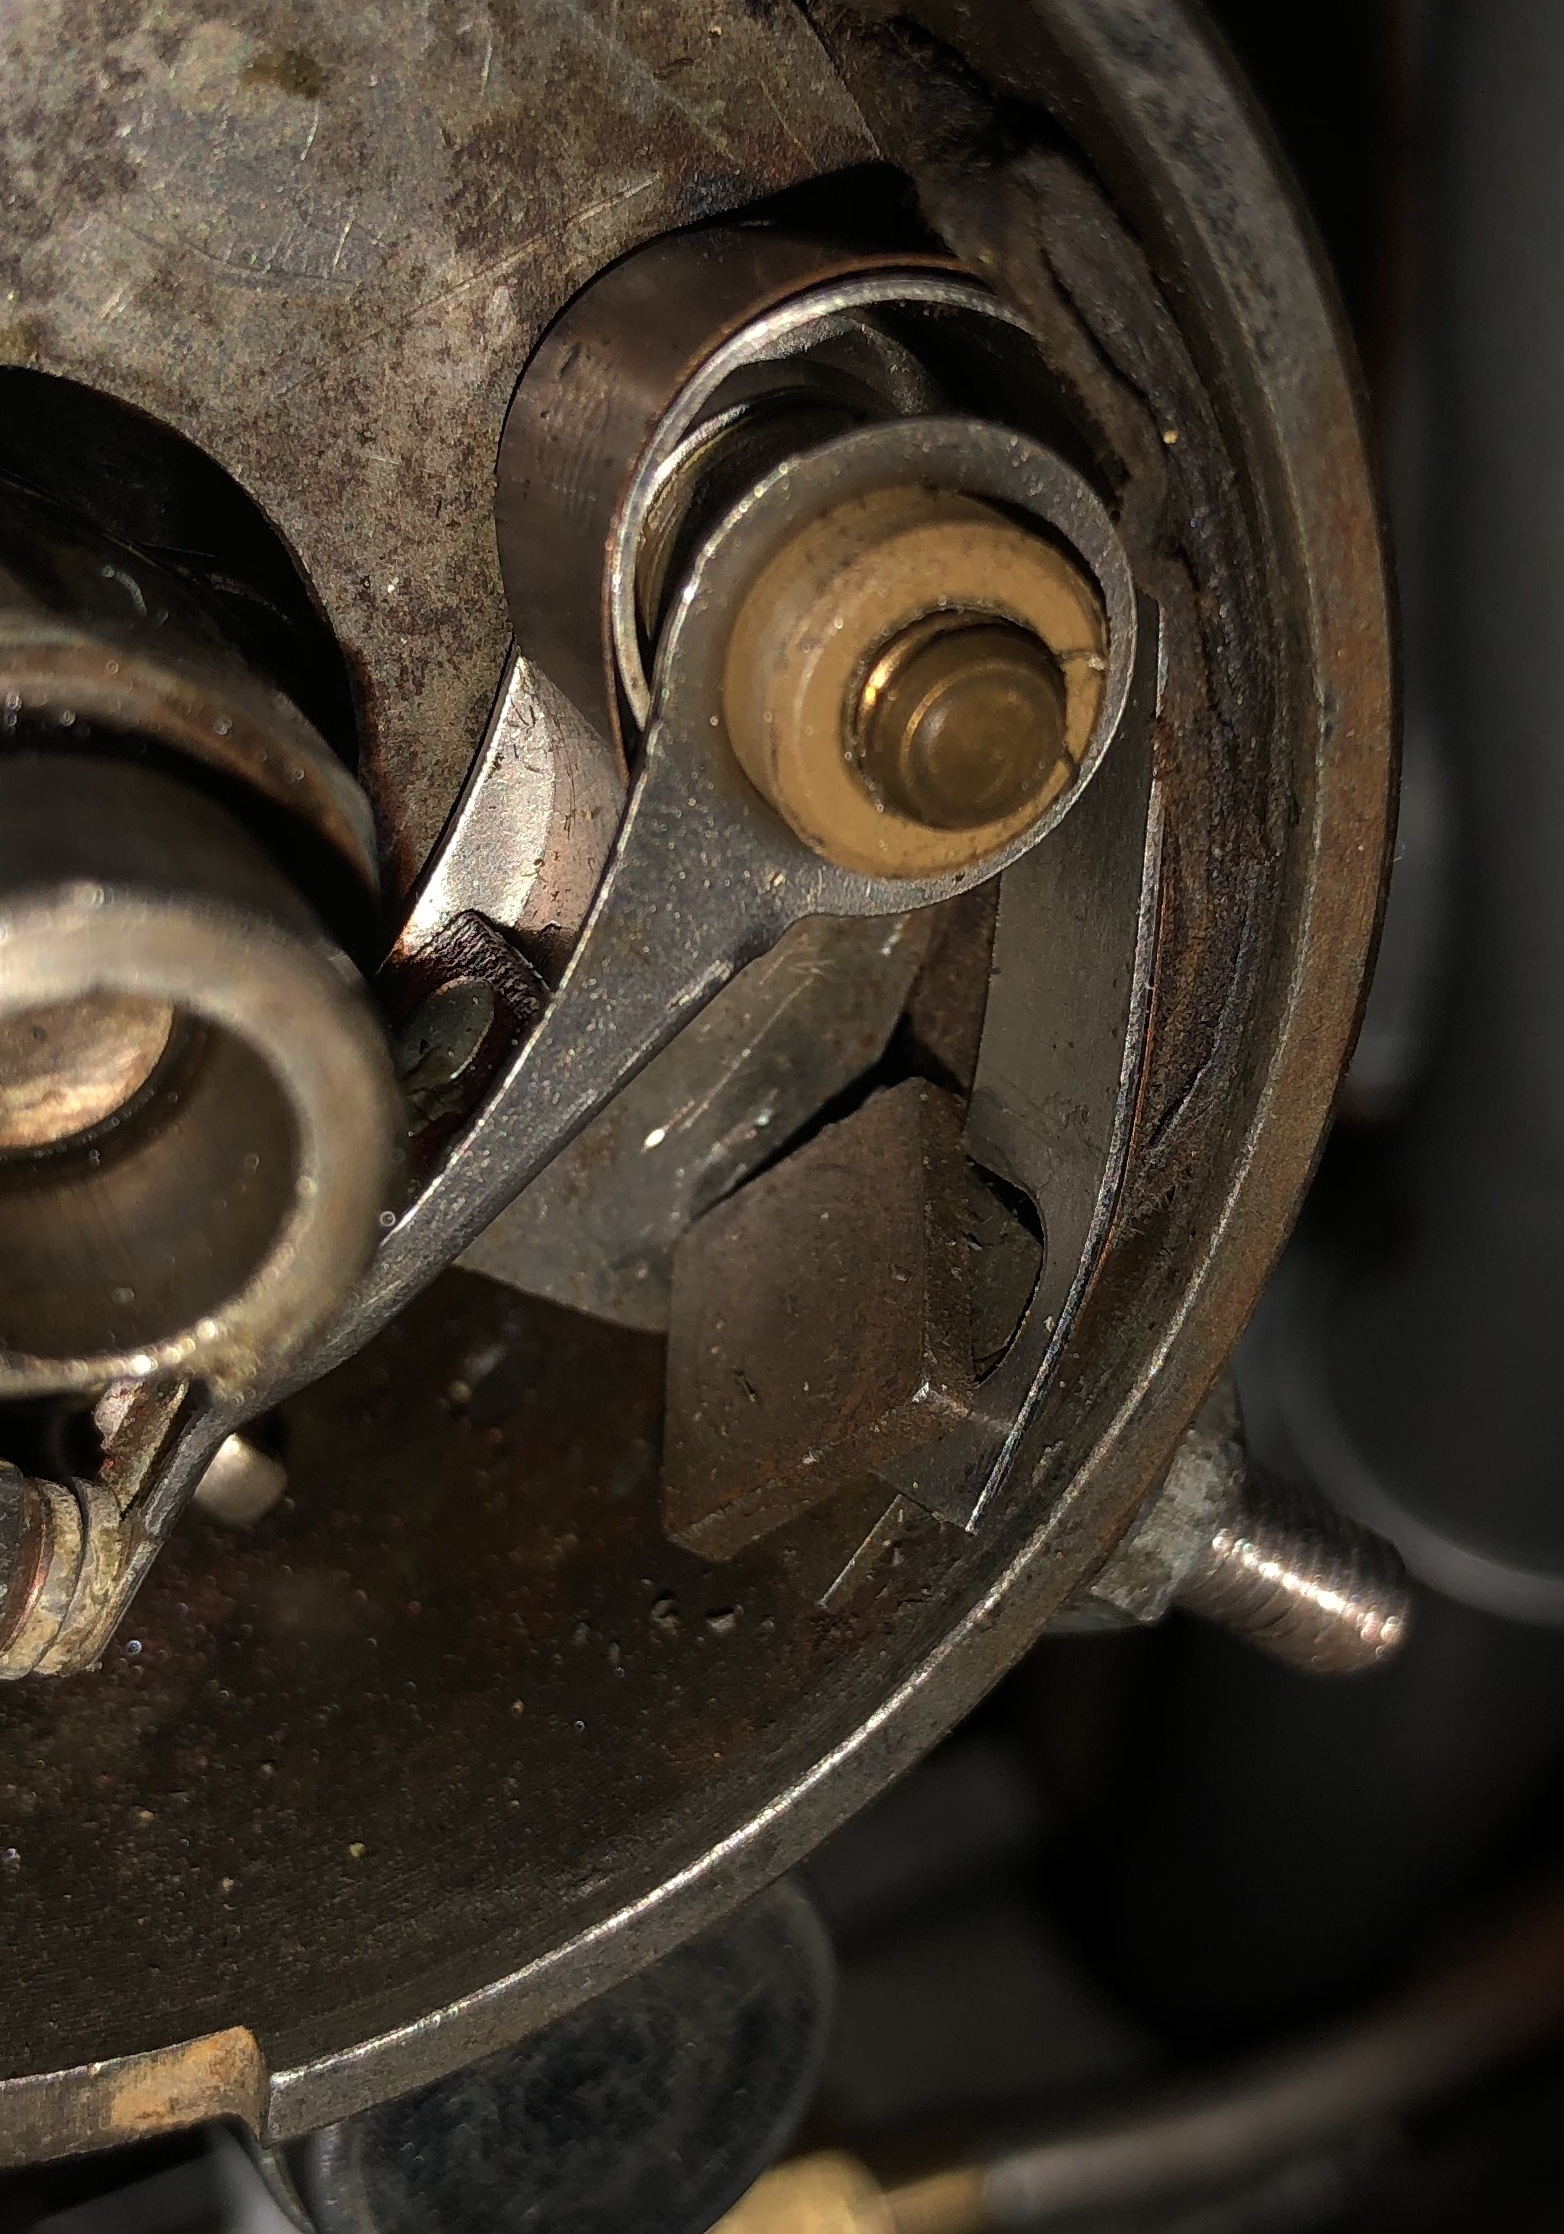
Bolt head corrected: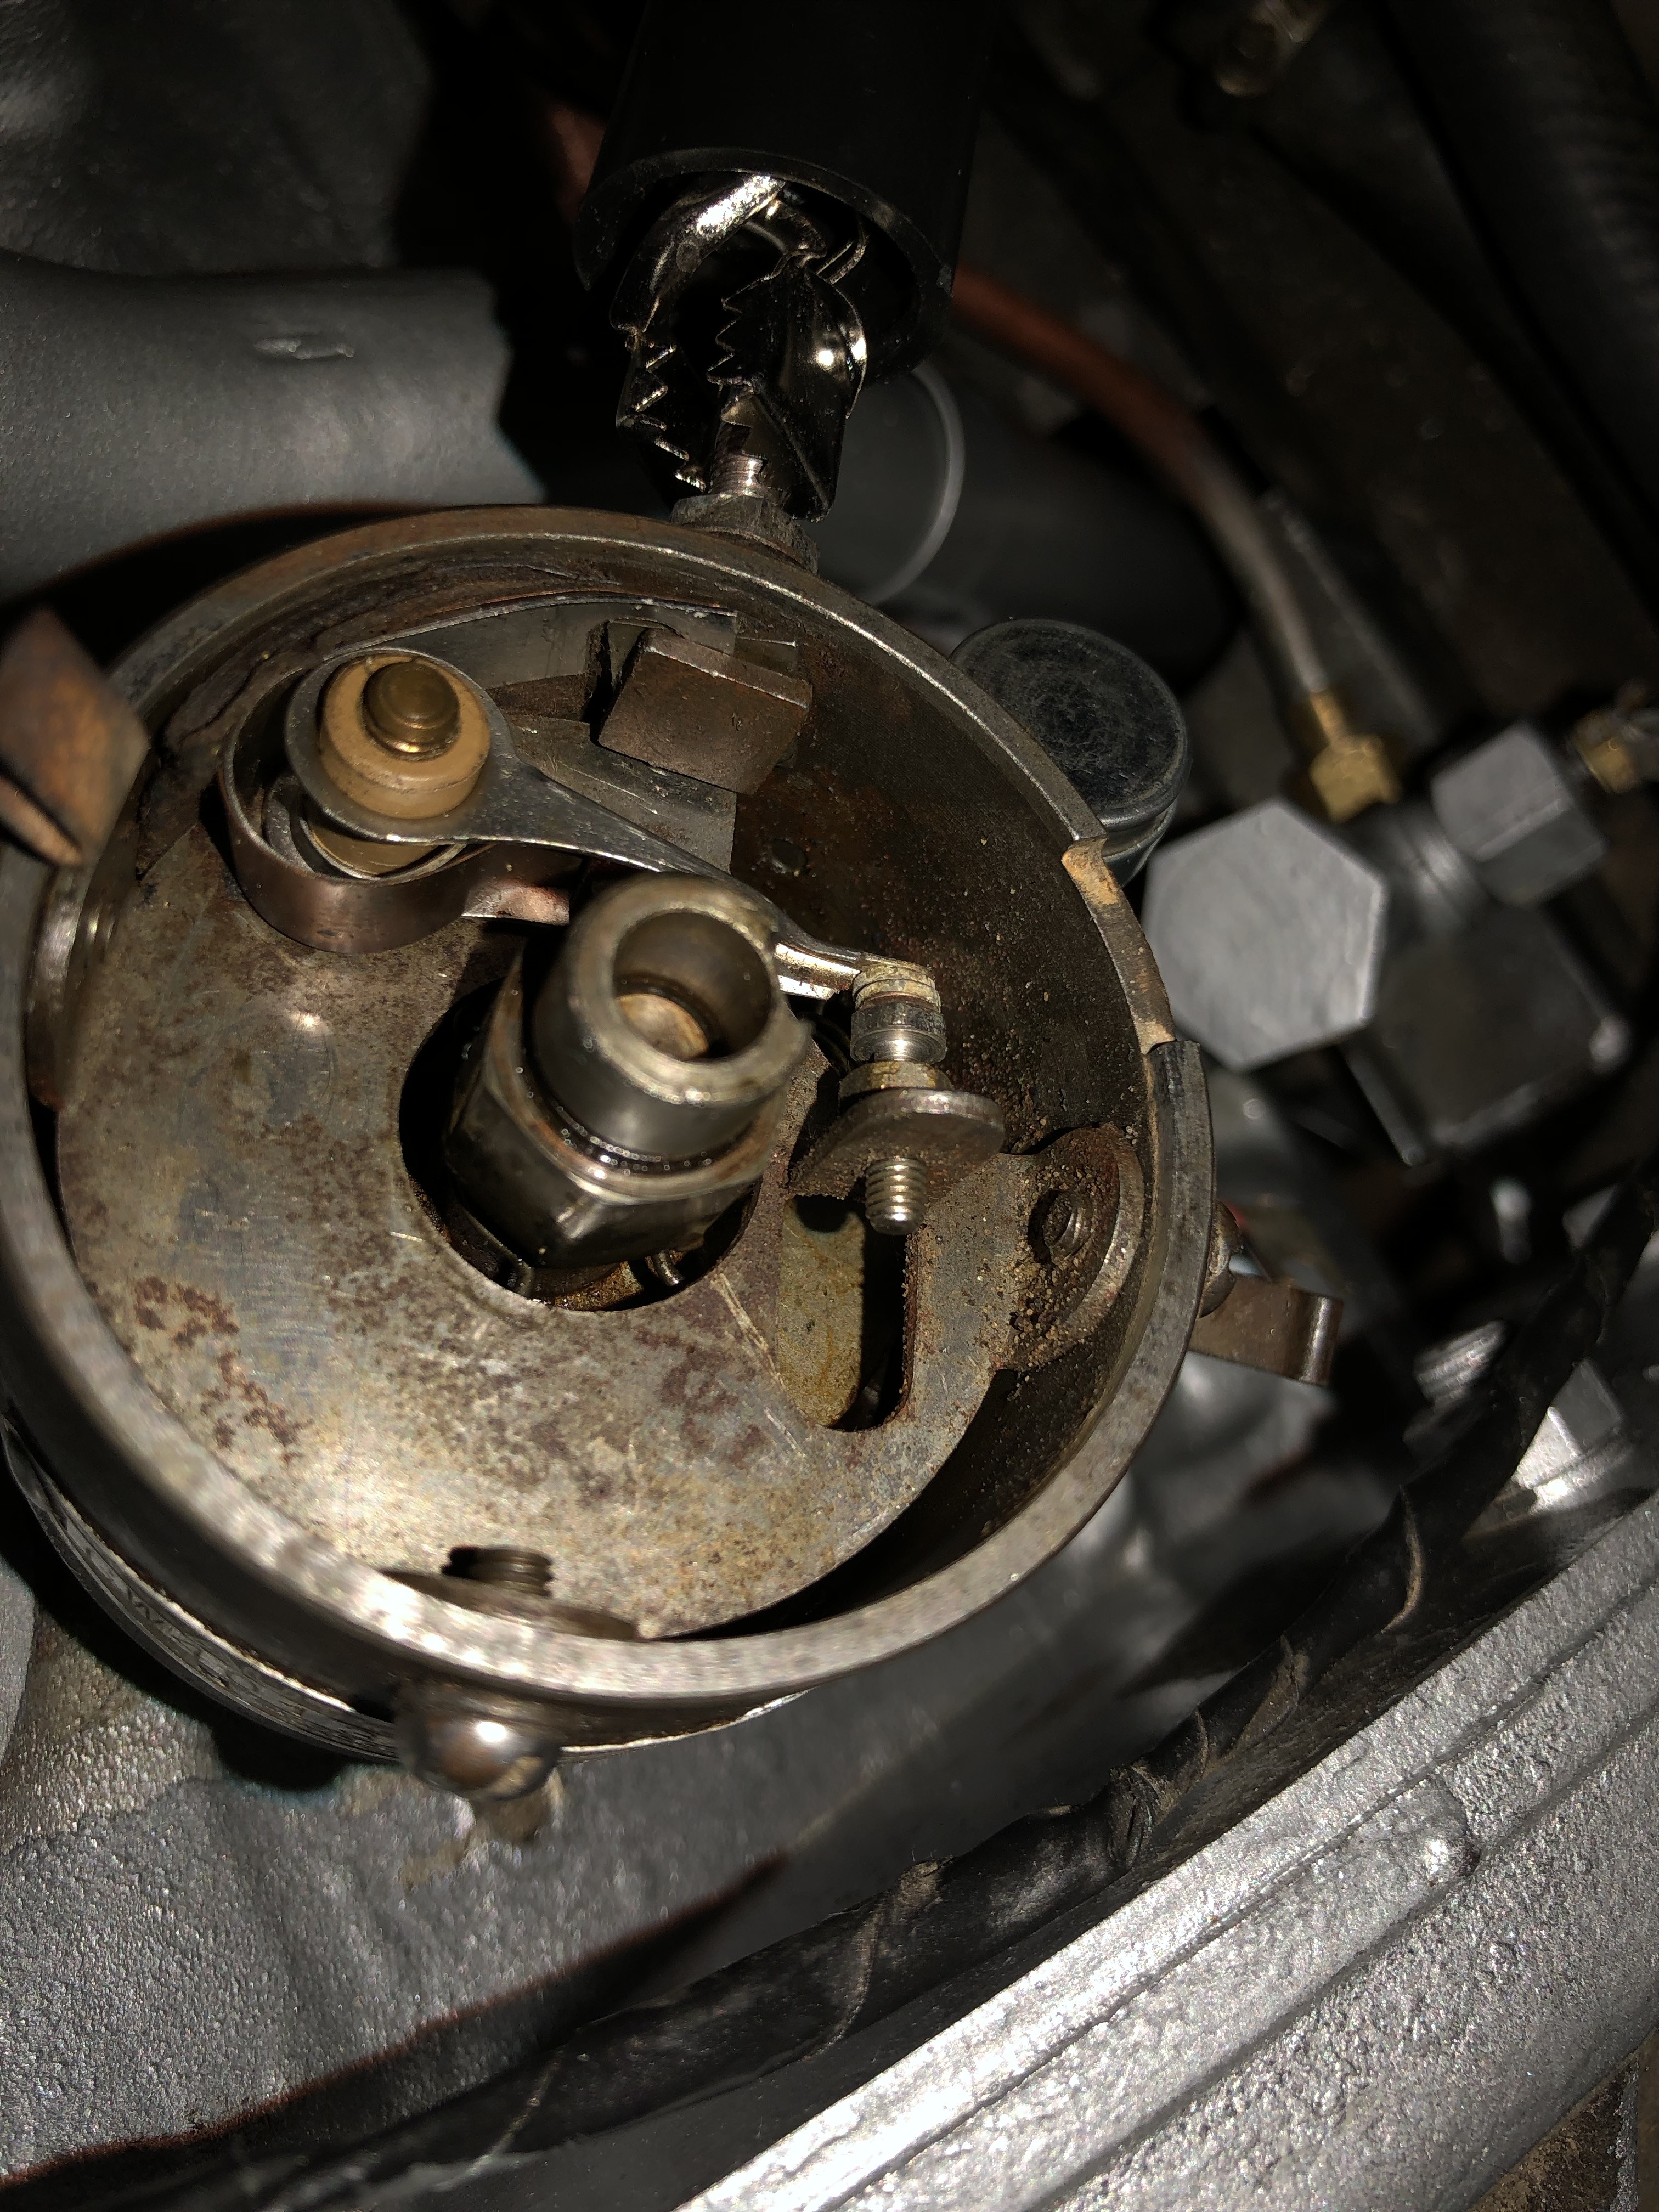
Hope this helps someone,
Brian0 -
Thanks for this write up, this should be put in the WTN.0
-
WOW, nice write up, seems you went the long way but you learned a lot in the process. Thanks for the info and I hope she runs good for you.0
-
A vacuum gauge connected in to the inlet manifold (I used the wiper vacuum outlet on my '36) can be used to fine tune the timing and mixture according to the fuel you use. That's what I do and it works fine. I haven't looked at the timing marks for years. In fact the timing marks are pretty crude and surely never meant as more than an approximate starting point, with final advance back in the day established by the standard on-road pinking test in top gear.0
-
I too, use a vacuum guage. Really helpful on these motors.
0 -
I too have used vacuum gage on my car. Makes final adustments easy.0
-
What Kdancy said. This is a great write up. Thank you for taking the time to document this, with photos even.
I have a timing light so have not used a vacuum gauge to fine tune the timing. So guys, what exactly would someone be looking for if they tried this? Will the year matter, or are all the 212's the same if using a vacuum gauge to fine tune timing?
And yes BigSky, your motor looks great!0 -
Advance the timing until the gauge peaks out and starts fluttering then back off a little (nearly 1lb) until it steadies up, that's what I do. You can adjust the mixture the same way, look for maximum vacuum then lean it out a touch. Adjust the mixture first then the timing. There are plenty of articles on the web to look through to get a general consensus. Of course if it is pinking once you've done this on road testing you will need to retard the timing a little.farmermike said:
I have a timing light so have not used a vacuum gauge to fine tune the timing. So guys, what exactly would someone be looking for if they tried this? Will the year matter, or are all the 212's the same if using a vacuum gauge to fine tune timing?
The same principles apply no matter what the year. Mine is a '36 212 with a 112 head giving 7.3:1 compression.
0


Categories
- 36.6K All Categories
- 85 Hudson 1916 - 1929
- 11 Upcoming Events
- 73 Essex Super 6
- 28.4K HUDSON
- 511 "How To" - Skills, mechanical and other wise
- 990 Street Rods
- 150 American Motors
- 170 The Flathead Forum
- 47 Manuals, etc,.
- 71 Hudson 8
- 40 FORUM - Instructions and Tips on using the forum
- 2.7K CLASSIFIEDS
- 592 Vehicles
- 2.1K Parts & Pieces
- 76 Literature & Memorabilia
- Hudson 1916 - 1929 Yahoo Groups Archived Photos