Coolant System

I’m draining the coolant to replace hoses & ultimately remove water pump, thermostat housing & water jacket to evaluate exactly what’s there or “not” there. Ultimately getting hidden things on the right track & not assume everything I cannot see is fine.
Thus, the radiator is drained but I could only get one drop of fluid from the block drain port on the right of the water jacket. Should I get more? Is there a way to blow air to make sure it’s empty before I make a big mess?
Thus, the radiator is drained but I could only get one drop of fluid from the block drain port on the right of the water jacket. Should I get more? Is there a way to blow air to make sure it’s empty before I make a big mess?
0
Comments
-
Too late... she came gushing out, had to use my hand as a shield. Jacket taken off, but I have no idea what the inside of the 6 cylinder water jacket should look like & I cannot find an image on line?
Here’s what I found...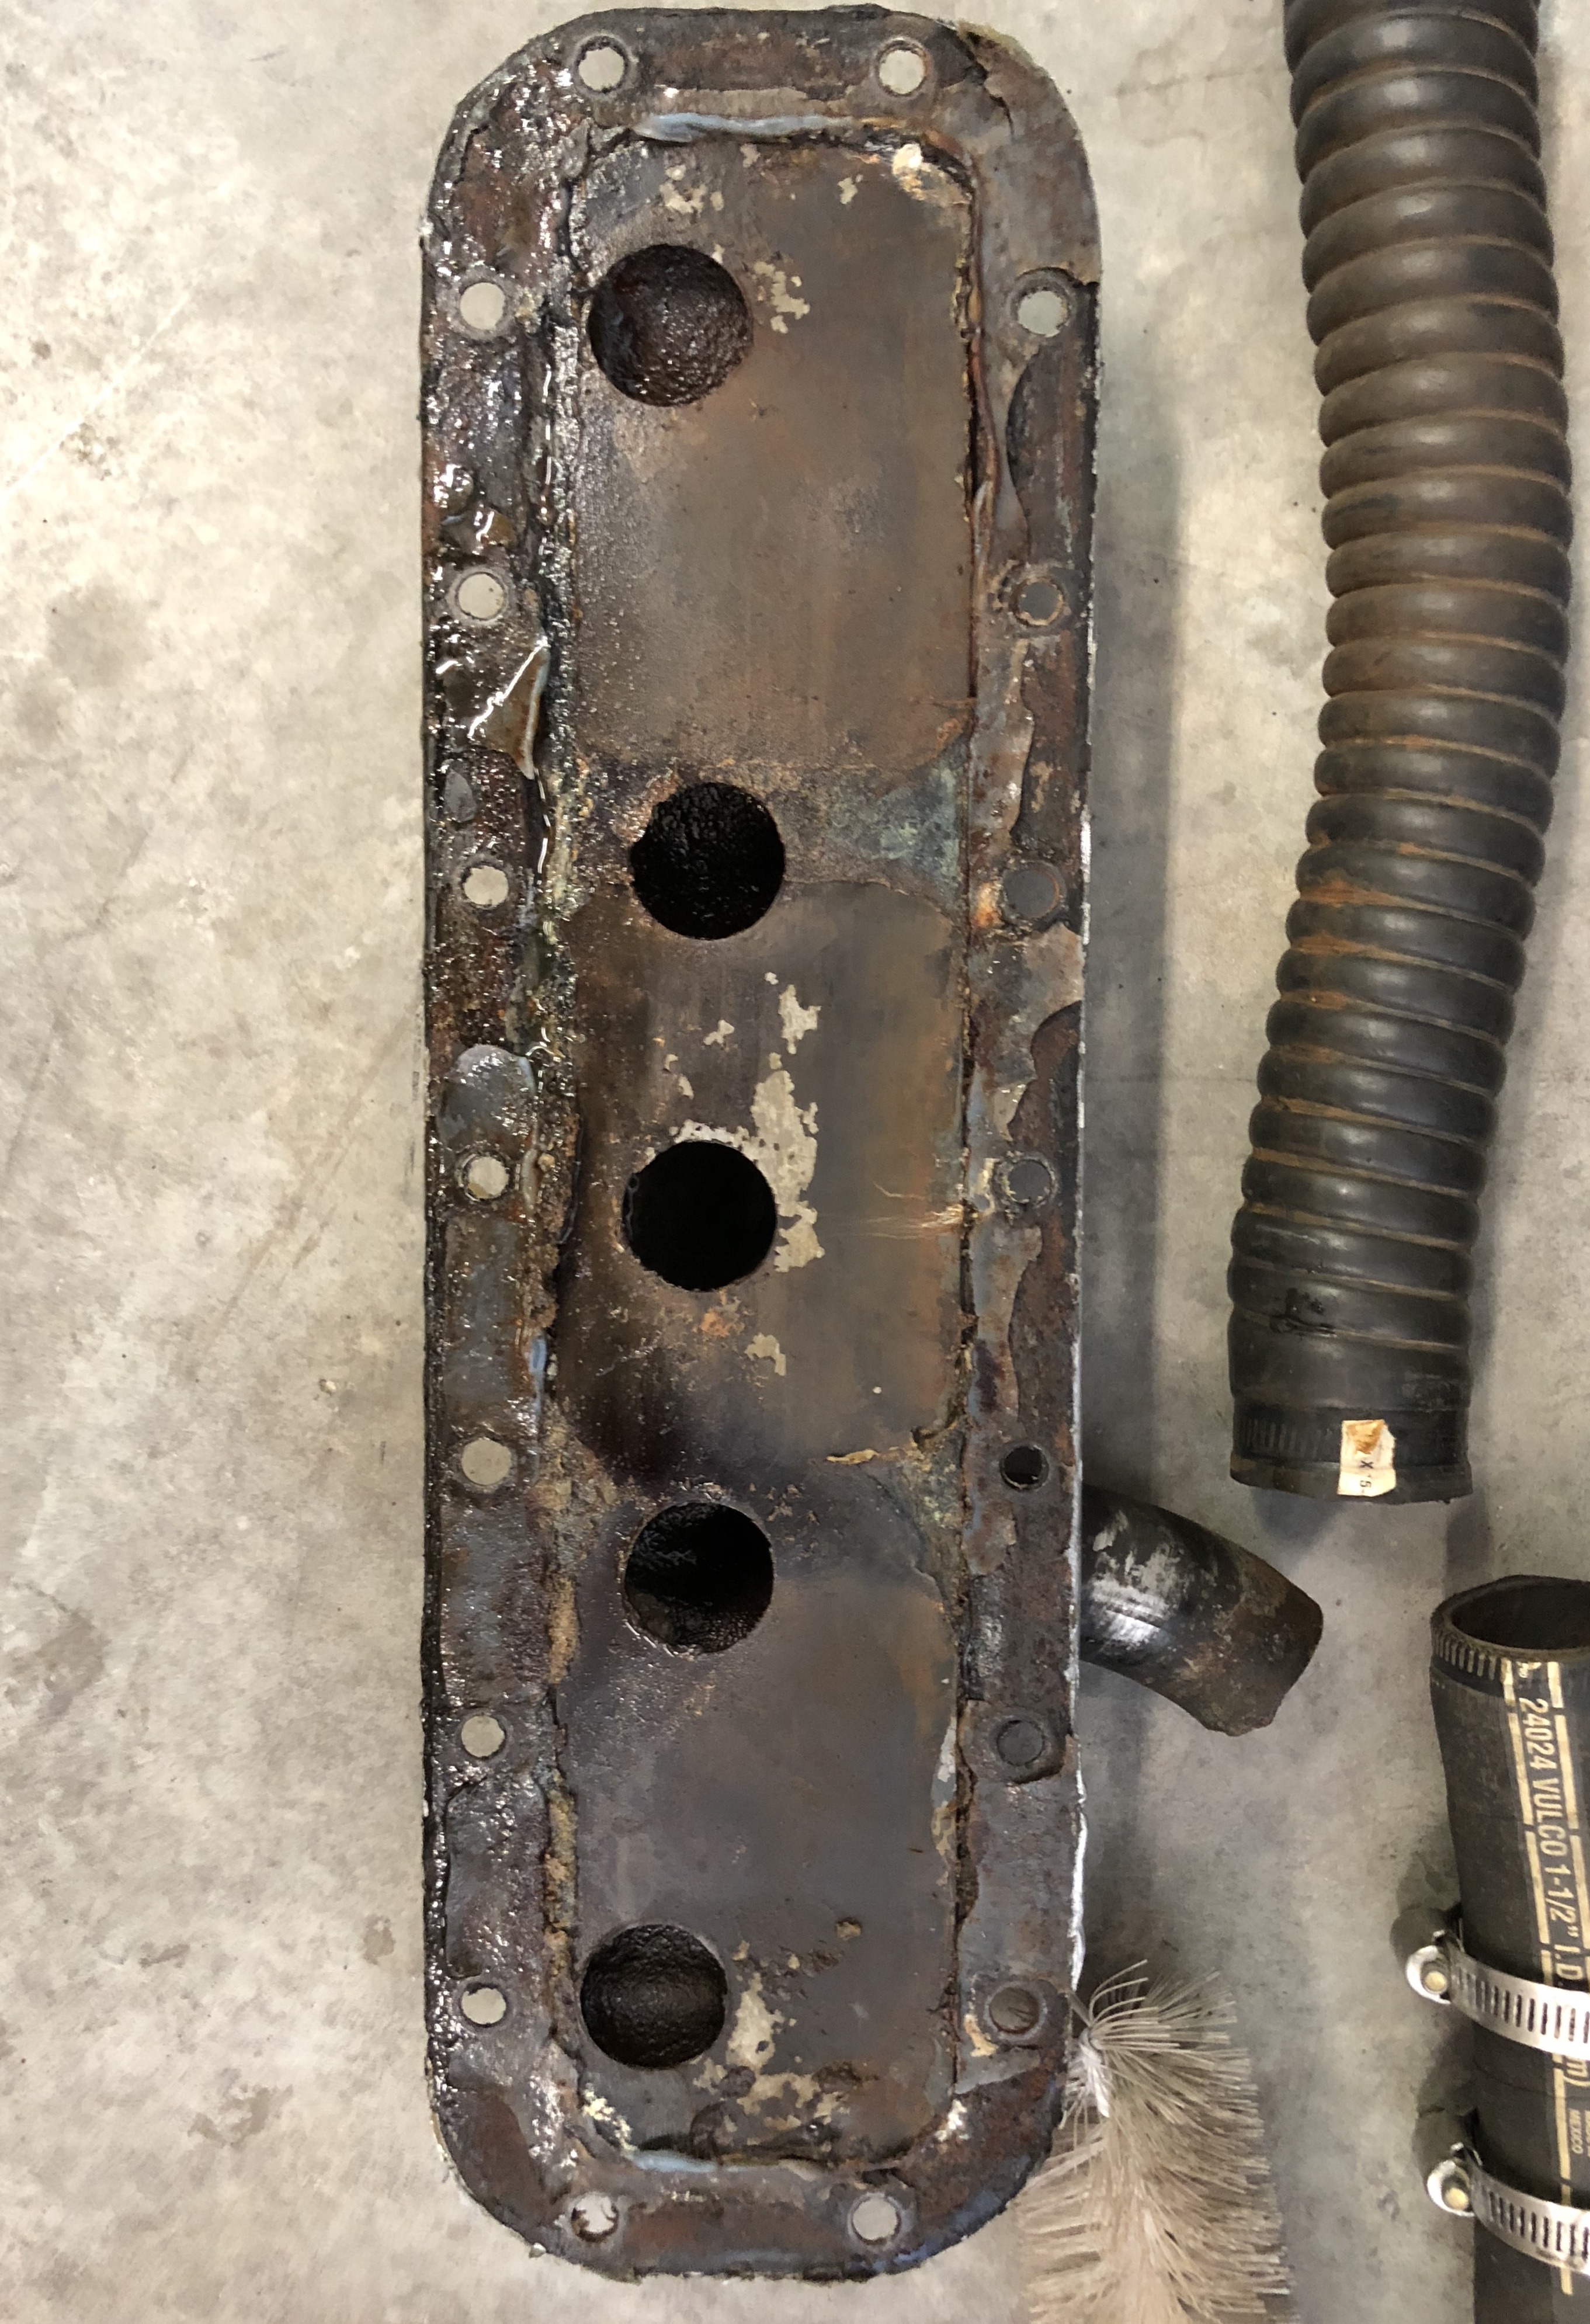
0 -
Use a wire or coat hanger and clean out the sediment between and around the cylinders, especially in the rear.Then take a water hose and flush it out good. Makes a mess,but not as big a mess as over heating and boiling over makes. Dale Cooper has the gaskets.0
-
Good advice. I’d planned on using a couple different brushes but the coat hanger definitely can help.
My big question: are the holes on the back of the water jacket look like they are correct factory holes? I’ve never seen inside the jacket before but had a recollection of varying sized holes, but I’m not sure on that one.
Anyone?0 -
holes are factory correct.0
-
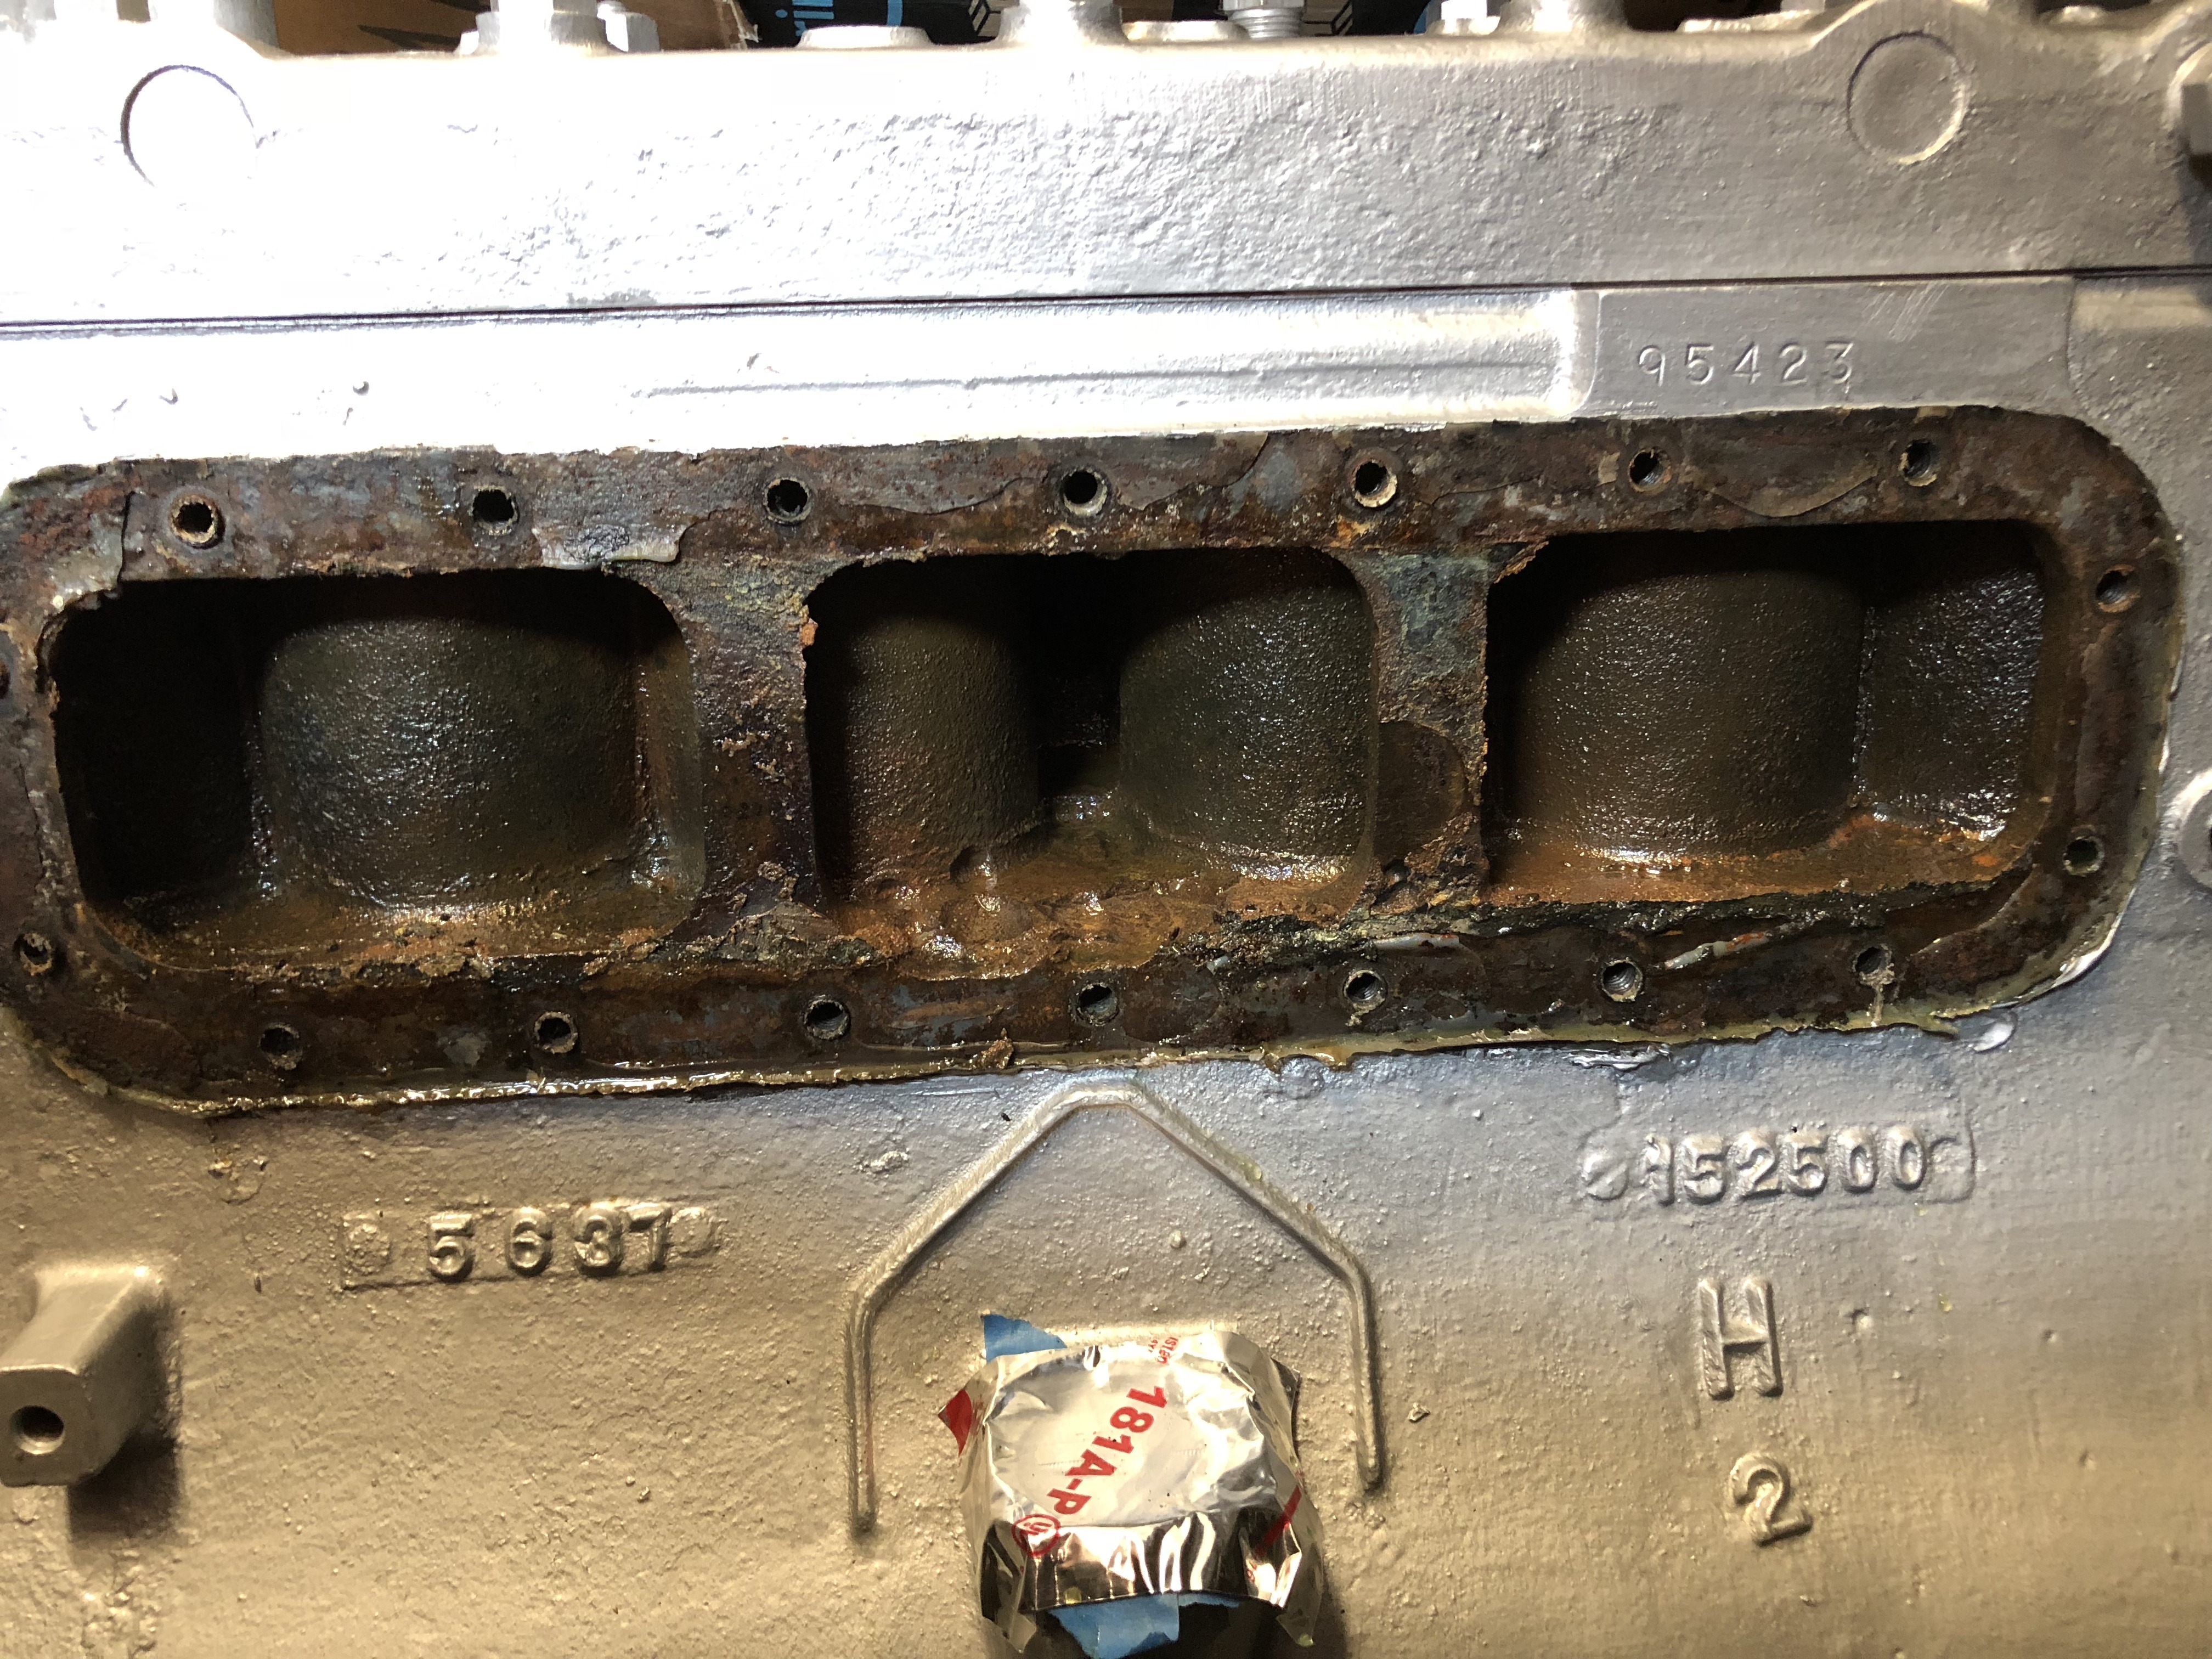
Hummm, I sincerely appreciate your feedback. However, I’m not 100% sure that what I’ve got is actually a factory piece and here’s why I have questions.
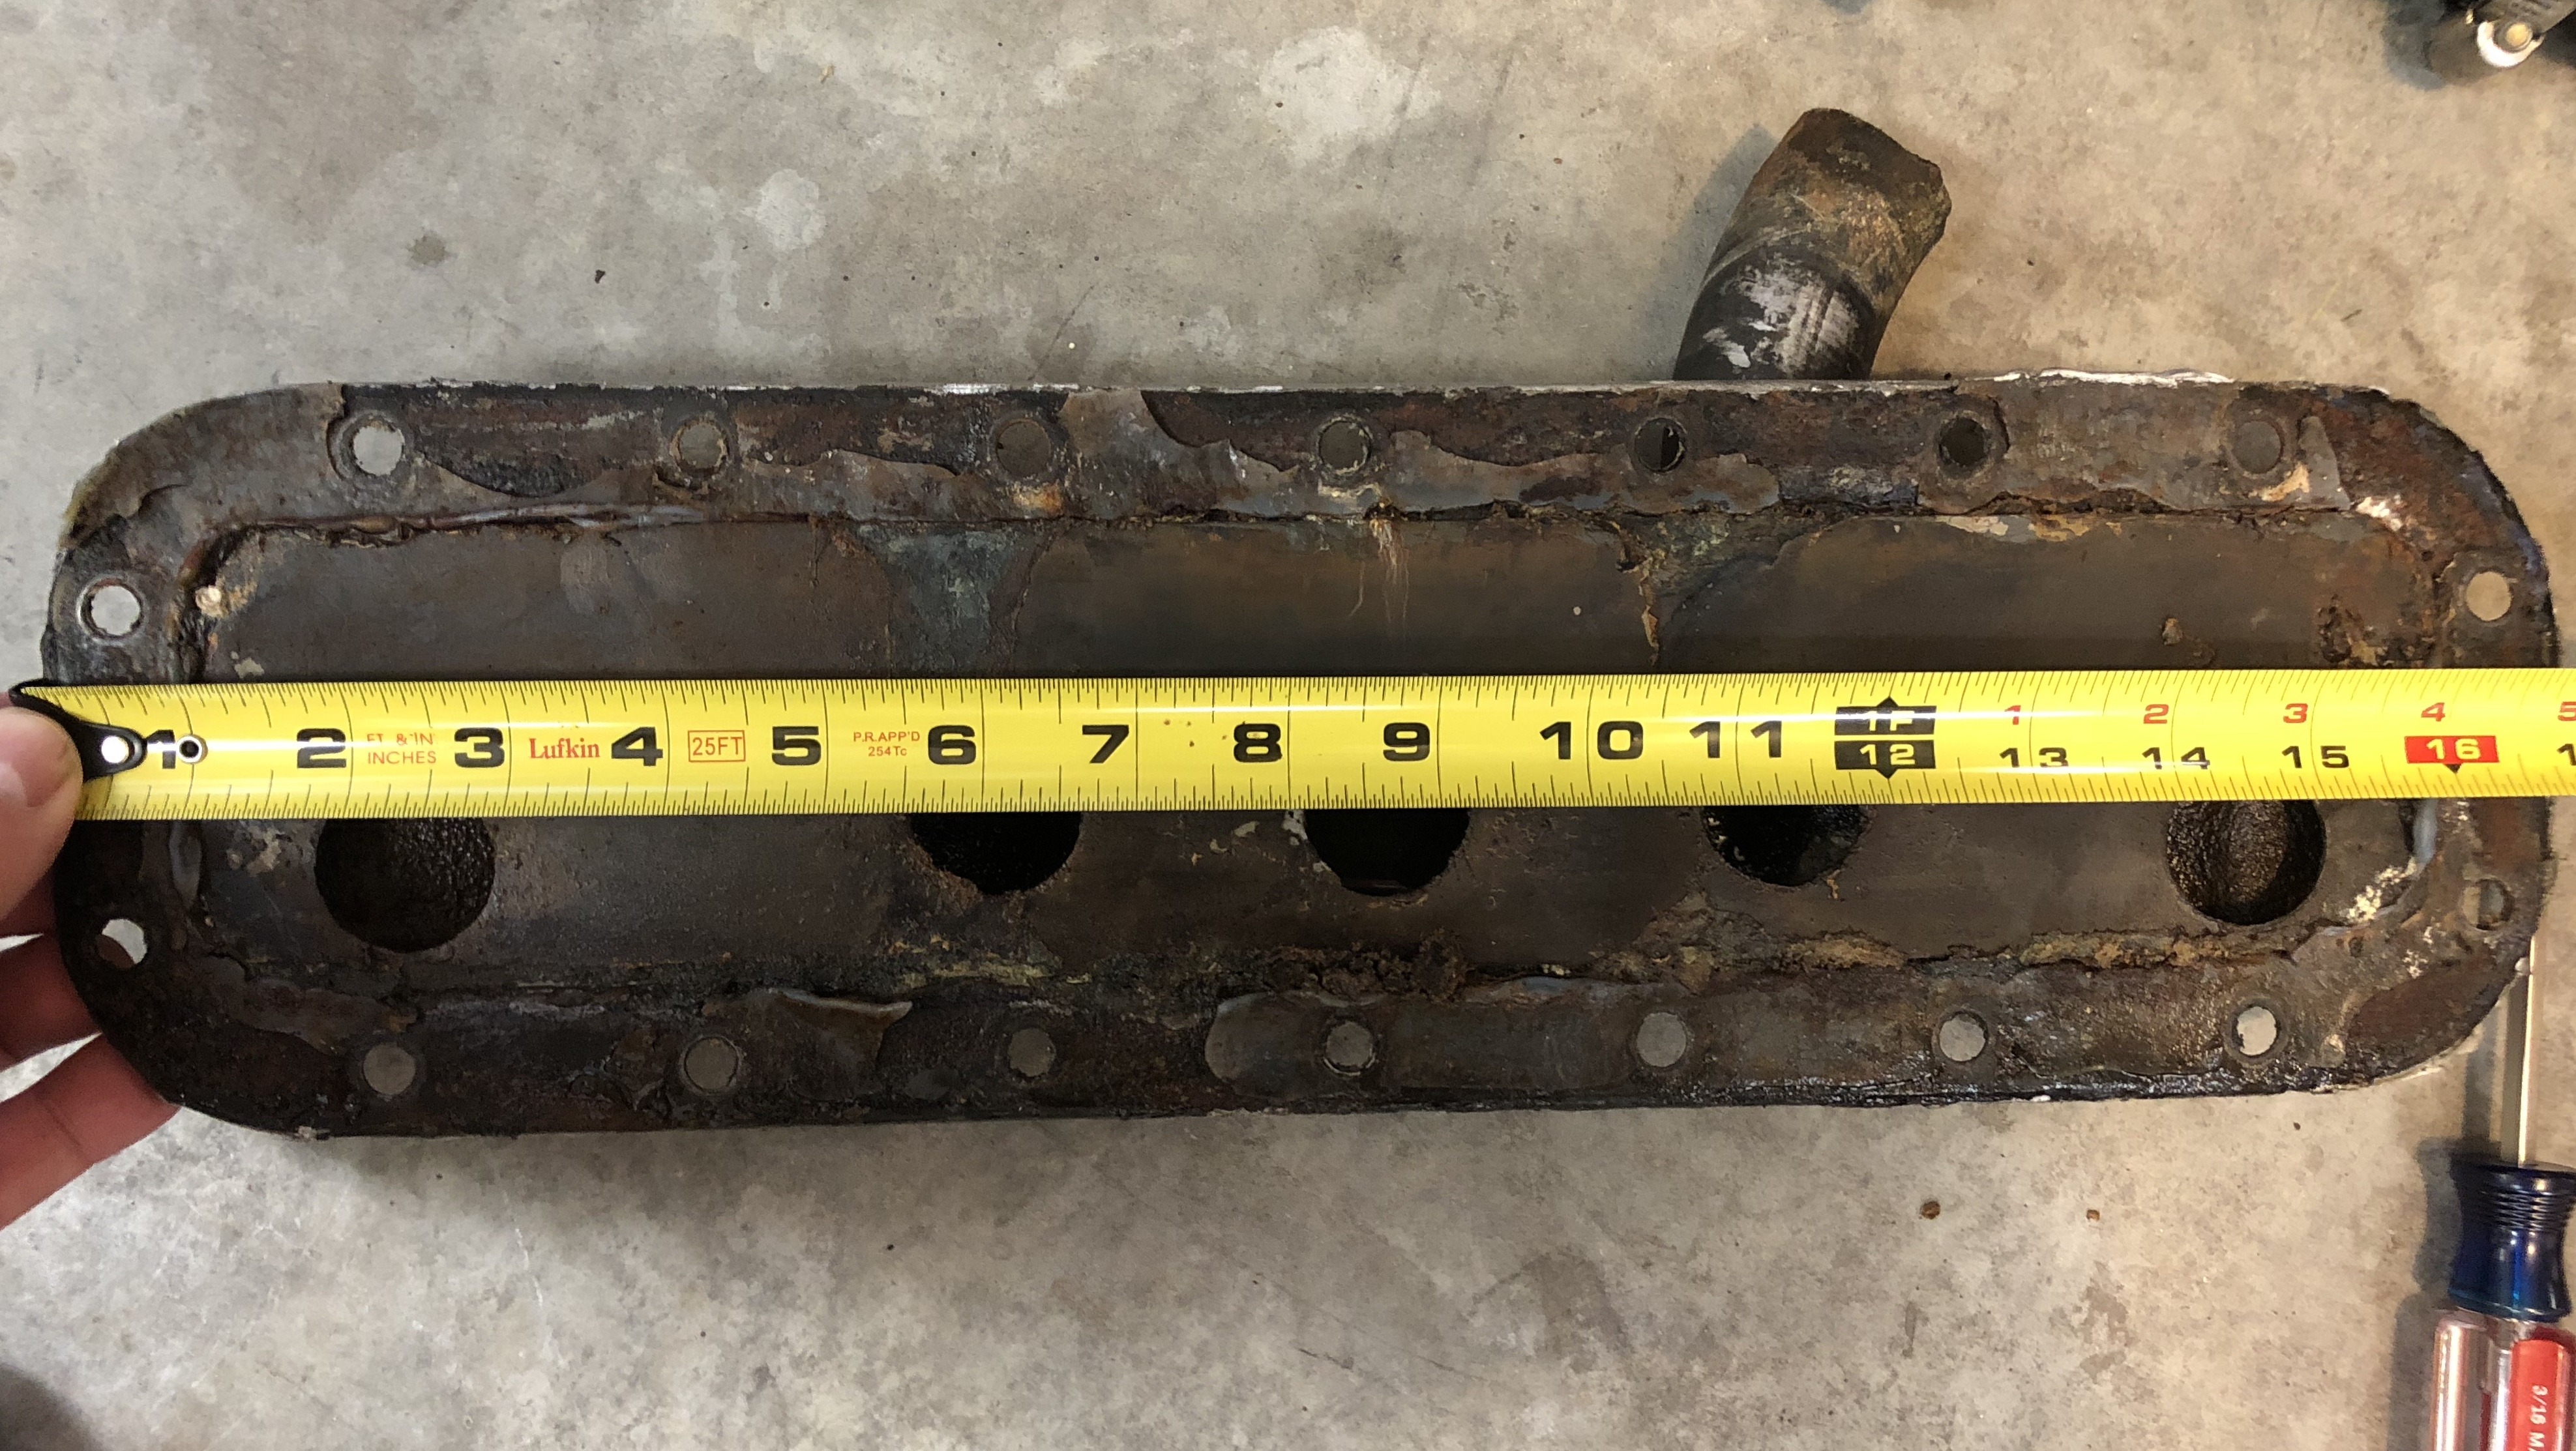
When one looks at the placement of the holes, the hole at the 6” mark (in photos) is blocked by the vertical support of the block also at 6”. I have a hard time believing that was engineered that way. The holes are approximately 1” and perhaps that is the pattern but I’m wondering if this was a DIY repair?
Are there photos of the factory factory plate with the holes? Preferably with a tape measure going across it to evaluate the hole positions vs my unit.
Another question: was the plate with the holes a separate piece or was it welded together with the cover or something else?
I’ll have to to clean up the water jacket & see what else it might show. Check back later....
Thanks again!
0 -
Great discussion! If you are thinking the engine block engineering staff interacted with the “tin” engineers you are thinking how most folks would. Unfortunately there was little cross talk and that which occurred was only implimented if it was a money maker! The Stepdown 6 Engines are an example of how the designer of the water tube did not line up the water release holes properly. Later engines show how much the water tube hole placement changed to the better. Good luck getting your engine to the standard you desire.0
-
I've searched up some old threads that will help you including images of a NOS one:
https://openforum.hetclub.org/discussion/comment/207134#Comment_207134
https://openforum.hetclub.org/discussion/comment/195046#Comment_195046
0 -
I pulled the water pump & thermostat housing & as I thought there was no thermostat & the bypass wasn’t closed or restricted.
I’ve been “told” that that can lead to overheard as the coolant doesn’t have enough time in the radiator to properly cool & some of the engine coolant ends up going right back into the water pump & block, further creating heating issues. If the water jacket isn’t providing the cooling it should either, then it was a good thing I opened this system up & see what’s going on.
Now 1) where can I get a 160 or 180 degree bypass thermostat for this old girl, 2) how can I confirm the holes I have in my water jacket to a factory unit, 3) is there any modification to the water jacket or elsewhere I need to do to get proper (all cylinders) cooling in the engine, 4) what do I need to do to secure the plate with holes into the jacket, or do I even need to do this, 5) find replacement hoses, shiny hose clamps & probably a new radiator cap, 6) buy any gaskets I don’t have already and finish cleaning & painting these items for reinstallation. Am I missing anything here?
I cleaned up the water jacket mating surface & drew (blue sharpie lines) approximate lines for the blockage when mounted so everyone can see what I’m talking about here.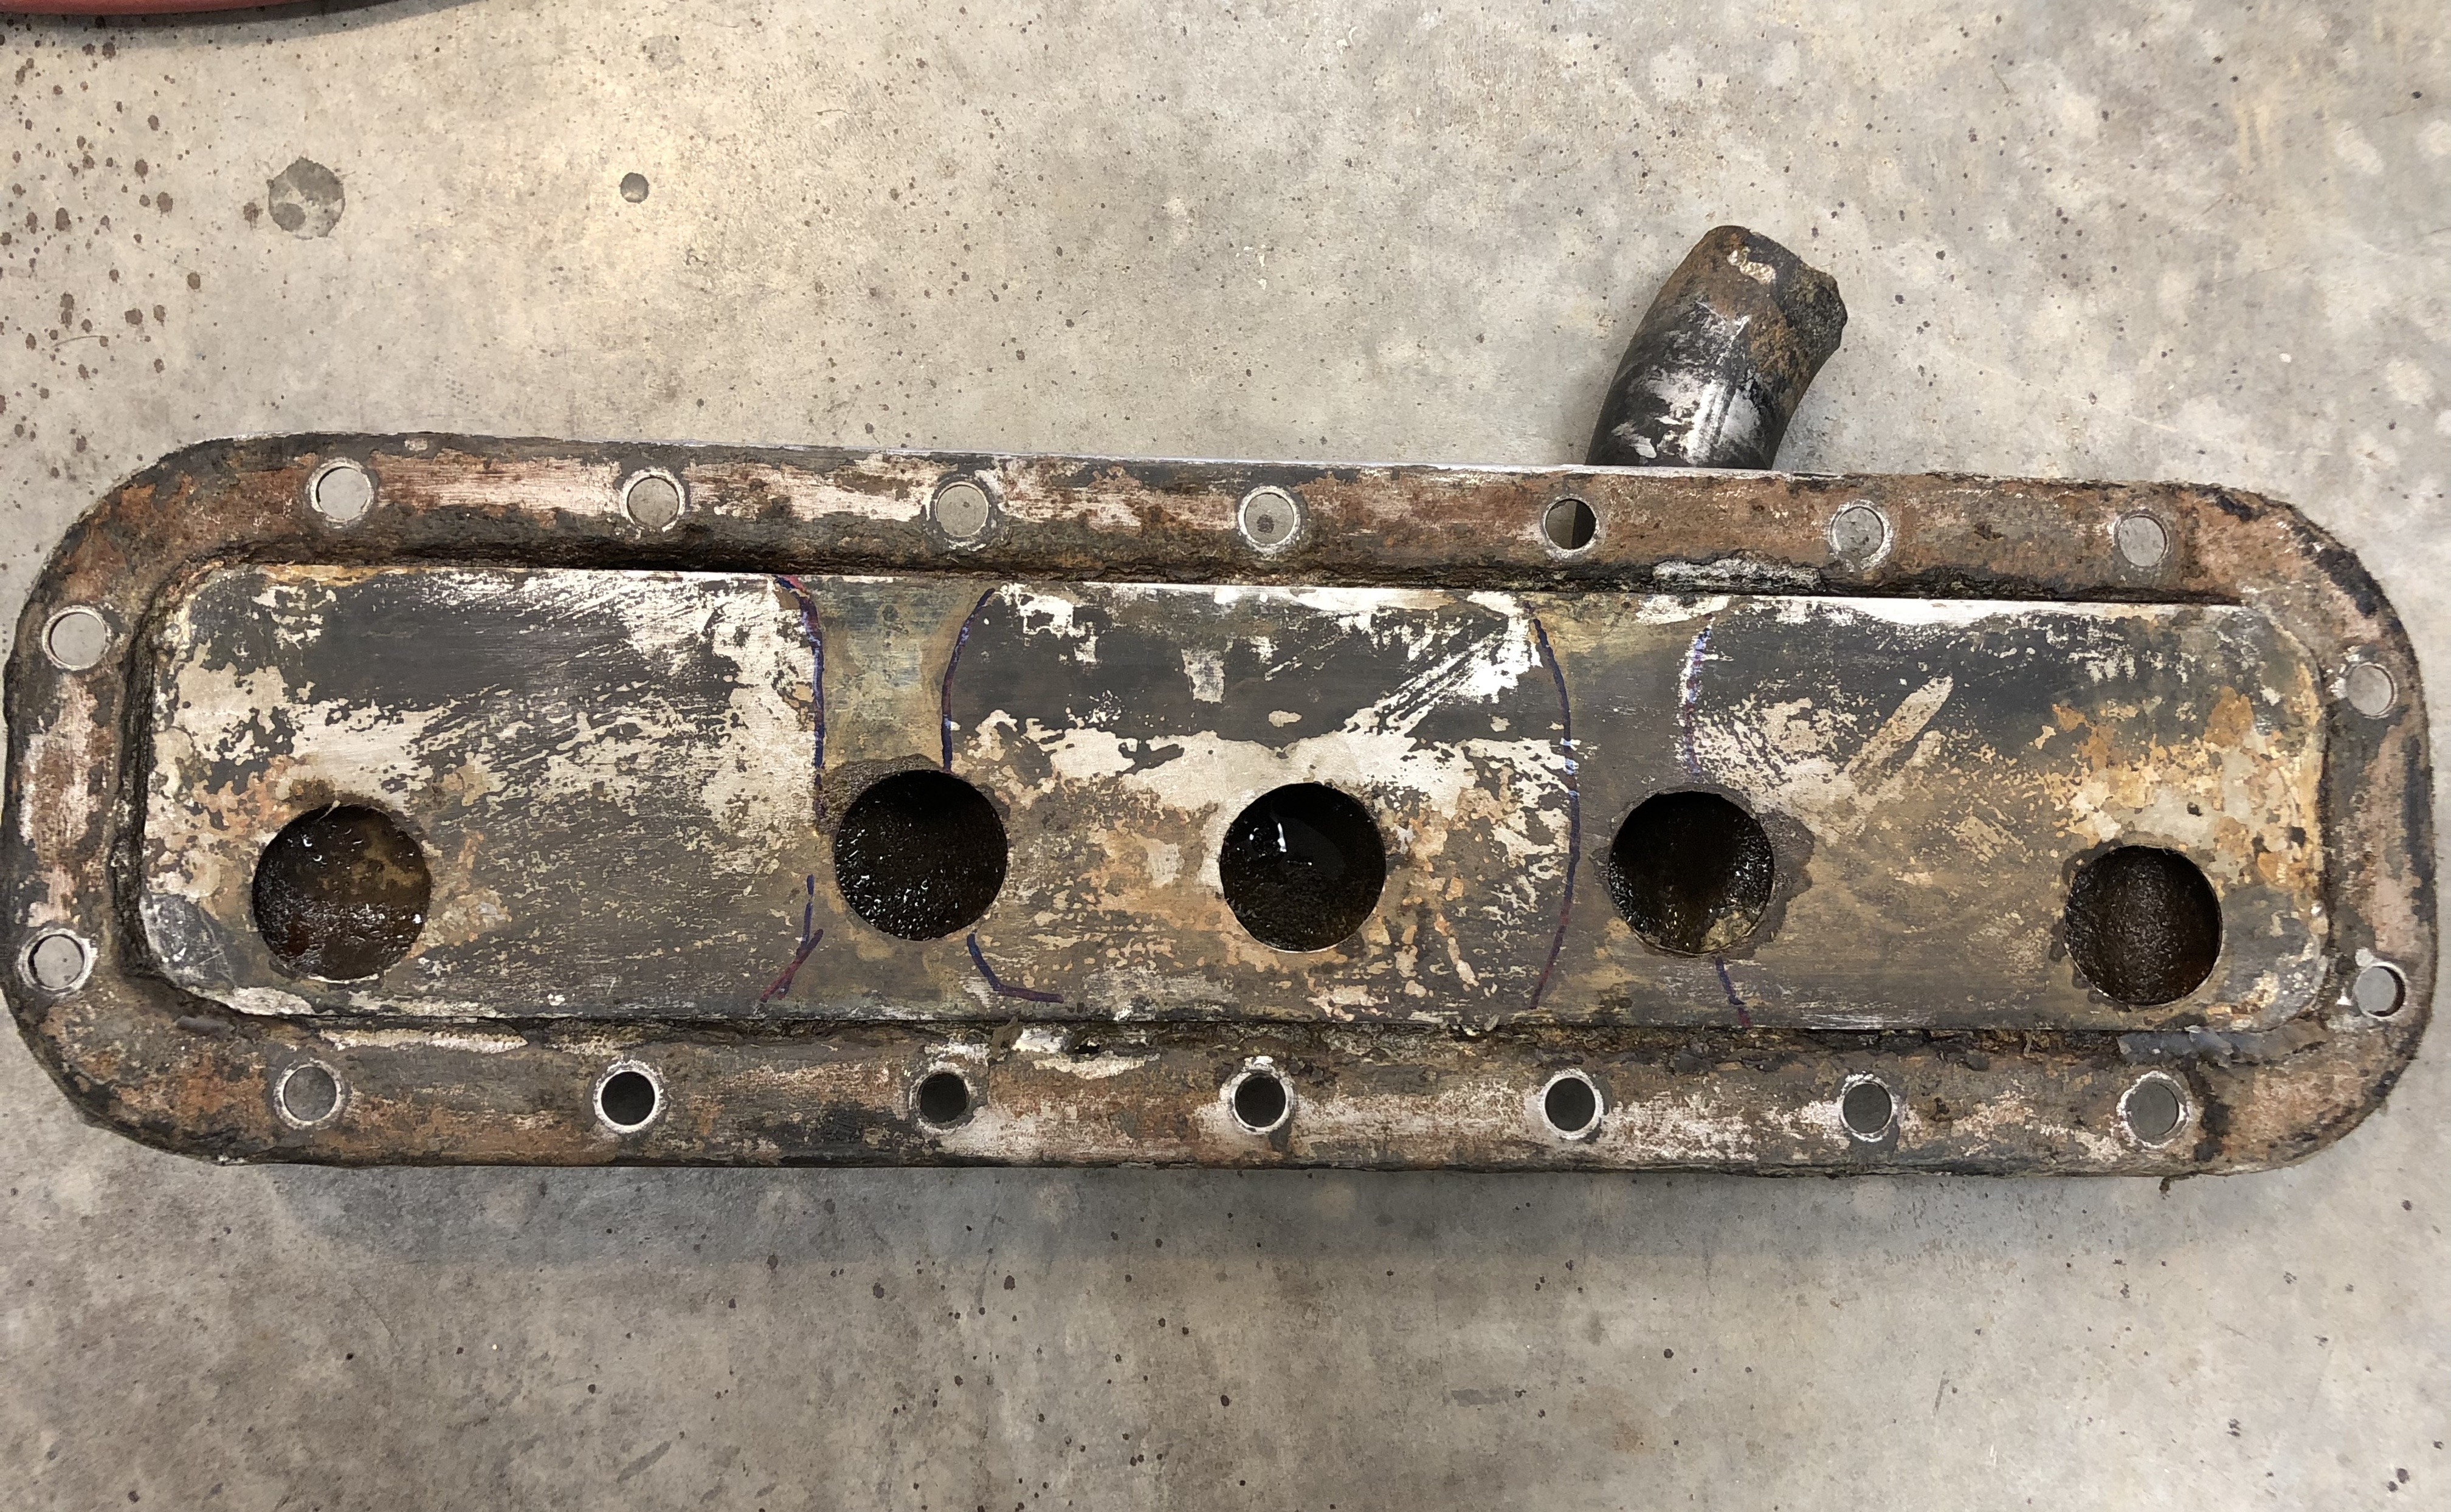
0 -
i have used old gun cleaning kit to clean up similar in the past.
But dont be afraid to get wet as you will need to flush and re-flush with a good pressure hose.0 -
Great help everyone!
Ken, what year is that NOS one? It’s ddf different than what I’m sporting. Looks like 1/2 my hose neck is also missing!
Is it safe to assume these aren’t remade? If not I suppose I should try to restore this the best I can...0 -
No question that I agree! I’ve always used distilled water & good green coolant, within the first few weeks of any old car I’d bought. The difficult part is not knowing if it was done correctly before.
I’d also add that much more frequent coolant changes is cheap insurance for the preservation of our favorite old cars.
Does Les anyone have a good water jacket they’d be willing to part with? Ken? I also need a bypass thermostat.
I think while I’m at this I’d better make sure I have blades in my water pump! LOL!!!
0 -
Definitely need a new water jacket!
When I went to cleaning this up, it became quickly apparent that the corrosion was the only thing keeping coolant from leaking. The many holes reared their ugly head.
Anyone know where to look or who may have one?0 -
take it to a radiator shop get them to fix it. They should be able to patch it up or cut the mounting face off and fab up open box out of an old top tank then stick em together.
or if you want to take the first steeps into welding then try soldering it up. From the inside. Patch with copper where needed.0


Categories
- 36.6K All Categories
- 85 Hudson 1916 - 1929
- 11 Upcoming Events
- 73 Essex Super 6
- 28.3K HUDSON
- 511 "How To" - Skills, mechanical and other wise
- 989 Street Rods
- 150 American Motors
- 170 The Flathead Forum
- 47 Manuals, etc,.
- 71 Hudson 8
- 40 FORUM - Instructions and Tips on using the forum
- 2.7K CLASSIFIEDS
- 592 Vehicles
- 2.1K Parts & Pieces
- 76 Literature & Memorabilia
- Hudson 1916 - 1929 Yahoo Groups Archived Photos