'49 Nailhead Hudson
Comments
-
You sure have been busy.
The nailhead looks great with the finned parts. I'm partial to finned engine dress up parts.
Looks like the Buicks flames could use some pinstriped outlines. Let me know if you need a good striper.
My good mate Gonk can hook you up.
I almost had the 29 legal, but stuck on a Damn anti rattle spring for front discs.
It's out of a 77 to 82 Toyota Hilux,, and no wrecker in the country stocks em, and even tried Japan, but no cigar.
I have a spring maker in Chch ready to make one, at big expense.
0 -
i may know of one. Give me a day or two. Think my neighbor might have an old Hilux out in the paddock with all his other old parts cars.
0 -
Thanks Alex.
I have a friend in Cave who had an old chassis, so I rung him, and he sold it a year or so back.
Don't know if 4x4 the same as a two wheel drive, which is what it's from.
I can supply a pic if u like.0 -
went and had a few brews with him last night. not sure the year but its his sons & apparently he has plans for it.0
-
Thanks for trying.
0 -
well i will start off with the fact that i took a week or so away from the project. Didn't want to walk in the garage or acknowledge the existence of the motor or trans.
Using the ol if i dont see it then it never happened reasoning.
All this was brought about by the rather unpleasant sound of cast aluminium cracking. Now if you have never had that distinct displeasure of hearing this then im jelouse.
So the story goes i was having a great ol time. tunes blaring, woodstocks sunk and it seemed like the best time to mate up the trans to the engine.
Pop some fluid in the torque converter & slip it on hearing the clunks as it fitted on snugly.
Place the newly worked trans on a trolly jack and position it.
Easy i think and start tightening it up. CRACK!!!
I freeze as heart skips a beat.
Trans bellhousing around one of the bolt holes has a crack.
I didnt swear or curse. just stared at it in shock. laid down my tools. Stood up. collected my tools and put them away then exited the garage to find a beverage. My dearest who was helping balance and hold stuff had the sense to not say a word as i went about these duties in silence.
So guessing the dowls didn't line up as well as i thought.


Not the end of the world. Can be TIGed back up. Just frustrating, annoying and plain old Grrrrr......
This was done a few weeks ago. I have taken a lesson from our cat. that being ignoring it. So its still in the same place i left it - that being middle of garage and even though i walk around it i have chosen not to look at it. This method seems to work well for the cat. "I ignore your existence and you reward me with temptations"
So I have moved on from that debacle to the ignition system.
I dont like the HEI nailhead distributors. Big and ugly. dont look old school for my tastes.
I had two old GM Delco distributors. Media blasted, reconditioned to make one good & smooth operating with no end play. New cap and rotor along with a paint job and its looking better than new. Will use the other as an oil primer once i get to the fluids phase.
Ripped out the old points and condenser and have put in a Pertronix Ignitor II electronic ignition unit. So should never need to worry about that side of things again. Although i have kept the old parts to keep in the cars tool box just encase the new electronic ignition ever plays up. The conversion is all done inside the distributor so i can always swap back with no issues.
Also got the Pertronix Flame Thrower II coil. Its like 45k Volts so way more than i need i guess but i decided to get the coil made to work with the new electronic ignition. Black of course ( i really cant help my self) yet the thing is going to be covered by the finned metal coil cover anyways.

For leads i went with Taylors ThunderVolt 8.2MM custom wire kit. things run at 40ohms so will carry the spark to problems. Nice and black so wont be an eyesore under the hood. The lengths of wire are ubber long whats good i guess. I sure did have alot of left over wire after cutting to length & crimping all the terminals up. Only down side with the kit is that it dosnt come with a crimper. But have a MSD one so that wasnt a biggie. The wires will be out of sight mostly due to the finned spark plug covers. Also the old Nailheads have the dissy at the back behind the intake so the duel carbs and airfilter will hide it all whats great. tested my leads and ALL had 39ohms or lower resistance. think the lowest was near 37ohms.

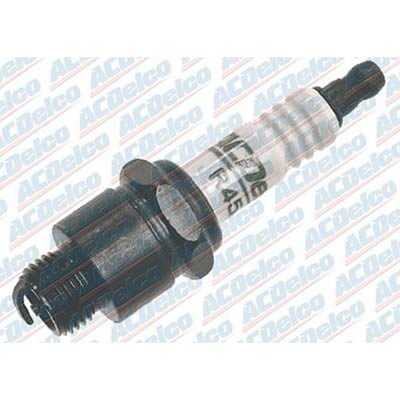
Alot of people seemed to recommend the old AC Delco R45S sparkplugs to work for Nailheads. So i went for those. The R45S are a tad longer than the normal ones.
And thats basically it for the ignition side at the moment.
As for the car it self. I need to get in contact with Flockie to talk over the plan of attack i guess. With luck he has had a good ol poke about underneath and came up with a few ideas.
Im chaffing at the bitt to finally get things going. Patience has never been one of my strong points - a trait i believe i picked up from my father then compounded by working in ICT where everything progresses fast if not instantaneous.
Constantly telling my self slow down (or i may break something like a transmission...)
0 -
Well that sucks.
It's all part of the modified car game, and you did well not to throw your toys outer the cot.
I learned years ago, to walk away, ignore the issue, untill you feel ready, and things have a way of sorting themselves out when you do this.
Sounds like you have a wise cat.0 -
My dual quad intake arrived just before Christmas & i only recently have had time to look at it and the engines induction.
So the intake was one of the first things i ordered way back in August. I was told it would take 4 - 6 weeks to ship. four months latter and many many emails it finally arrived.
Prior to buying the crudson i was toying with the idea of Nailheads and had seen the brand Eelco as being the best intake for the old engines, better HP gains etc than the even the Edelbrock manifolds or six carb setups. Not to mention they just look bleeping cool. So off i went and brought one. Wasn't until months latter and no intake along with a HUGE list of excuses i did a bit more research and found out the manufacture had an extremely poor reputation. mostly for taking the cash and never delivering the goods. a few threats of contacting paypal got the fire under him and the "motorbike accident", "surgery" and god knows what else all suddenly cleared up and goods sent.
The intake is all i wanted and more. Extremely happy with it. Its so light weight when compared to the factory single 4brl one i had.
Nailheads love alot of carb. So two Edelbrock Performer 1405 carbs delivering 600cfb each will sit on top of the new aluminum intake. Got these from Summit when they had a sale coupled in with an instant manufacturer rebate meant i was able to get the two carbs at about the same price i could pickup a single carb for here in New Zealand.
Obrein truckers sorted me for the washable airfilters along with the old school finned cover. Got to say Dennis Obrein was great to deal with. Extremely helpful and answered all my emails fast and fully. gave options and suggestions. top man in my books and I would happily shop there again.
Quick pic of the induction components before I got busy on them all.

So first thing was cleaning up the intake then painting it. Me being me i got a lil eagger and even though i knew it was not the best weather/temp to spray i still went ahead and sprayed. I know i know. Middle of the night when its cold and raining out should be a no brainier for not laying down paint. Still I blasted down my primmer coats and was happy enough with it i went ahead and splashed a few coats of black on it.
Went off to see my old man for a few days the follwing morning but had a quick look at the intake before leaving and was relived to see it looked fine. I decided it was for the best that i was away for a few days to really let the paint cure otherwise i would of done something stupid no doubt. I also had planed to pick up the needed intake gaskets when i was in the city. No luck. All the car shops had never had one in and some had never even heard of a Buick 401/nailhead. Sigh... looks like i will be ordering them in. yet another holdup.
Got back and popped the carbs, progressive linkage & fuel line on. Need to get some Vac block offs to cover a few unused ports. also the main PCV port on the primary carb(rear carb) is so close to the secondary/front carb i doubt i will be able to use the port & im thinking I will have to block it off as well. The Edelbrock carbs have a vac port at the back of the carbs meant for power brakes & im thinking I may be able to use this. Would suit me best as the PCV is located at the rear of the valley pan between the intake and distributor so this would mean the shortest rout if i use this vac port. Anyone here used the rear vac port on an Edlebrock for PCV?


And of course i couldn't help my self and popped the setup on the engine to get an idea how it would look & to check clearances etc. Its all a bit grubby but thats to be expected. im pretty stocked how it all looks. cant wait to turn this thing on \,,/(-.-)\,,/


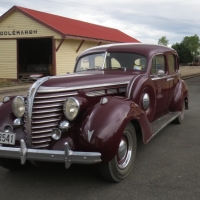
And even though its not related to the the Hudson here's a pic from yesterdays backroad explorations in the Buick. Took us through gorges & passes to some decent secluded river swimming spots then all the way to the ocean and sandy beaches. Nothing like a sunny day cruising with ya missus in the middle of the bench seat. Tunes blasting and a retro cooler of goodies. Pull up for an ice cream or to get fresh fruit from an orchard and watch from the shade of a coolabar tree as people congregate around the car taking selfies & pics. Also stumbled upon a Fair - same old crap really with little of interest.

Happy New years guys
Alex
0 -
Ahh what a weekend. Honest last week sucked with one day being a family funeral then the other days working till 8:30 each night as I worked to a time frame that is still closing on me in a most desperately horrid fashion.
Yesterday (Saturday for those future cyber readers out there) in a semi hangover state it was deemed a most suitable idea to jump in the ol 52 Buick and cruise along two and a half hours of highways around lakes, gorges and wide open roads to a small central Otago NZ town called Cromwell. Calls of fame being some giant fruit statue thing, a hydro power lake, vine yards and for the last few years a car show attracting a wide following of people from around the South Island NZ.
A good chilled turn out of 600-700 cars i guess. Some pretty cool cars. But the inspiration i was looking for wasnt present to tell the truth. I was after interior ideas. Paint ideas. tail light ideas. and well... ideas in general.
This fine day was followed by more liquid refreshments & fish n chips -a kiwi classic and mighty fine cuisine in moderation when coupled with a Mexican blanket, a good woman and pumping tunes in summer.
Saturday done and pass resulted in a overcast rainy Sunday. Fine day for garage mayhem really. And that is what happened. With a general check over the 52. not much to report. rock steady. Following this beverages where served and car chats between the better half and my self progressed. Good times chatting over cars we saw yesterday, looking at photos and being those critical bastards as we picked at bits n bobs from each car.
Flockie from Flockies Kustom Chassis & Rods flicked me a most welcome text saying basically to check facecrack. Faster than a speeding ticket I was online. will note as fast as i was "she" was going "FUCK ME! HE CHOPPED IT!" before i could figure out whats what on my phone. beating me to the line by a good 30 sec. ( i work IT and got thrashed)
Measurements taken. Flockie in the background getting ready.
Available realestate is promising upfront. Checkout that sweet ride in the background.
Diff out. Looking pretty good under there for the age of the beast.
Ass end is dropped on out. But man that crap up front just aint doing it for me. Wonder how that can be fixed.... ? Something that makes sparks maybe?ps dont mind the slide in the background. a reason to all madness. last i was at the shop he was fixing an early 50's F100 hood that had been used as a sled for the kids behind a truck in the fields by the last owner.

Touching wheel arches. Damn those big old guards can swallow up 28 inches of tire. I see this and just grin. Of course bumpstops and bla bla bla will add a few inches but still. BRUTAL! Side pipes will be on there as well to make it that lil bit lower...
Im thinking a C Notch is in order my friends. Check out below pic and tell me what you think. God im almost tempted to say tubb that fucker and get some serious fats on the back. Unfortunately i doubt this will happen though. those guards are a pain to get fat tires off but we will see what can be done.
Gud damn son! Low enough?
Front off, ass dropped and sitting pretty.
This is the pic that got the missus screaming "he chopped it!" over and over with squeals of glee & frantic social media postings. This generally only happens normally for lipstick releases from her fav brands, cats, new episodes of Vikings and leadsleds in general. So a big TICK in the only female perspective i care about.
I plan to use this photo to combat the "maybe i should curve your spending on the car line" should it rise its ugly head.
Top job Flockie. Thanks Ash for the pic's. He has a Truck he was air bagging today at the same time Flockie was taking care of business.
o.o i have a new desktop wall paper.
Alex0 -
Car show looks like it was a great day for it, considering we are having the crappyest Summer I Think I've ever experienced.
We're only getting one nice Summer day, to every week of rain up on the Coast.
Maybe next year, you'll be the only Hudson at the show.
Sure looks like you'll have it done at this pace.
My springs are made, at a cost of $170 for three. Only need one, but three was his minimum.
They will be here this week, so I'm hoping to be driving before our rain soaked Summer ends.
I hear on the wireless its been snowing down South, WTF?
Here's a view from my front lawn, of the lake across the street last week.
That's normally a dog park.
My lawn art, is a 1928 Cadillac.0 -
i/we had planned a bit of a road trip for this summer.
Original plan was Wanaka. west coast. nelson west coast.
Obliviously this didn't happen due to my obsession with the crudson although i do like to add in weather and earthquakes as a plusable explination.
Anywho i have promised a road trp WILL happen Late Dec- early Jan this year.
Me being a cultural sort i think its only right to stop in to see such an art instillation.
so Springs are ready? When do we see the pics and progress photos!
Alex
(tried my best to not comment on the lack of sun shine unless i jinx it. >> mates say it will start Feb when kids start back at school.0 -
Yes, springs are ready and should be posted off to me on Monday.
As to the lawn art, by the time you call in, it'll probably be running a Holden V12.
My next part of its evolution is to build a wooden V block to take two Holden six heads.and
I can't wait to watch baffled car guys scratching their heads over that.
Hope you don't mind, here's a pic or two, of its beginnings.0 -
That car is going to be low, and the nailhead is looking fine also.0
-
Rolled into Flockies Kustoms today after work to have a yarn about the important things in life... cars.
Focusing on the rearend at the moment. To gain the air out/low height and drive height we are after means getting the diff up higher.
This will mean more fab work than initially expected but really it aint no great surprise to tell the truth.
C-Notching the chassis rails about 4inch and then raising part of the floor in the boot (trunk for you yanks) to get more clearance for the diff housing. Also may need to alter the floor slightly under the rear seat for the two piece driveshaft.
We are looking at a ride height of a minimum 100mm (4inch) maybe an inch or so higher if needs be. Then of course we can go up or down from the bags when the mood suits.
As you can see in the below image there is sweet fek all clearance and the ride height is still to high.
A slightly better image maybe.
So those rails are looking at getting about 4 or 5 inch C-notch. So up inside the trunk a bit.
On a side note the wall thickness of the Ridetech 4Link that will be bolting up in here is much better than expected.
Just above the center diff housing is a small raised section of the trunks floor. This will need to be raise up a bit further to get clearance for the housing. Still should be enough clearance on the ledge for the airtank etc. So no great loss really.
Looking at running the exhaust under the diff.
In the above pics you can kinda see just in front of the diff (opposite side than we see) that the seats floor pan is looking like it might just slightly be in the way for the drive shaft. May need a little massaging.
Another issue maybe changing the tire. Will give that better thought once we know where everything will sit better. The diff is slightly narrower than stock to help with this. Also pumping up the bags will help a bit. Doubt some unbolting of the diff scenario will work due the exhaust going under the diff.
All i can say is im happy that my insurance comes with free AA roadside assistance nation wide. AA stands for Automobile Association in New Zealand NOT Alcoholics Anonymous. Would be rather amusing to dial for a 12 steep program to change a flatty stuck in a wheel well.
Now this is all nutted out its time to get the certifier involved just to make sure he is happy with it all. No point cutting then to find out it wont meet cert. Hope he gets out there this week but i doubt it unfortunately. Im bleeping eager to get Flockie welding shit up.0 -
Got asked if i have any pics of the car from when it was in storage.
The better half did a quick search pulled these off the interwebs.
Since it was off the road since 1969 im guessing it also had other older accommodation at some point.
Three owner car so i guess the person who took these was the second owner who had it for a handful of months & we purchased from.


0 -
Does the Kiwi number plate mean that it was always a NZ car?
0 -
The original reg papers i have are issued 1950.
Imported from the states and converted to RHD then.
those are the original plates from 1950.
The farmer imported two. One for him self and one for his son. I have the sons one. lists his details on the ownership paper (otherside/back of reg papers)
With these and the old photos it means i can use the old black plates and dont need new plates.0 -
Guess you don't need the trunk, seeing how it's a four door.
You can throw a chilly bin and a change of clothes on the back seat, when you drive it up next year.0 -
When Flockie called saying come over and rip out the seats n stuff cus the car will be going on the rotisserie an image of the crudson slowly rotating in a giant BBQ flicked through my head.
What can i say i love BBQ and for the last years I have done rotisserie turkey with good results at xmas. A bit of Apple & orange glaze with a touch of manuka smoke and yeah good times.
Of course this isnt what he had meant but i still find it a rather humorous image.
Saturday the better half and i rolled up with rubbish sacks & got to work. Front seat was already unbolted so removing the seats was simple. Rats really had had a field day in the seats. stuffing, crap & walnut shells littered every inch of the interior.
Keep im mind we already had filled a sack or so of this junk when we did the first clean out. Another half sack was soon recovered with an easy other half sack still lodged in the seats springs. That can be attacked by the vacuum at a latter date.


Door sills also got removed. Will give them a clean up to see how they look. If i can track down some repo ones i may get them depending on price.
Bumper was stripped off. Original thought was to turn the three piece bumper into a one piece. Wield it together. cover up a few old bolt holes and get it rechromed. Maybe move the bumper guards more into the middle to frame the number plate. Re chroming is bleeping expensive and i can pick up a new triple plated bumper from the states way way cheaper. But if i was to do this then i would be staying three piece. Looking at the bumper Im thinking if it was deeper ie the measurement from top to bottom of bumper was larger it would look better as it would look lower. Ideas and suggestions? Anyone know if other Hudson steepdown models had a deeper bumper that would fit?

Rockers - the body panel that runs along the side of the car below the doors also removed.
The right hand side panel had a large rust hole. Was worried it may of also effected the chassis rails behind. Was relived to find this wasn't the case. Both sides of the car showed to be rust free, dry and straight. Although looking inside the boxed frame there is a good 2inch or so of dirt that has accumulated inside the chassis rails. I aint kidding the rails are half full of dirt. Flockie just patted me on the back saying i was going to get very dirty and wet once the car was flipped on its side and waterblasted.
Loaded the seats and other parts we ripped out into the station wagon. Windows down and the car smelled a tad Ripe to put it mildly. Ratty piss n shit seats sure do have an aroma I wouldn't recommend to anyone.
Car will be put on the rotisserie this week at some point.
0 -
On a cold Wednesday a txt msg came across saying the rotisserie has showed up.
What better day to flip the old tank on its side and waterblast the underside.
Assembly didn't take long. Straight forward process of slotting it all together really and checking the pins.
A quick bit of fab work and some welding and it was all connected to the car whilst still sitting on supports.
Sledge hammer was brought into play to whack out the supports.
And the car floated there like some crudy jetsons hovercar. ^^
Releasing the pins it sat level. A good sign. Was a bit worried it might not of been centered and would flip to one side.
We slowly rotated it and clearances worked just fine. Flockie nailed it. Rotated nice and smooth with little effort required.
Now if any of you have even tried trussing up a bird or something on a BBQ rotisserie you might appreciate how well we did getting a huge old car so well balanced. I know for one i have popped a chicken or something on to find it is off kilter slightly as it turns. Resulting in all kinds of grief from worn out motor to drive it to one side hitting the pan as it rotates.
And behold the HoverHudson!


As you can see in the above image - its a tad dirty under the car. Dry as a bone and no rot to be seen. Everything is nice and straight just dirty.
The rotisserie is on wheels so moving it about is a breeze.
With the forks of the tractor it was brought outside for another water blast.
The amount of gravel, rat turds, dust and crud that came off the bottom of the old beast was amazing. Think some of the rails had been solid silt and dirt. Some gravel is still trapped in the rails.
And as much as i would like to blame the light rain that had started i must confess that the reason i got so saturated was my glee i was having as i blasted the shit out of the old car.
Day latter it had dried up a bit.
Will be back out on Sunday to scrape more crud off it.
0 -
Rotisserie looks like the way to get things done, nice underbody on that car, neat to see that view, thanks for posting pics.0
-
Got home from being away scraping off under sealer from the Hudson to have my old man and his mate roll up with 74 Valiant to park up for the week at my place.


Not the 1970 Buick GSX im after but has potential i guess. Two to many doors and a
lot of other work needed.
Anyway. Anyone have any tips for removing undersealer? Gave a scraper and some power tools a go but the darn stuff is rock solid. After sitting so long all dry in a shed its turned to rock and stuck on. Not flaking off in sheets like we hoped.
Other than media blasting?
I hear petrol works then scraper. Any tried this?
Missus cleaned up the old seats. Vacuumed out most of the old rat turds, walnuts, nests and filler from the underside of the seats.
Now need to find a decent upholsterer.


Considering they are near 70 years old they & had been used by rats as a house they are in pretty good shape really. Still stink though. Springs all seem fine along with the frames. So good bones for what ever we add on them.
Originally we thought get a Kanter kit and give it a go but then we would face issues with fabrics not matching the doors and other parts of interior.
0 -
I bookmarked those pics so I can try to steal them to look at when I'm pondering the bottom side of a rusty Hornet.0
-
Maybe i should do a quick vid or something for people to reference.beaverbikes said:I bookmarked those pics so I can try to steal them to look at when I'm pondering the bottom side of a rusty Hornet.
If you need more pics, close ups or measurements etc just let me know.
0 -
Now that some of the old crap is off the rear its time to start the cutting and welding madness! God damn but i am excited!
So as you can gather from the above posts the springs etc have all been ripped on out.
I chose a RideTech Triangulated 4Link to take its place.
Must say im happy with the product. 5.6mm(0.219inch) wall thickness tubing and 4.8mm(0.188inch) laser CNC brackets - included is brackets for the shockwaves. It just feels sturdy and built right. Ridetech sales reps are great to deal with and more than happy to go over everything making sure the right product was ordered for the car, weight, ride height and driving style.
I chose triangulated for a few reasons. One being no panhard being needed to free up room with luck for the exhaust as not much room under the Hudson for two pipes. Another was i could get tighter wheel to fender clearances due to less or no side to side play compared to a parallel 4link. They should give a much better ride quality than springs whilst being able to cope with rising and lowing the car better as well with bags.
Anyway a refresher of how it was once the big stuff at back was stripped off:
Below you can see the old brace and spring mounts. Flockie dealt to these.
And then fabricated a Hudson bracket kit & pipe support to replace original chassis brace for each side. Good thick 5mm plating.
Welded the four brackets to the car along with the ride tech one. Everything is rust killed and sealed up under the plates.
With bottom bar attached.
Bottom bar & mount.
Right hand side bottom bar done.
Left hand side bottom bar.
And done!
Bottom two bars attached to car via with some nice brackets.

Next is notching the chassis to allow diff, rising the unscraped section of trunk floor a bit and attaching the top triangulated bars.
Flockie just sees the gear and the car, visualizes so quickly how it will go together, quick glance at the NZ certification rule book to make sure its good then attacks it.
Check out Flockies Customs Facebook here.0 -
Very impressive work on your Hudson, Its gonna be a top notch car.0
-
Alex,thanks for these last pictures,the cross piece running between the frames that you welded to needs to be fixed on my '54 and I have a guy coming next week to look at it,I can't wait to show him these pictures,it will sure help.I want to replace the whole cross piece on mine. Dan By the way check your email0
-
Hi Alex.
You seem to be making great progress with your project. Have you given any consideration to what you are going to do with the redundant parts. As I said when I visited I would be interested in them and wonder if you could give me a call.
My number is 03 4710632.
Regards
Trevor Dunedin
0 -
hey ya
Yip the parts are still here and more is being added to the pile constantly as I decided to replace this and that. Wont be for a month or so till im ready to get ready of it all. maybe a bit longer as i just havnt had time to work on the car lately.
Have all your details and will keep you in mind.
Alex0 -
Work has been in in the way of late so we havnt had time to do a thing on the crudson.
Got to pay for it all somehow though.
Had a car show last saturday and saw a Hudson.
No idea what year it is or anything and no doubt everyone here would want to throttle me if i was to say my grand ideas of what i would do with such a car.
First time i have seen a Hudson at a show & is the second Hudson i have ever seen real life ( other being my own)
As a side note i think i have decided what to do with my rear bumper. That being putting Kaiser guard/over rider on it. and running the exhaust through the pointy dagmars. now i just need to find a Kasier bumper >< Not holding my breath as they seem to be hard to come by.
Also my old man and his missus just brought a fully restored 61 Newport. Looking forward to seeing it latter this week. looks mint.0


Categories
- 36.9K All Categories
- 102 Hudson 1916 - 1929
- 17 Upcoming Events
- 90 Essex Super 6
- 28.5K HUDSON
- 556 "How To" - Skills, mechanical and other wise
- 992 Street Rods
- 150 American Motors
- 172 The Flathead Forum
- 49 Manuals, etc,.
- 75 Hudson 8
- 43 FORUM - Instructions and Tips on using the forum
- 2.8K CLASSIFIEDS
- 597 Vehicles
- 2.1K Parts & Pieces
- 77 Literature & Memorabilia
- Hudson 1916 - 1929 Yahoo Groups Archived Photos