Project creep, Valve guides, valve job, etc

Well I decided to look into the low compression on cyl 1 and 6 of my 262. Did the dry and wet compression test with no increase.
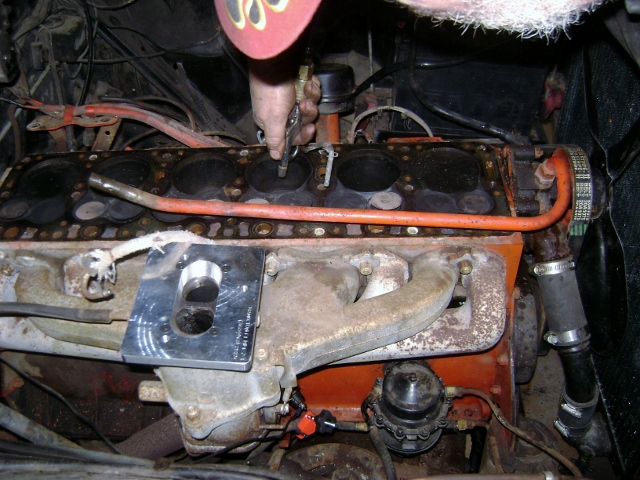
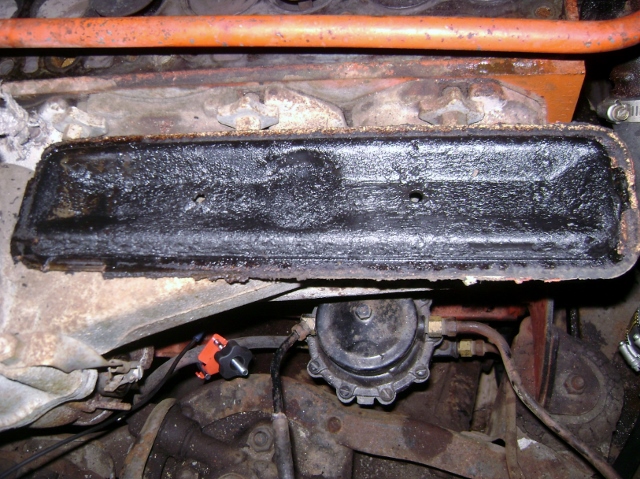
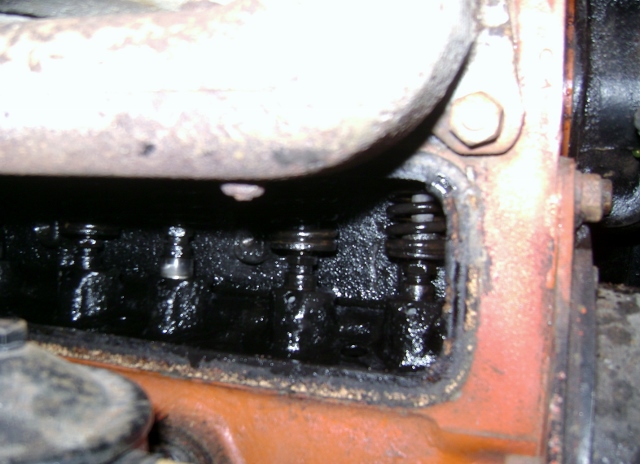
Popped the lifter cover and tried to snap the valves closed a couple times to stake them. No help.
So we were left with the decision to remove the head.
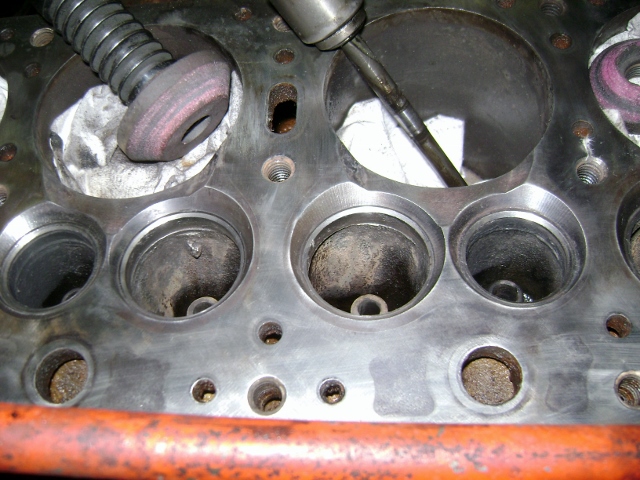
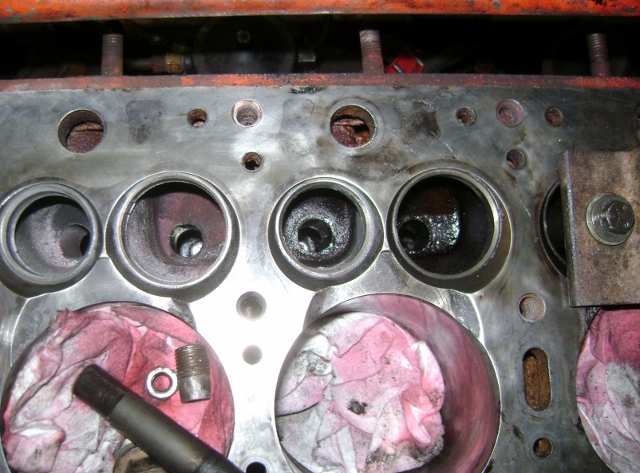
Once removed, all my original suspicions were confirmed. My supposed to be rebuilt engine (some time in it's former life) was really just a krylon rebuild.
I could be wrong but looking at the top of the pistons they appear to be original pin type. They are still numbered with the correct cylinders.
I grabbed my dial calipers and guess what, still standard bore.
I have found so far....
1. Timing chain has about 45* or rotation slack
2. Several valves flop around in the guides.
3. About 20* of play in the distr drive gear.
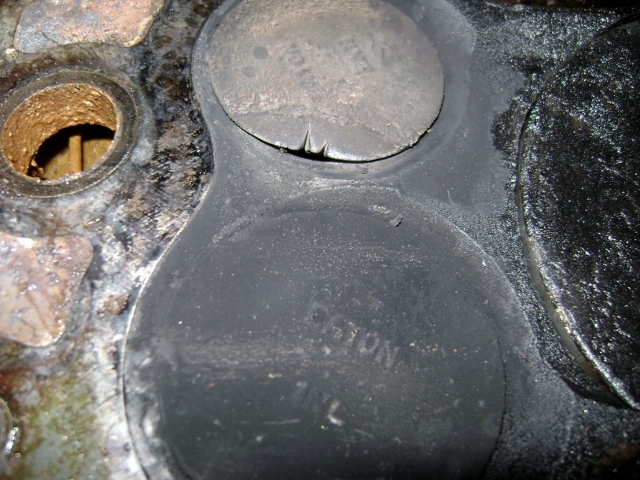
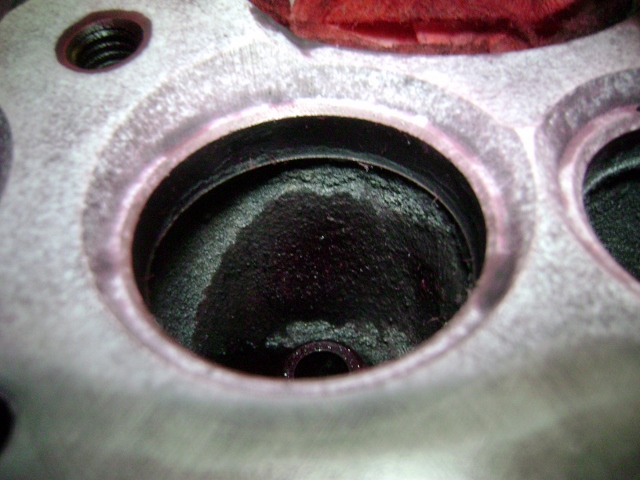
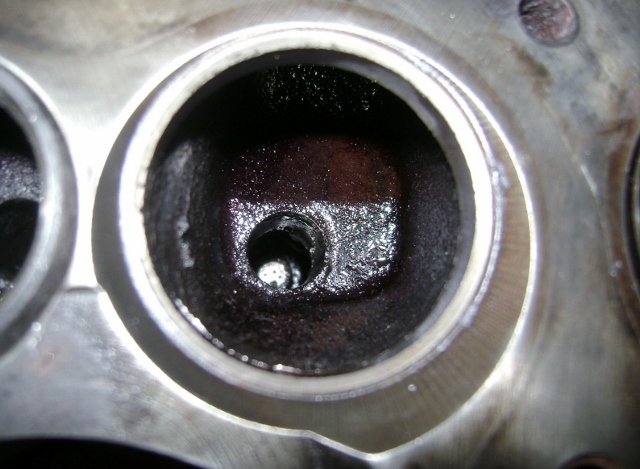
4. Exhaust valves on 1 and 6 burned
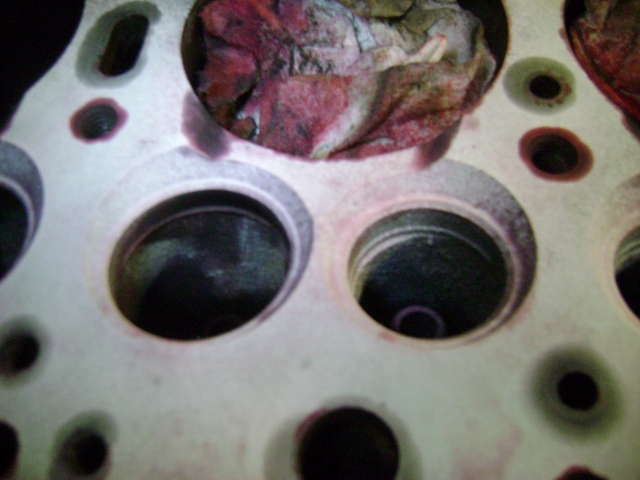
5. Cylinders standard bore with about .005 ridge.
But we did get it to run the first day we dragged it home and even drove it up to 50mph once we got the OD to kick in!
So now were faced with finding a vendor to supply the $1600+ master rebuild kit, pulling the engine for the machine work and then assembling it and dropping it back in.
All just so I can actually finish my EFI conversion, which is all I wanted to do when I bought this thing!
I really hate project creep.
Here's a few pics of the offending parts.
Popped the lifter cover and tried to snap the valves closed a couple times to stake them. No help.
So we were left with the decision to remove the head.
Once removed, all my original suspicions were confirmed. My supposed to be rebuilt engine (some time in it's former life) was really just a krylon rebuild.
I could be wrong but looking at the top of the pistons they appear to be original pin type. They are still numbered with the correct cylinders.
I grabbed my dial calipers and guess what, still standard bore.
I have found so far....
1. Timing chain has about 45* or rotation slack
2. Several valves flop around in the guides.
3. About 20* of play in the distr drive gear.
4. Exhaust valves on 1 and 6 burned
5. Cylinders standard bore with about .005 ridge.
But we did get it to run the first day we dragged it home and even drove it up to 50mph once we got the OD to kick in!
So now were faced with finding a vendor to supply the $1600+ master rebuild kit, pulling the engine for the machine work and then assembling it and dropping it back in.
All just so I can actually finish my EFI conversion, which is all I wanted to do when I bought this thing!
I really hate project creep.
Here's a few pics of the offending parts.
2
Comments
-
Come on Bill, Pull the engine and do it right!
You'll be happy you did and you'll have a running lab for the EFI conversion.1 -
Bill, are you working on your car at 2am? I thought I was one of the few who did that . . .0
-
I agree with Kerry. Re-build it, you'll be glad you did when it's over.0
-
At this point I'm not sure there's another option.
From checking prices it seems my $1600+ will be the beginning cost.
I may have to just swap out to my new dual 1bbl manifold, that's in the mail from another member, while it's tore down so I don't have to waste another manifold gasket later. Guess that's a positive!
If anyone has experience with vendors you can PM or email me if you don't want to post it in the open forum.
Looks like I'll be starting with a master kit, pistons, bearings, valve guides, valves, timing gear chain, oil pump kit, gasket set....
I doubt anyone includes the distr drive gear so that will be added.
Maybe I should hit CL and see if a "good" 308 exist near me....I can dream can't I?
0 -
3rd pic down - is that a valve that's, uh, whatever???? I've bent my share of valves in my many years but I can't recall ever seeing a valve damaged like that. Looks like something went thru that shouldn't have been there.
Hudsonly,
Alex Burr
Memphis, TN
0 -
That valve is good and burned. I had one like that in my engine. When they burn that bad, it's like a small torch burns away the valve material during each combustion. Now that the valve is not contacting the seat right there, it gets hot - stays hot and burns away.
0 -
Yep, pretty typical for a burnt valve.
The hot cylinder gases act like a plasma cutter.
You see it a lot when companies do a really cheap valve job and just cut the valve and seat to a 45* and lap them in.
All valve jobs should be at least 3 angles.
The wider the contact area the more heat the valve retains and the faster they burn thru
0 -
Another possibility would be to shop for a good used engine at a fraction of the cost of the rebuild kit alone.
You could try the WTN, Ebay, even H.A.M.B. or other hotrodders' websites (for those who are replacing the original engine with a Ford or Chevy).
(By the way, you did check Dale Cooper's price list for the master rebuilt kit, right? I just noticed that his are only $1365 though that is not including the lifters, shipping & handling. So maybe when that's all added in, it comes to $1600, but just checking.)
By the way, I just discovered this on the Northern Indiana Craigslist -- sorry, but I don't know if the '50 Pacemaker is the same engine you have (I'm a "stone age" Hudson owner, from Before the War, and have little knowlege of these modernistic Hudsons... And this is a "stuck engine" anyway, so might work no better than yours!)
"I have for sale an engine and overdrive transmission out of a 1950
Hudson Pacemaker, it is a flat head six cyl ,the engine is stuck from
sitting would like $325.00 obo calls only 574-8 five7-27zero9 "
http://indianapolis.craigslist.org/pts/4369776400.html
0 -
A "master Rebuild Kit" is the easy part......just order it. Unless you are equipped to do the rest be prepared for the cost of block cleaning, crank re-grind, cylinder re-sizing, a cam regrind and those lifters to match, a carb rebuild (OOPS! I forgot you won't need that part) and re-surfacing of the head and maybe block, plus a few other things that will pop up. There's no where to stop but if you want to do it right you've just got to bite the bullet and go for it.
I would respectfully disagree that a wide seat "retains heat". A wider seat provides more contact surface area and thus, better heat transfer to the block. There's a limit to that of course so stick to the specs. An important point often overlooked is guide condition, (which you have already addressed) which, if ignored, will lead to premature failure as shown in the photo. I've seen them cut danged-near to the stem. "Run 'er 'til she drops!" some say.
F
0 -
FYI
Doing a complete rebuild is the correct way to do it as everyone mentioned but if your just going to use Mtr as a guinie pig for the EFI system consider doing an 'in chassis' Valve Job and save the rebuild money for a 308 Kit later that will yield far more power than a 262..It usually takes at least 90 days to get Machine work done these days, but usually always longer, and machine costs more than double the 'Kit' Cost..(However, Its all worth while investing into a Hornet Mtr if your after Hi- Performance)...
Suggest check If the pistons have little side to side movement you may regain decent enough compression with a valve job to drive the car awhile even with worn guides. A problem may be finding an electric valve grinder Set these days, but JC Whitney has inexpensive portable hand tools that work pretty well.In the old days most Gas Stations had In Chassis valve Grind Sets (and a Mechanic) because of cars short intervals between valve jobs.
I would scrape the lifter area sludge and maybe pull the pan to clean the oil pickup screen.262's are real decent Mtr's so it probably was never abused so the bottom end brgs probably are in good shape.. Worn valve guides may puff a little out the Draft tube, but I solved that by installing modern (Chevy) PCV System in valve cover to recycle the fumes. Given the play in the Dist rotor suggest remove damper to check the timing Chain sag. Its normal for chain to wear retarding the timing then run sluggish..Ive done similar to my 262's then drove them for yrs using Lead Additive with a little Marvel Oil at fill up's. Just a thought to save a little....
1 -
Bet your water distribution tube is hogged up looking at your water jacket. Mine was 75% restricted. Believe it to be in your best interest to tear the thing apart. Sorry to say.0
-
A little update.......
I have decided to do what is needed to get this 262 back up and running enough to determine the remaining repairs that may be needed with the rest of the drive train.
so I ordered and received:
A full gasket set.
Full set of valve guides
Double roller chain and gears
Bronze distr drive gear.
Set of 6 used exhaust valves from
Still waiting on the motor mounts.
Here's the thought process.
The only real consumable is the gasket set. If I do a full rebuild later then all the parts I just got will still be useable for the rebuild.
If and when I do a rebuild, it would get a full set of stainless valves, just have to decide on stock or oversize.
So with all that said, I started digging deeper.
I did a lot of searches on here and google searches and was surprised that there is not much in the way of write ups from guys doing maintenance on these. I didn't really find anything on valves and guides. At least not specifics.
So this is where I started.
I removed the manifolds as a set. That was fun. But no broken bolts!!
Then removed the lifter covers.
http://openforum.hetclub.org/utility/thumbnail/FileUpload/a6/b76121c1fa89109b534d5b18c5235f.jpg'
.0 -
Jon B, If that is an original Pacemaker engine, it will be the narrow block 232 version made from 48-50. (first pacemaker in 50) The "wide" blocks were later, 51-56.
Bill, about the most organized info outside the Hudson manual that I have seen is Walt's stuff, worthwhile to have on hand.0 -
Kerry,
I need to study the wide vs narrow more.
Some reference make me think the engines are totally different and no parts swaps. Then I read that you swap the 262 or232 head on the 308. So is that just 262 wide to 308 wide or are the heads still common between all sixes?
My decision to not do a complete rebuild on the 262 is because I have a line on a 54 308. So if I'm going to do a full rebuild and machining I figure I might as well do it all on the 308 over next winter.
0 -
yes, heads from wide block engines only for wide block engines and narrow block to narrow block.
the early narrow blocks were 262 and 232. The later wide block 232-262-308 will all interchange but you might be pushing it to put the 232 head on a 308.0 -
Back to the valves:
I got the inner fender, manifolds and side covers off to give room to get to the valves.
All that is in the service manual provided in the online library(thank you).
There has been quite a few discussions on the web about removing the springs, valves and guides but not a lot of specific answers. So I figured I would pass on what I find.
First is the valve springs. There are many styles of valve spring compressors out there.
Most will probably get the job done but some may be better than others.
In my humble opinion(IMHO) I think you need a compression type tool that can be inserted over the top and bottom coils and compressed. So it starts wide and then compresses together.
I am still waiting for one to arrive so I can try it.
The more common type used is a spreader type. It starts with both forks together and you insert between the block and one end of the spring. Then you compress the spring in one direction.
This is the type I have now and was able to remove all the springs.
The problem is the springs are longer than the opening between the block and the lifter. So if you release the compressor to remove it, the spring will still be stuck in there.
So you end up having to leave the spring partially compressed and then pry one end of the spring to the side as you release the remaining tension.
that's all fine except when you think about it going back together the same way!
One tip when removing the valves and keepers. First note the paper towels in the trough to block off the oil return holes. next, with the cylinder on TDC so both valves are closed, as you compress the spring only compress it till the valve lifts off the seat. then use a brass drift or brass hammer and tap the top of the valve to break the keepers loose from the retainer. Then continue compressing the spring. The valve will stay down on the seat.
Everything out of the way.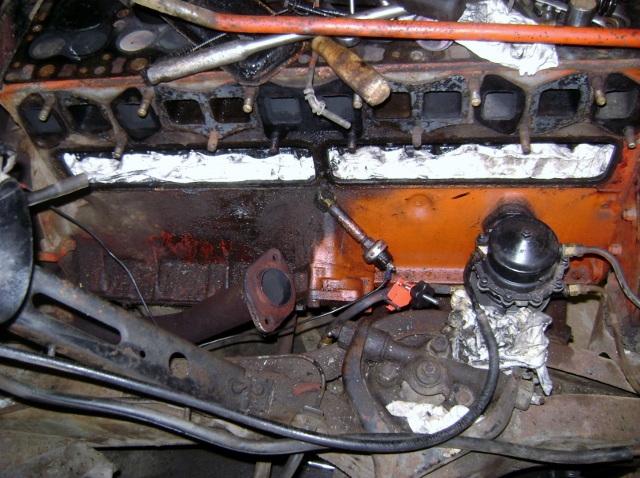
Compressing spring with the more common spreader type compressor.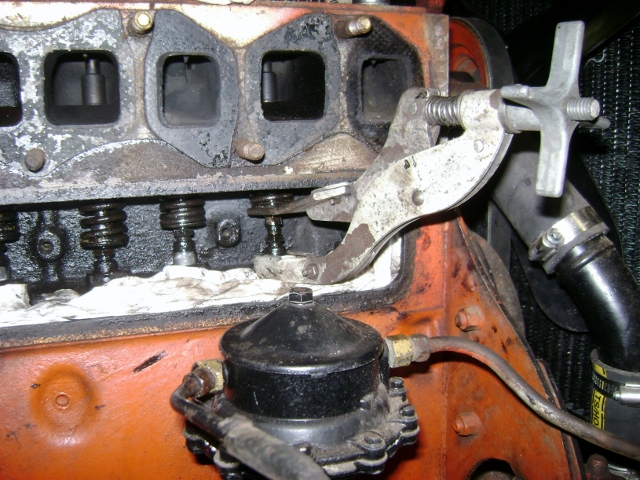
Keepers exposed.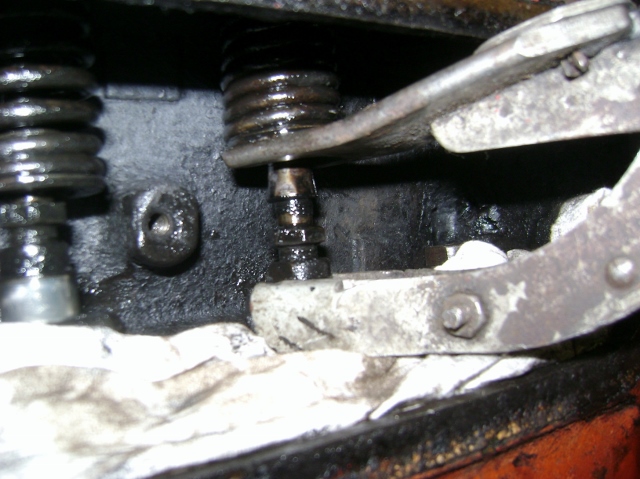
Showing the spring being pried to the side. I removed the compressor so you could see it.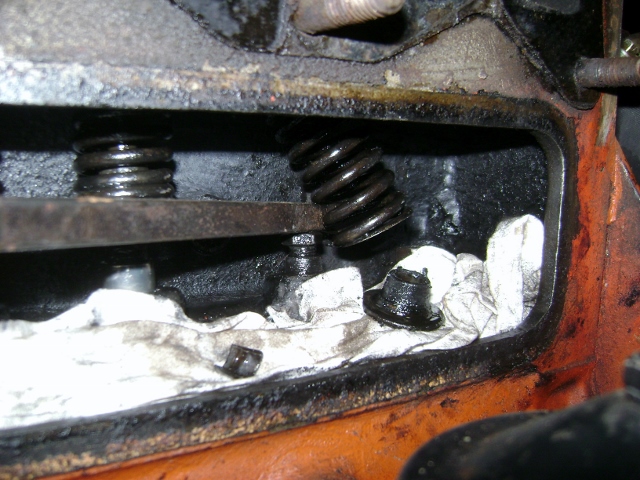
Remaining valves removed.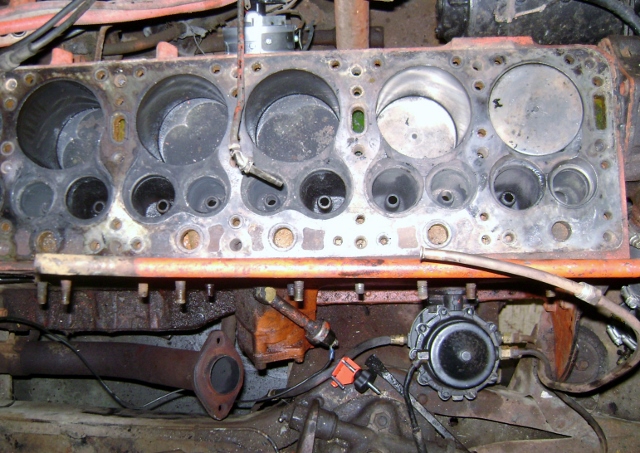
Next we will move to cleaning and inspecting.1 -
yes, heads from wide block engines only for wide block engines and narrow block to narrow block.
the early narrow blocks were 262 and 232. The later wide block 232-262-308 will all interchange but you might be pushing it to put the 232 head on a 308.
OK good to know. I was hoping to use my 262 head on the new 308, but that's out.
It looks like the 54 had the H145 head which was better than the early 308 wide but then in 55 I think they went to the 262 wide head for better compression. I also read about the 54 H145 power dome being cast in alum and steel.
Do you have a link to Walts info?0 -
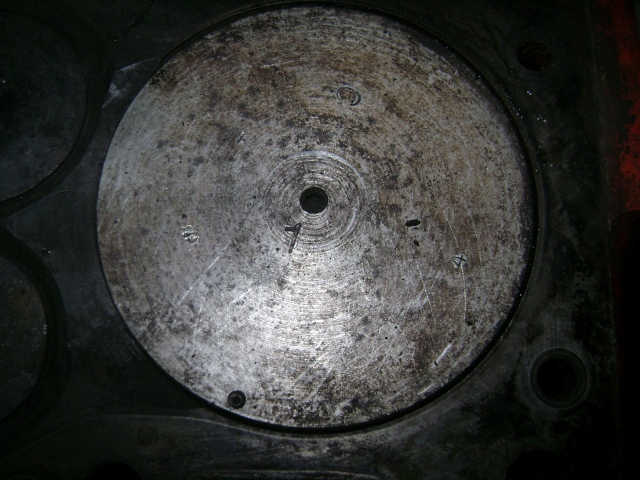
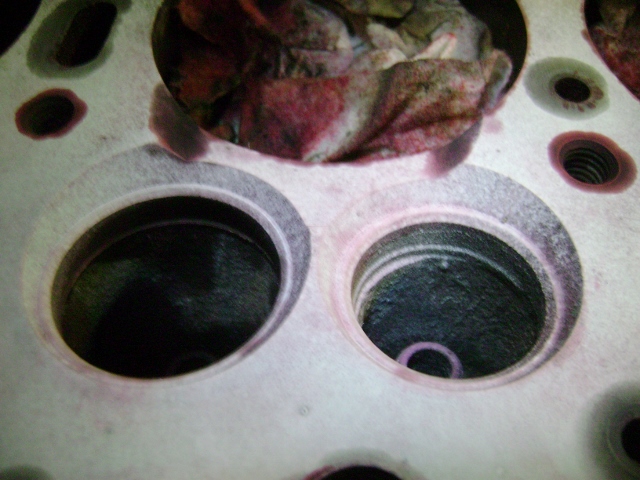
Now that valves are all removed I started cleaning up the top end to get ready to do some NDI-Non destructive inspection, for any of you that spent any time in the service doing repairs.
")
I used a rotary scotch pad and a wire wheel and cleaned up most of the carbon and gasket surface.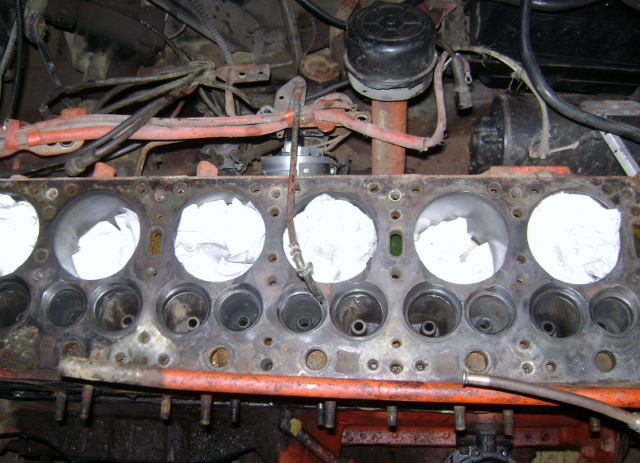
Then I just kissed the seats with the valve stone to clean them. I can't grind any seats until the new guides are installed.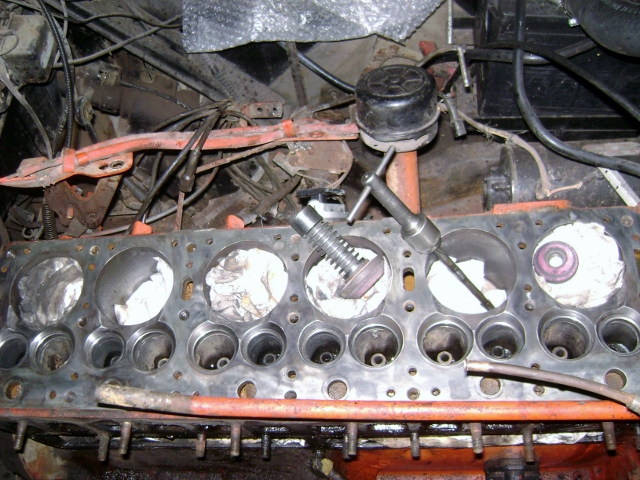
 0
0 -
Bill, thanks for the picture update.
Walt's info - In the WTN
415-939-1202
0 -
For the NDI, I got a dye penetrant kit just for these occasions.
I read a lot about the Hudson developing cracks thru the valve seats so I figured I better check this engine before I get in too deep.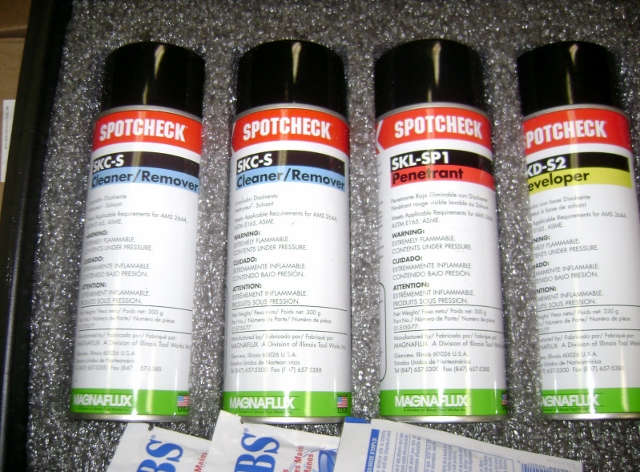
After a thorough cleaning with brake clean and the NDI cleaner you spray a wet coat of the dye penetrant and let it set for a few minutes.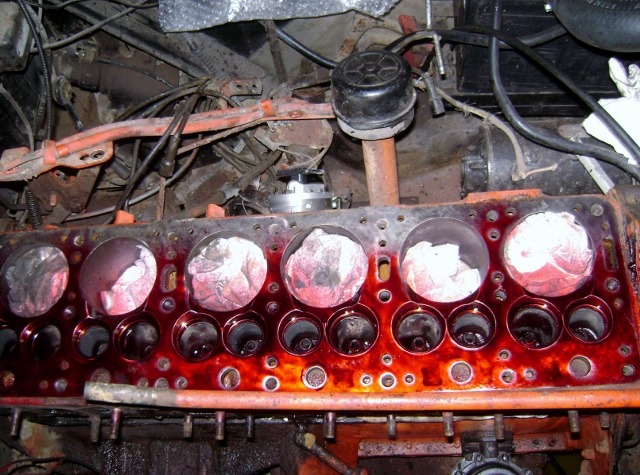
Then wipe it all down to remove all excess dye.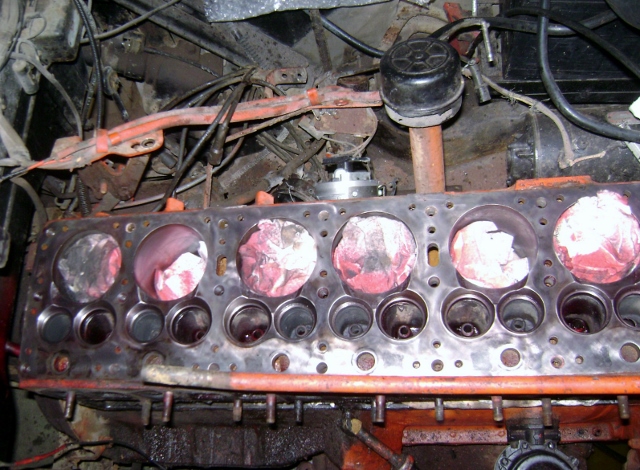
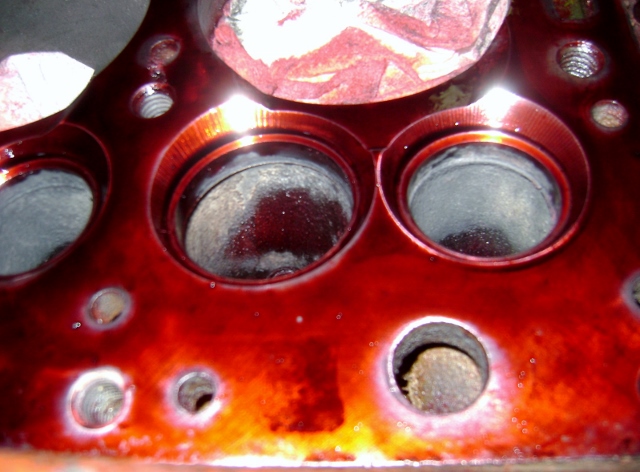
Then you spray the developer on with a light wet coat and let it cure. You should end up with a white coat of snow when dry. If you have a crack it will show as a deep red line.
Looks like I have a good block so far!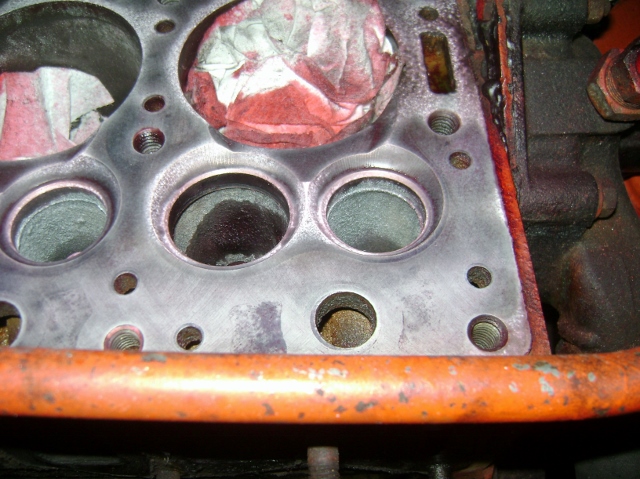
 1
1 -
Bill, thanks for the picture update.
Walt's info - In the WTN
415-939-1202
I haven't received my copy of the WTN yet.
I'm still a newbie!") 0
0 -
Looks like somebody did a spray can rebuild not long ago. Thanks for your efforts posting the photos and details. It will be a good reference piece in the future.
I've done a few Hudson valve grinds in the vehicle , they get easier when you're familiar with the procedure.
You're fortunate the block isn't cracked at valve seats.
0 -
I was told the engine was rebuilt at some time before I got it.
When I started tearing into it I said the same thing. It got a krylon rebuild!
With the 40*+ slop in the timing chain and 20* in the distr drive gear, and 2 burnt valves...I was amazed we got it running and drove it!0 -
BillUSN1
Walt does not hear so good on the phone. Better to email: HETmmordenti@aol.com remove the HET. Both his Tec Manuals are worth having especially while working on the car. A lot of good info not found anywhere else.
Lee O'Dell
0 -
FYI
Your doing a good job and using using the best Spring Tool Ive found for Hudson. When install the 'keepers' I put a little wheel brg grease on the back side so they cling to the valve stem when let spring down.
Prying the springs off & on is tricky but simpler after doing a few times. Notice the Tightly wound coils on the Spring go back in toward the Top of Mtr.
Another reason a valve will burn is if it was adjusted too tight, especially an Exh. I set mine a little looser than factory setting.....
0 -
Lee, Thanks for the contact info.
Ol racer, Thanks for the confirmation. I did find a compression style that is on the way and will report what I find with it.
0 -
I got started on the valve guides.
Again, I did a search of the forums and google and found lots of differing replies.
Driving the guides.
I use a brass or alum punch so it's softer than the guide and I use a 2lb brass hammer.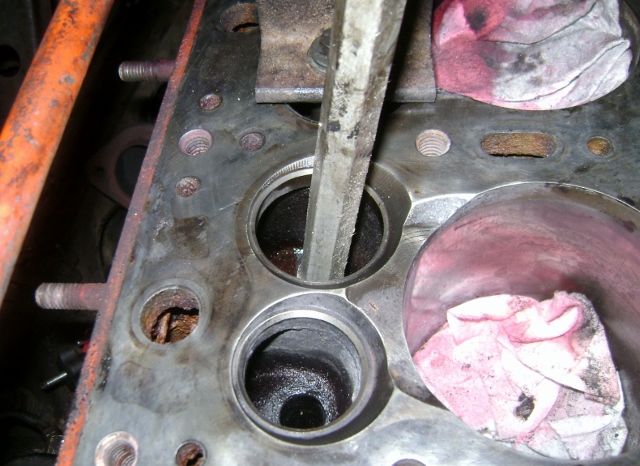
Driving valve guides out through the bottom. This seemed to be a common reply to most people when asked how to replace the guides.
Well I guess the technical answer would be yes you "can". But in reality I would say no you "can't" or shouldn't.
I tried this on my first guide because it seemed like the easiest and most straight forward method.
The problem comes as you reach the lifter and the guide is still not out.
It is very close....but not out.
So I removed the lifter adjuster screw...............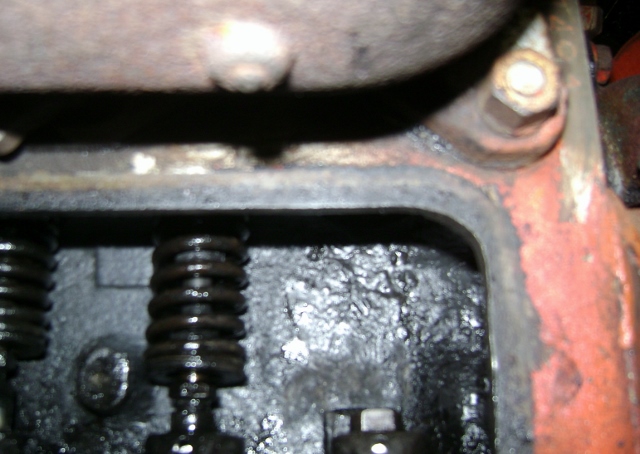
Still couldn't quite get it. It would rock back and forth but would only make it about 3/4 of the way off the top of the lifter.
So I ended up prying it to the side and was able to fracture just enough of the tip of the guide to get it out.
The argument could be made that if you just take a chisel and break the lower portion of the guide off prior to driving it out then it could end up being a faster method of removal. You would need to ensure no fragments can fall through the oil return or casting holes, into the motor.1 -
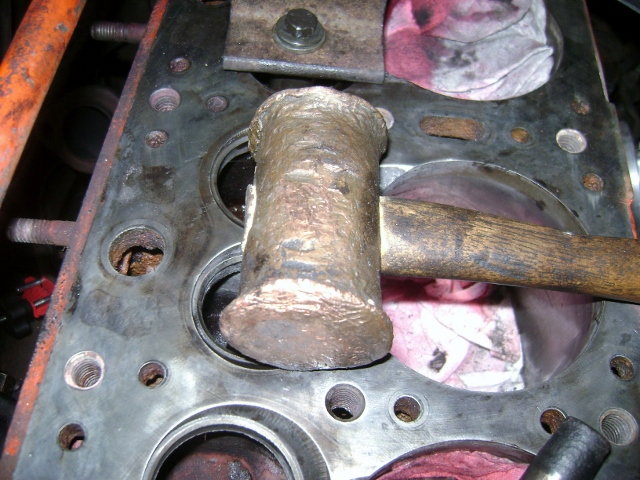
Pulling the guides
This one gets a little more fun and creative and time consuming.
I'm about 1/2 way thru my removal of the guides and this is what I have found so far.
1. Always do an initial staking/driving of the guide to break it loose from the head. This is very important to prevent too much stress from being applied to your puller, causing damage. There will be little doubt when it moves. Your first hit will be like striking a solid steel block with no give. It will "buzz" your hands like a bad hit on a baseball with an aluminum bat! Yes they were already invented when I played as a kid.
Once it moves, that's all you need.
2. It takes some resources and ingenuity. I a currently using a grade 8, 5/16-18x6" bolt and nut. I use a piece of 1/4" x 2 1/4" angle with a 5/16 hole dilled in it. If you can get a grade 8 bolt with threads all the way up the shank it would be good. Or some grade 8 all thread!
note: the guides are at an angle to the head surface. The shorter length of angle iron is used so it sets in the relief cut of the block to set in an angle to match the guide!
A short piece of 3/8NPT pipe nipple as a short spacer after I reach the end of the threads the first pull.
A piece of 16mm / 11/16" steel tube(left over from my time in Italy)about 2 1/4" long that I use as a spacer under the angle to allow the exhaust guide to pull out the top. If you just use plate across the head then the guide hit the plate before it is completely out the top.
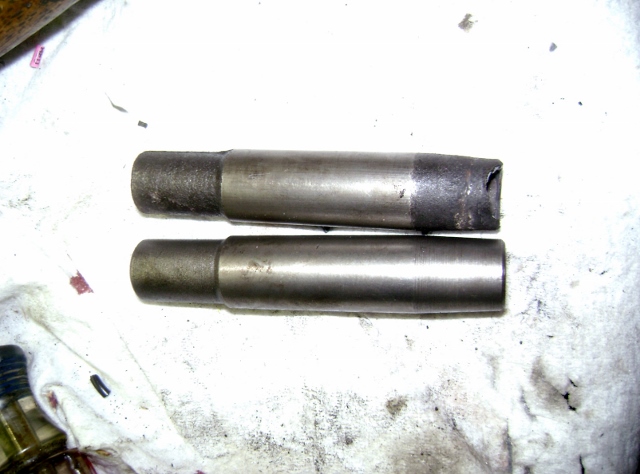
Bottom of guide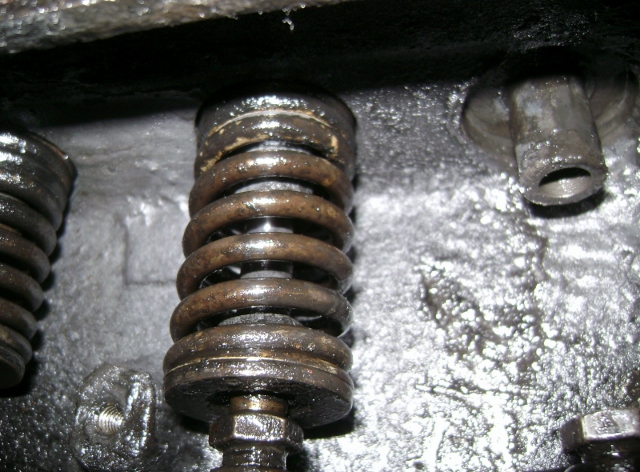
Top of guide with angle and bolt installed for first pull.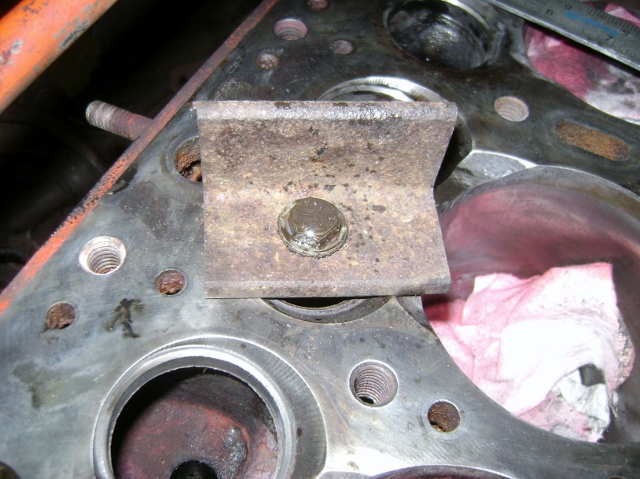
Holding nut on bottom during pull. You can turn from the top or the bottom depending on how free your bolt is through the plate.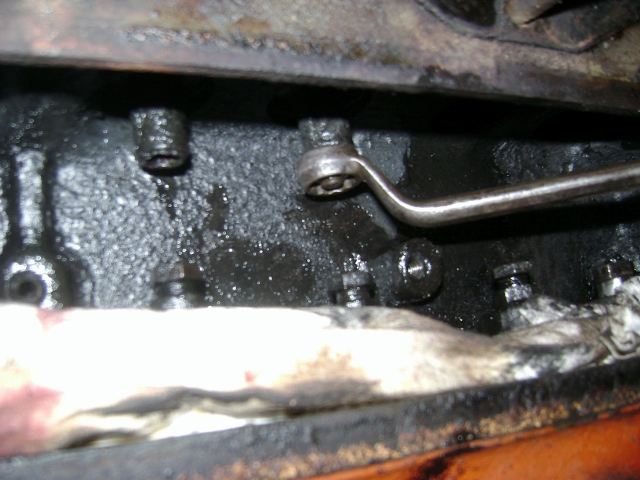
After first pull when I have run out of threads on the bolt, I add the spacer.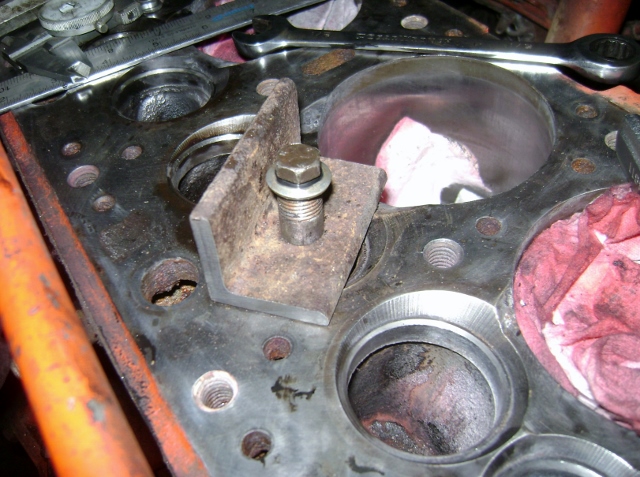
Then I found on the exhaust guide that it was too long and hit the plate.
So I made the lower spacer tube to lift the 1/4" plate up off the head. I had to angle grind one end to match the angle of the guide so it still pulls straight in line with the guide.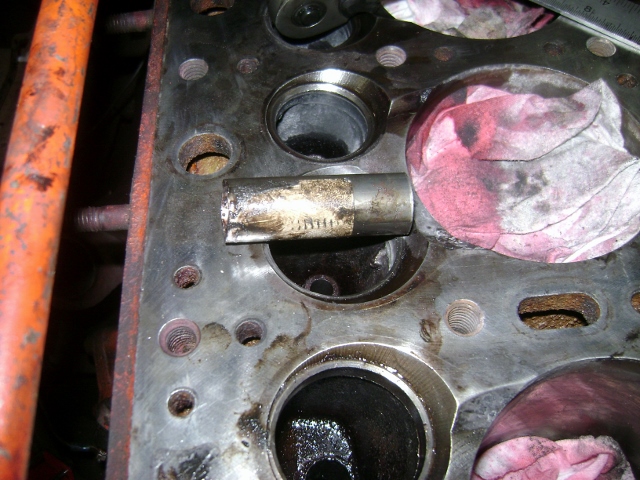
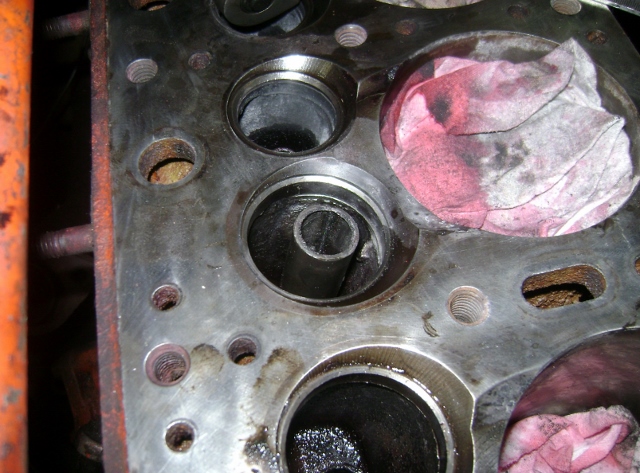
Now I can pull the guide all the way up and out.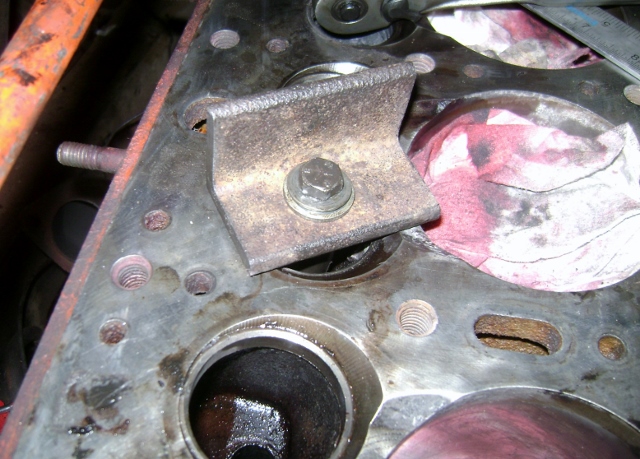
 0
0 -
Oh, I did try a piece of 1/4 strap without staking the guide loose first.
This is what it looked like. It turned it into a U and the guide never broke free.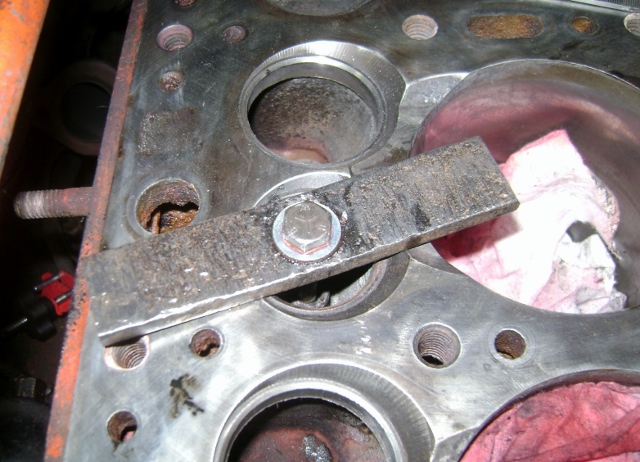 0
0 -
Thanks for putting all this up Bill, a very interesting post.0


This discussion has been closed.
Categories
- 36.6K All Categories
- 85 Hudson 1916 - 1929
- 11 Upcoming Events
- 73 Essex Super 6
- 28.3K HUDSON
- 511 "How To" - Skills, mechanical and other wise
- 989 Street Rods
- 150 American Motors
- 170 The Flathead Forum
- 47 Manuals, etc,.
- 71 Hudson 8
- 40 FORUM - Instructions and Tips on using the forum
- 2.7K CLASSIFIEDS
- 592 Vehicles
- 2.1K Parts & Pieces
- 76 Literature & Memorabilia
- Hudson 1916 - 1929 Yahoo Groups Archived Photos